background image

14

14

After Sales Support

 (AU) 1300 886 649  (NZ) 0800 836 761  |       info@tempo.org

Other Useful Information

WARNING!

To reduce the risk of electric shock or injury, always switch off the appliance and 

disconnect it from the power supply before cleaning or maintenance.

WARNING!

•  Never clean the unit with an abrasive, acid, oil or solvent based cleaning agent, or 

with abrasive pads or scourers. Never use flammable fluids or sprays for cleaning 
as the fumes from these substances can create a fire hazard or explosion.

•  Never clean the appliance with a steam cleaner. Moisture could accumulate in 

the electrical components, danger of electric shock! Hot vapours can lead to the 
damage of plastic parts. 

•  The appliance must be completely dry before it is placed back into service.
•  Ethereal oils and organic solvents can attack plastic parts, e.g. lemon juice or the 

juice from orange peel, butyric acid, or cleansers that contain acetic acid. Do not 
allow such substances to come into contact with the appliance parts.

Cleaning the fridge

•  Turn the temperature control to the minimum position, unplug the fridge and remove 

the food, shelves and crisper drawer.

•  Wash the inside surfaces and the interior accessories with a damp, warm cloth 

moistened in a water and baking soda solution (about 2 tablespoons of baking soda 
to 1 litre of water). Wring excess water out of the cloth before cleaning around the 
temperature control or any electrical parts. Rinse and wipe dry with a soft cloth.

•  Clean the outside of the unit with a damp, well wrung out cloth. Keep the door 

gasket (seal) clean.

•  After everything is dry, place appliance back into service. 

Interior light

The fridge is equipped with an internal LED light, which requires a professional service if 
it needs to be replaced. Please contact a qualified technician.

Defrosting the appliance

Manually defrosting is not necessary as this is a frost-free appliance which will be 
defrosted automatically. 
Regularly examine the drain in the refrigerator for defrosted water. If necessary, clean 
the drain. If the drain is blocked, water will collect in the bottom of the appliance.

Summary of Contents for AK-331-UF

Page 1: ...AFTER SALES SUPPORT AU 1300 886 649 NZ 0800 836 761 331 L Upright Refrigerator INSTRUCTION MANUAL MODEL AK 331 UF E209 ...

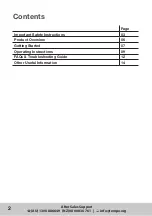
Page 2: ...ort AU 1300 886 649 NZ 0800 836 761 info tempo org Contents Page Important Safety Instructions 03 Product Overview 06 Getting Started 07 Operating Instructions 09 FAQs Troubleshooting Guide 12 Other Useful Information 14 ...

Page 3: ...dhered to Keep the manual in a safe place for future reference along with any warranty information your purchase receipt and packaging carton If applicable pass these instructions on to the next owner of the appliance This symbol alerts you to take care as the appliance contains flammable materials isobutane as refrigerant and cyclopentane as insulation blowing gas While isobutane R600a is a gas w...

Page 4: ...g period of time as it could be very hot The interior lamp can only be replaced by authorised service personnel Please contact our after sales support centre for a service if the lamp needs replacing Disconnection Never unplug the unit by pulling the cord Always grip the plug firmly and pull straight out from the power point All electrical work for the installation must be carried out by a license...

Page 5: ... care when moving it To avoid back or other injury consider a two person lift or mechanical aid when installing it Failure to do so can result in back or other injury Freestanding design This appliance is designed to be freestanding only and should not be recessed or built in Keep it upright Do not tilt the fridge more than 45º from upright when moving it Handle with care Do not apply force to any...

Page 6: ...ing feet 5 Upper door balconies 6 Bottom door balcony bottle rack Other inclusions not shown Instruction manual Warranty certificate NOTE Due to continued product improvement images and illustrations in this manual may vary slightly from the product purchased All images in this manual are for reference purposes only Parts are not necessarily pictured to scale Scope of delivery 1 2 3 5 6 4 ...

Page 7: ...er cord Unwind the power cord to its full length and inspect it for damage Do not use the appliance if the appliance or its cord has been damaged or is not working properly In case of damage contact our after sales support centre for advice on examination repair or return of the damaged product Read the manual Before installing your new fridge read all safety instructions especially the sections o...

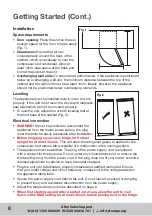
Page 8: ...t be possible to disconnect the appliance from the mains power supply the plug must therefore be easily accessible after installation Before plugging in your new fridge let it stand upright for at least 4 hours This will allow the refrigerant gases to settle into the compressor and reduce the possibility of a malfunction in the cooling system The appliance must be earthed The plug of the power sup...

Page 9: ...erature has been reached and the thermostat starts cycling off and on adjust the temperature to the setting that best suits your needs a middle setting at position 3 4 should be appropriate in most cases for general operation Fig 3 To turn the appliance off first turn the temperature control to the minimum position 0 which will stop the cooling cycle then disconnect the power supply cord from the ...

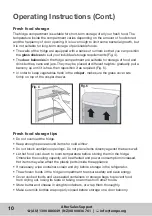
Page 10: ...r to keep vegetables fresh in the crisper make sure the glass cover sits firmly on top of the crisper drawer Operating Instructions Cont Fig 4 Fig 5 Fresh food storage tips Do not overload the fridge Keep enough space around items for cold airflow Do not block ventilation openings Do not place items directly against the back wall Let hot food cool down to room temperature before storing them in th...

Page 11: ...ber of times the door is opened However if the power is going to be off for a longer period of time you need to take proper steps to protect your food Going away Short vacation Leave the fridge operating during vacations of less than a month Long vacation If you are not going to use the fridge for longer periods remove all food and unplug the power cord Clean and dry the interior thoroughly To pre...

Page 12: ... for air circulation There are vibrations The appliance is not level The appliance seems to make too much noise A rattling noise may come from the flow of the refrigerant which is normal As each cycle ends you may hear gurgling sounds caused by the flow of refrigerant Contraction and expansion of the inside walls may cause popping and crackling noises The appliance is not level Readjust the feet T...

Page 13: ... be warmer than room temperature This is normal while the compressor works to transfer heat from inside the fridge cabinet Excessive frost and ice has built up The fridge door has been left open Something is preventing the door from closing The door gasket is dirty or damaged The compressor runs continuously The temperature is set too cold select a lower warmer setting The door is open or somethin...

Page 14: ...nces to come into contact with the appliance parts Cleaning the fridge Turn the temperature control to the minimum position unplug the fridge and remove the food shelves and crisper drawer Wash the inside surfaces and the interior accessories with a damp warm cloth moistened in a water and baking soda solution about 2 tablespoons of baking soda to 1 litre of water Wring excess water out of the clo...

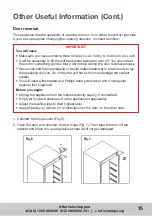
Page 15: ...reversal process Have some soft foam packaging or similar material blanket or towel ready to lay the appliance door on Do not lay the unit flat as this may damage the coolant system You will need a flat bladed and Phillips head screwdriver and a hexagonal spanner not supplied Before you begin Unplug the appliance from the mains electricity supply if connected Empty all food and shelves out of the ...

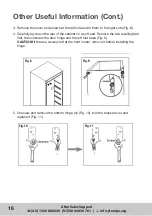
Page 16: ...ht side Fig 8 4 Carefully lay down the rear of the cabinet on a soft pad Remove the two levelling feet first then unscrew the door hinge and the left foot base Fig 9 CAUTION If there is a screw left at the front corner remove it before installing the hinge Fig 8 Fig 9 5 Unscrew and remove the bottom hinge pin Fig 10 turn the bracket over and replace it Fig 11 Fig 10 Fig 11 ...

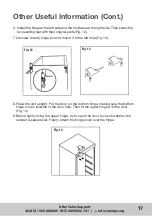
Page 17: ... the top hinge pin and mount it to the left hole Fig 13 Other Useful Information Cont Fig 12 Fig 13 8 Place the unit upright Put the door on the bottom hinge making sure the bottom hinge core is inserted in the door hole Then fit the upper hinge with the door Fig 14 9 Before tightly fixing the upper hinge try to open the door to check whether the cabinet is sealed well Finally attach the hinge cov...

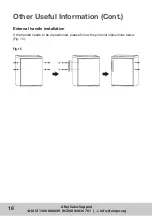
Page 18: ...es Support AU 1300 886 649 NZ 0800 836 761 info tempo org Other Useful Information Cont External handle installation If the handle needs to be repositioned please follow the pictorial instructions below Fig 15 Fig 15 ...

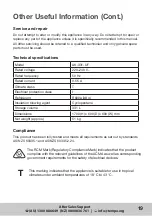
Page 19: ...MA as well as corresponding government requirements for the safety of electrical devices E209 Compliance This product has been fully tested and meets all requirements as set out by standards AS NZS 60335 1 and AS NZS 60335 2 24 Service and repair Do not attempt to alter or modify this appliance in any way Do not attempt to repair or replace any part of the appliance unless it is specifically recom...

Page 20: ...ems with this product or if it fails to perform to your expectations make sure to contact our After Sales Support Centre on AU 1300 886 649 or NZ 0800 836 761 for advice For an electronic copy of this manual please contact our after sales support centre Distributed by Tempo Aust Pty Ltd ABN 70 106 100 252 PO BOX 132 Frenchs Forest NSW 1640 Australia Customer Helpline AU 1300 886 649 NZ 0800 836 76...

Reviews: