background image

English

   - 29 -

TV Menu Features and Functions

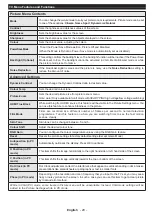
Picture Menu Contents

Mode

You can change the picture mode to suit your preference or requirements. Picture mode can be set 

to one of these options: 

Cinema

Game

Sport

Dynamic 

and 

Natural

Contrast

Sets the lightness and darkness values of the screen.

Brightness

Sets the brightness value for the screen.

Sharpness

Sets the sharpness value for the objects displayed on the screen.

Colour

Sets the colour value, adjusting the colors.

Power Save Mode

 To set the Power Save Mode as Eco, Picture Off and Disabled. 
(When the Mode is Dynamic, Power Save mode is automatically set as disabled.)

Backlight (Optional)

This setting controls the backlight level. The backlight function will be inactive if the Power Save 

Mode is set to Eco. The backlight cannot be activated in VGA, Media Browser mode or while 

the picture mode is set to Game. 

Noise Reduction

If the broadcast signal is weak and the picture is noisy, use the 

Noise Reduction

 setting to 

reduce the amount of noise. 

Advanced Settings

Dyanmic Contrast

You can change the Dynamic Contrast ratio to desired value. 

Colour Temp

Sets the desired colour tone.

Picture Zoom

Sets the desired picture size from picture zoom menu.

Note: Auto (Only available in Scart mode with SCART PIN8 high voltage/low voltage switching)

HDMI True Black

While watching from HDMI source, this feature will be visible in the Picture Settings menu. You 

can use this feature to enhance blackness in the picture. 

Film Mode

Films  are  recorded  at  a  different  number  of  frames  per  second  to  normal  television 

programmes. Turn this feature on when you are watching films to see the fast motion 

scenes clearly.

Skin Tone

Skin tone can be changed between -5 and 5.

Colour Shift

Adjust the desired colour tone.

RGB Gain

You can configure the colour temperature values using the RGB Gain feature.

Reset

Resets the picture settings to factory default settings.(Except Game Mode)

Autoposition (in PC 

mode)

Automatically optimizes the display. Press OK to optimize.

H Position (in PC 

mode)

This item shifts the image horizontally to the right hand side or left hand side of the screen.

V Position (in PC 

mode)

This item shifts the image vertically towards the top or bottom of the screen.

Dot Clock (in PC 

mode)

Dot Clock adjustments correct the interference that appear as vertical banding in dot intensive 

presentations like spreadsheets or paragraphs or text in smaller fonts.

Phase (in PC mode)

Depending on the resolution and scan frequency that you input to the TV set, you may see a 

hazy or noisy picture on the screen. In such a case you can use this item to get a clear picture 

by trial and error method.

While in VGA (PC) mode, some items in Picture menu will be unavailable. Instead, VGA mode settings will be 

added to the Picture Settings while in PC mode.

Summary of Contents for ALED2609TWE

Page 1: ...20 1 39 LED TV DVD COMBI DVB T C TUNER ALED2609TWE...

Page 2: ...ote Control 25 Remote Control DVD 26 Connections 27 First Time Installation USB Connections 28 Switching On Off 28 First Time Installation 28 Media Playback via USB Input 28 Media Browser Menu 28 TV M...

Page 3: ...dance with the installation instructions if the option is available Occasionally a few non active pixels may appear on the screen as a fixed blue green or red point Please note that this does not affe...

Page 4: ...I inputs are for connecting a device that has a HDMI socket USB input OSD menu system Scart socket for external devices such as DVD Players PVR video games etc Stereo sound system Teletext Headphone c...

Page 5: ...to reach the ambient room temperature before you connect the set to the mains Plug the power cable to the mains socket outlet Antenna Cable Connection Connect the aerial or cable TV plug to AERIAL INP...

Page 6: ...Display RF Aerial Input 75 Ohm unbalanced Operating Voltage 220 240V AC 50Hz Audio German Nicam Stereo Audio Output Power WRMS 10 THD 2 x 6 Power Consumption 75W Weight 5 70 kg TV Dimensions DxLxH wit...

Page 7: ...r up 7 Cursor left 8 Programme up Page down 9 Programme down Page up 10 Mono Stereo Dual I II Current language in DVB channels 11 Previous programme 12 Electronic programme guide 13 Info Reveal in TXT...

Page 8: ...anguage selection 5 Display Time DVD menu 6 Clear 7 Stop 8 No function 9 Rapid reverse 10 Rapid advance 11 Info 12 Zoom 13 Repeat 14 Root 15 Menu 16 Title 17 OK Select 18 Navigation buttons 19 Subtitl...

Page 9: ...of the TV before mounting on the wall Insert or remove the CI module only when the TV is SWITCHED OFF You should refer to the module instruction manual for details of the settings Getting Started Conn...

Page 10: ...nel sequence if available Cable Installation If you select CABLE option and press OK button on the remote control To continue please select YES and press OK To cancel operation select NO and press OK...

Page 11: ...DMI True Black While watching from HDMI source this feature will be visible in the Picture Settings menu You can use this feature to enhance blackness in the picture Film Mode Films are recorded at a...

Page 12: ...tion as Headphone Dynamic Bass Enables or disables the Dynamic Bass Surround Sound Surround sound mode can be changed as On or Off Digital Out Sets digital out audio type Settings Menu Contents Condit...

Page 13: ...available broadcasts will be searched If the TV locates any new or missing broadcasts a menu screen will be displayed asking you whether or not to execute these changes The Channel list will be updat...

Page 14: ...e same time General TV Operation Using the Channel List Software Upgrade YourTV is capable of finding and updating automatically via the Aerial Cable signal or over the Internet Software upgrade searc...

Page 15: ...lace a disc into the loader 2 Disc is incorrectly loaded Ensure that the DVD disc is in the loader with the label facing you when looking at the TV screen 3 Wrong type of disc The DVD player cannot pl...

Page 16: ...Hz O 576I 576P 50Hz O 720P 50Hz 60Hz O 1080I 50Hz 60Hz O 1080P 50Hz 60Hz O HDMI1 HDMI2 480I 60Hz O 480P 60Hz O 576I 576P 50Hz O 720P 50Hz 60Hz O 1080I 50Hz 60Hz O 1080P 24Hz 25Hz 30Hz 50Hz 60Hz O X No...

Page 17: ...lly when you switch to DVD mode 1 Switch on the TV 2 Switch to DVD source using the SOURCE button on the remote control 3 Insert a disc into the loader The disc MUST be facing you when looking at the...

Page 18: ...ents are detailed below DEFAULT If you choose RESET and press OK the factory presets are loaded Parental level and parental password does not change DOWNMIX This mode can be selected when the digital...

Page 19: ...Previous Next Shifts the zoomed picture left or right if available Highlights a menu item Shifts the zoomed picture up or down if available Rapid advance Rapid reverse Views the scene from different...

Page 20: ...Compatible disc types Disc Types Logos Recording Types Disc Size Max Playing Time Characteristics Audio Video 12cm Single sided 240 min Double sided 480 min DVD contains excellent sound and video due...

Reviews: