124
Version 1.00
DISK MANAGEMENT
Regardless of the type of restore you have selected
2
, the process is initiated by pressing the
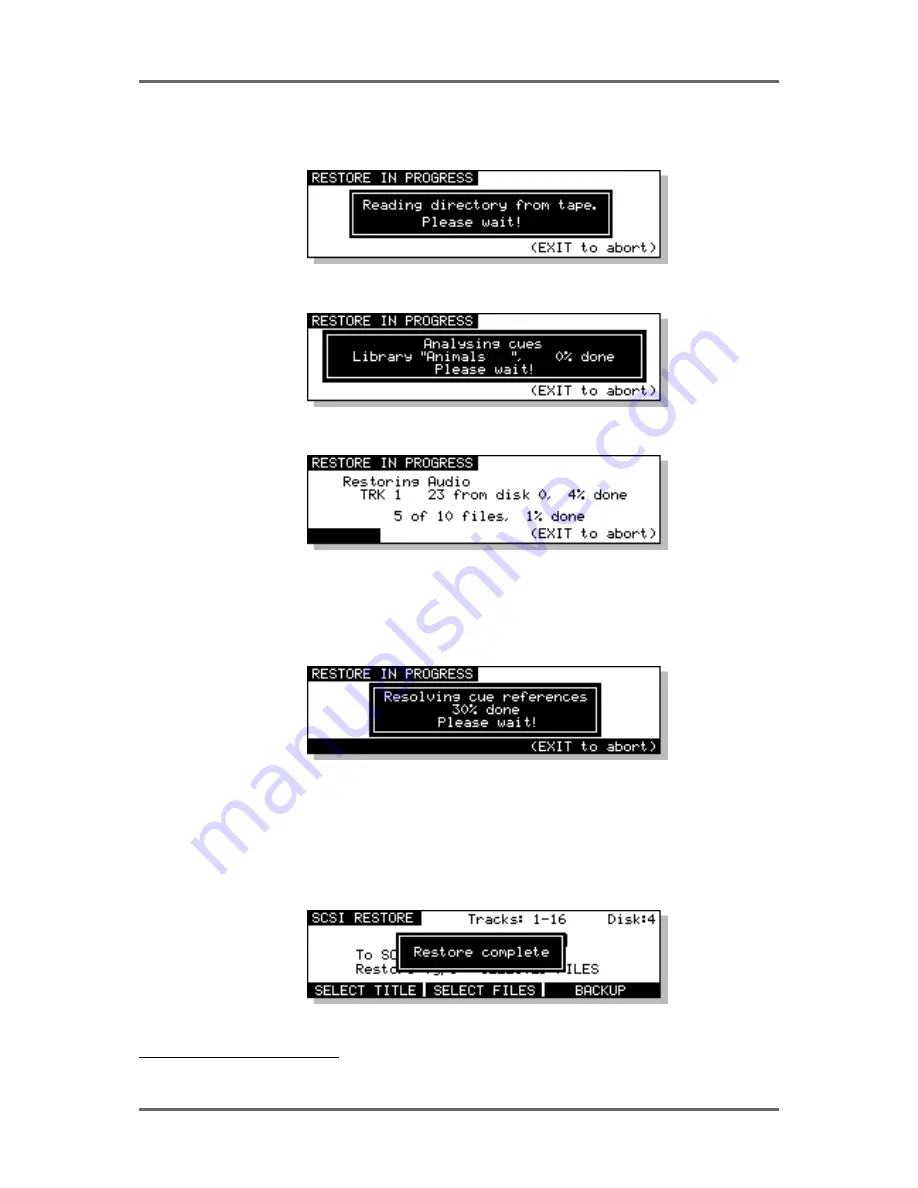
EXECUTE key. You will see this screen display:
Followed by this screen:
After a short while (depending on how many cues are in the backup), you will see this screen:
You will see the backup being restored onto the selected disk. The percentage figures will change
as the restore progresses and highlighted bar will move across the bottom of the LCD to further
indicate progress.
You will then see this display:
What the system is doing here is ‘fixing up’ all references to the audio data that has just been
restored so that any projects and/or libraries that may use the cues/clips that have just been
restored will play correctly. The percentage will change to indicate progress and the exact length
of time it takes depends on the mount of ‘fixing up’ the system has to do (i.e. how many different
places the audio you have restored is used).
Finally, you will see this screen display:
2
There is a difference when ENTIRE BACKUP is selected. This will be explained later.
Summary of Contents for RE32
Page 10: ...Page ix ...


