


CONGRATULATIONS ON THE PURCHASE OF YOUR NEW
CombMac - 240E
, A PROFESSIONAL AND HEAVY-
DUTY COMB PUNCH AND BINDING MACHINE. YOUR
CombMac - 240E
WAS DESIGNED WITH A FULL RANGE
OF FUNCTION AND PREMIUM QUALITY COMPONENTS TO GUARANTEE YOU AN EFFORTLESS AND
PROFESSIONAL BIND, AS WELL AS MANY YEARS OF TROUBLE-FREE SERVICE.
WE RECOMMEND THAT YOU TAKE A FEW MINUTES TO FAMILIARIZE YOURSELF WITH THE FUNCTIONS OF
YOUR NEW
CombMac - 240E
. YOU WILL FIND THAT WITH JUST A LITTLE PRACTICE, ANY PERSON CAN
ACHIEVE PROFESSIONAL RESULTS.
INTRODUCTION
O P E R AT I O N A L
M A N U A L
IMPORTANT
CombMac 240E
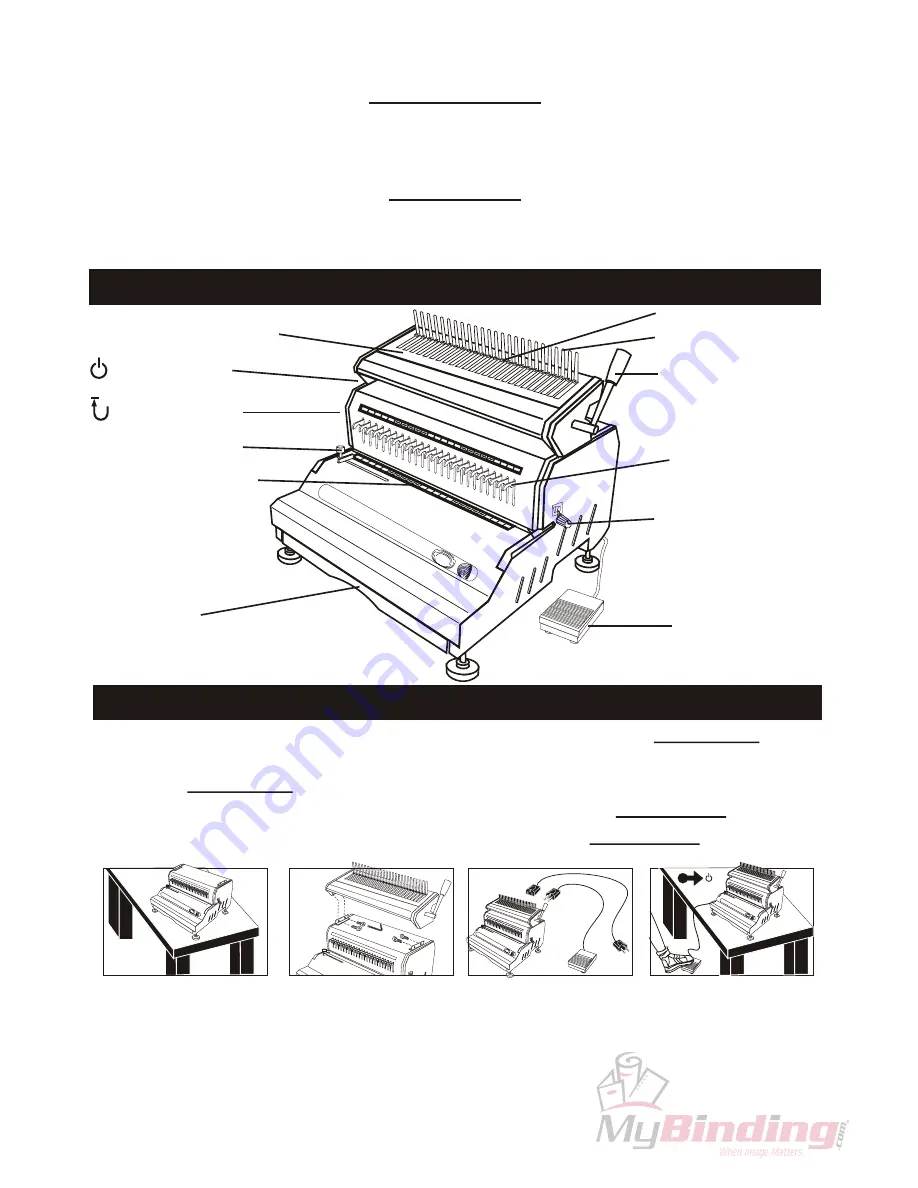
F E AT U R E S
A S S E M B LY & S A F E T Y I N S T R U C T I O N
Side Margin Control
Foot Pedal Control
Depth Margin Control
Power Switch
Reverse Control
Punch Throat & Ruler
Waste Drawer
1. Place your new
CombMac - 240E
on top of a sturdy working table.
See picture 1
2. Place Comb Binding unit on top of
CombMac - 240E
and fasten it by attached screws &
wrench.
See picture 2
3. Plug the power cord and foot pedal cord to the back of machine.
See picture 3.
4. Turn on Power switch and press foot pedal to test punching .
See picture 4.
4.
3.
1.
2.
5. Always turn switch-off and place Foot Pedal out of reach when machine is not in use.
6. To reduce the risk of electric shock, never operate the C
ombMac - 240E
near water.
7. Do not use the
CombMac - 240E
if power cord is damaged.
8. Do not allow the electric cord to be in contact with hot surfaces.
9. In case of malfunction, return the unit to your distributor for service. This equipment does not contain
any part that can be serviced by the consumer or operator.
Comb Binding Handle
Comb Binding Fingers
Comb Opening Hooks
Die Disengagement
Pins
Comb Binding Unit
"
"
"
7
45
8
3
2
3
3/
2"
/ "
"
1 1/
0
5


