11
Model No: 21LAS1Bn
Version 2.0
Adjustment procedure
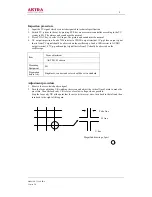
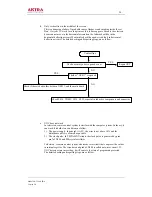
1. Receive the 5-circles pattern signal that is 50HZ vertical frequency
2. Press V-LINE, V-SIZE, V-CENT and H-CENT key on NO.2 service remote controller
respectively to select the vertical linearity, height, center (position) and horizontal center (position)
adjustment, and then press + or - key to adjust the value of them respectively according to
factory’s specification.
3. Receive the 5-circles pattern signal that is 60HZ vertical frequency
4. Press V-LINE, V-SIZE, V-CENT and H-CENT key on NO.3 service remote controller separately
to adjust the vertical linearity, height, center and horizontal center as above item 3.
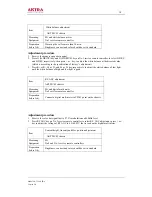
OSD position adjustment
Item
AKTP01/02 chassis
Measuring
Equipment
No.1 and No.5 service remote controller
Preparation
before Adj.
Brightness, contrast and color should be set in standard
Adjustment procedure
1. Press D-MODE key on No.1 service remote controller to set the set into design mode adjustment
2. Press or key to select OSD item, press or key to adjust the OSD to the center
position on the screen or press RF AGC key on No.5 service remote controller and press + or –
key to adjust the OSD position.
3. Press D-MODE key again to quit design mode adjustment.
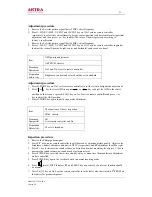
The functions of the set inspection
Item
TD46 chassis
Measuring
Equipment
SG
User remote controller and No.
Preparation
Before Adj.
The set is turned on
Inspection procedure
1. Receive the Philips pattern signal.
2. Press PIC key on user remote controller to call the menu as adjusting picture quality. Adjust color,
brightness, contrast, sharpness and tint (in NTSC) respectively and all adjustment should be right.
3. Press V+ key to increase the sound volume, no distortion heard at maximum level, press V- key to
decrease the sound volume, no sound heard at minimum level.
4. Press POWER key to switch the set into standby status, at mean time the manufactory adjustment
mode is cancelled.
5. Press POWER key again, the set should work in normal receiving mode.
6. Press
X
(mute), DISP (display), PP and SLEEP key respectively, the relevant function should
be normal.
7. Press S-OUT key on No.5 service remote controller to set default value that stored in E2PROM on
the chassis for product shipment.


