8. Menu Operation.
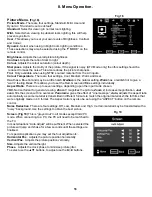
Fig 8
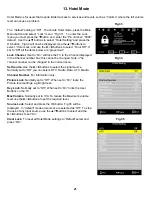
Fig 10
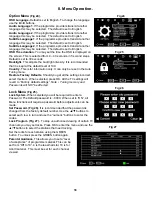
Fig 9
13
Program Edit. DTV. Fig 8
In this menu you may perform four functions. Skip, Lock, Favourite and
Delete.
Skip.
Use the
▲
/
▼
buttons to select which stations you wish to skip.
Press the “Blue” button. An indicator will be placed in the Skip column.
To remove, select again and press the Blue button. The Skip function
only stops selection of the selected station when using the CH+/CH-
buttons. Direct number entry works normally.
Lock.
Displays which stations have been locked. To change status you
must see page 17.
FAV.
To add stations to a “Favourite” list, use the
▲
/
▼
buttons to
select which stations you wish to add. Press the “FAV” button on the
R/C. To un select press the FAV button again.
Delete.
To remove any station from the listing, use the
▲
/
▼
buttons to
select which stations you wish to delete and press the RED button. If a
mistake has been made, you must select AutoScan to re install all the
stations.
Program Edit. ATV. Fig 9
In this menu you may perform six functions. Skip, Lock, Favourite, Delete,
Move and Rename
Skip. See above.
Lock.
Displays which stations have been locked. To change status you
must see page 17.
FAV. See above.
Delete. See above.
Move.
When “Auto Tuning” in Analog mode, it is possible that the stations
may not be in the correct order. To move any stations, use the
▲
/
▼
buttons to select the station. Press the YELLOW button. The line will
“widen” to show it has been selected. Use the
▲
/
▼
buttons to select the
new location and press “OK”. The station will now be in the new location.
Rename
. It is possible to rename any station in Analog mode. Use the
▲
/
▼
buttons to select the station. Press the GREEN button. The Station
name text will be highlighted. Use the
▲
/
▼
buttons to change the letter
highlighted, a full letter/numeric alphabet is available. To select the next
letter or digit use the
►
/
◄
buttons. To confirm the change press “OK”
Signal Information.
Select using the
▲
/
▼
buttons. A typical display is
seen opposite “Fig 10”.
This is for information only and cannot be changed.
13
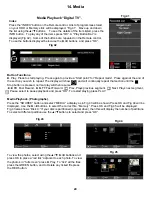
Firmware Upgrade OAD.
This is set to “ON” as default. If an upgrade
signal is received, you will see a message as in Fig 10A. Select Yes to
upgrade and No to decline the upgrade. If Yes is selected the TV will
automatically upgrade the firmware.
Fig 10a


