Mounting the rear wheels (20'')
476240_c
15
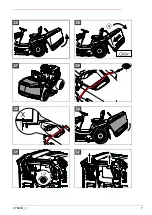
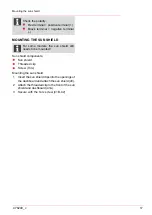
MOUNTING THE REAR WHEELS (20'')
(20'' tyres only)
1 Pull the rear of the tractor in the direction of a
rear wheel until you can hear it make contact
with the rim (1).
2 Remove the factory-fitted rubber O-ring (2).
Note: The O-ring only prevents loss of the
feather key during transport and is not used
any further.
3 Push a Ø 19 x 42 washer (3c) onto the axle.
4 Insert the lock washer (3b) into the shaft
groove in front of the washer, and press it into
the groove until it engages.
5 Press the cover cap (3a) onto the hub.
6 Pull the rear of the tractor in the direction
of the other rear wheel until you can hear it
make contact with the rim.
7 Remove the factory-fitted rubber O-ring.
8 Push a Ø 19 x 42 washer (3c) onto the axle.
9 Insert the lock washer (3b) into the shaft
groove in front of the washer, and press it into
the groove until it engages.
10 Press the cover cap (3a) onto the hub.
WARNING!
Danger of accidents due to lack of
braking power!
Check braking power!
Check braking power!
1 Lock the brake pedal.
2 Remove the chock.
3 Push the tractor by hand.
➯
If the rear wheels are mounted correctly, then
the tractor cannot be pushed by hand.
If you can push the tractor by hand:
1 check both rear wheels to ensure whether or
not the supplied feather keys are mounted
correctly.
2 If required, mount them correctly!
MOUNTING THE STEERING WHEEL
1 Set the front wheels to the to the strai-
ght-ahead position.
2 Place the clamping sleeve (4a) on the stee-
ring column.
3 Place the steering wheel (4b) on the clamping
sleeve.
Note: Make sure the position is correct with
the spoke pointing towards the operator.
4 Insert the washer (4c) and the cup spring
(4d).
5 Fasten the steering wheel (4b) using the he-
xagon bolt (4e).
Make sure the tightening torque is 35 Nm +
5. Use a torque wrench.
6 Put on the cover (4f).
MOUNTING THE OPERATOR'S SEAT
1 Remove the shaft fastener (5a) from the seat
(5c).
2 Pull out the shaft (5b).
3 Pass the shaft back into the seat (5c) and re-
install the shaft fastener (5a).
4 Connect the seat contact switch (6a).
5 Attach the cable (6b) of the contact switch
(6a) to the lug (5d) using cable ties.
MOUNTING THE CRUISE CONTROL
LEVER
1 Mount the control lever (7a) for the cruise
control using an M5 x 20 Allen key and a wa-
sher.
HOOKING IN THE FILL-LEVEL SIGNAL
TRANSMITTER OF THE GRASS
CATCHER
Hooking in the fill-level sensor of the grass
catcher
The fill-level sensor uses a horn to signal when
the grass catcher must be emptied.
The grass catcher must be removed in order for
the fill-level sensor to be fitted.
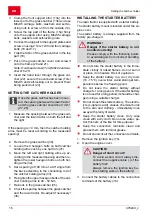
1. Push the fill-level sensor (8a) into the opening
in the rear wall. Make sure the fill-level sensor
is in the correct position.
2. Push it into the opening straight and without
excessive force, until you can feel it engage.
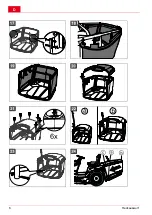
ASSEMBLING GRASS CATCHERS
ADVICE
Use a battery-operated screwdriver with
a Torx bit TX30 for assembly.
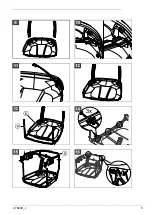
1 Insert the support plate in the bottom part of
the grass catcher on both sides (9).
2 Guide in horizontally and swivel upwards (10,
11 and 12)
Summary of Contents for 119589
Page 1: ...476240_c I 12 2014 Rasentraktor Montageanleitung Heckauswurf...
Page 2: ...D 2 Heckauswurf...
Page 4: ...D 4 Heckauswurf...
Page 5: ...476240_c 5...
Page 6: ...D 6 Heckauswurf...
Page 7: ...476240_c 7...
Page 8: ...D 8 Heckauswurf...
Page 9: ...476240_c 9...

