GB
52
Robolinho 700E/700I
Start-up
5.2
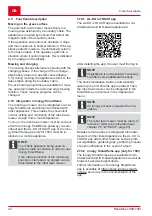
Making the basic settings
1.
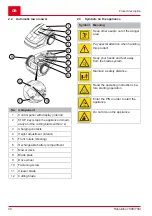
Open the cover flap.
2.
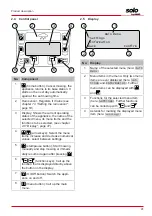
Switch on the appliance with
. The firm-
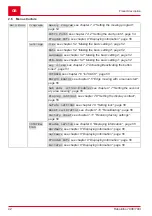
ware, code number and type are displayed.
3. In the menu for language selection, use
or
to select
English
and accept with
.
4. In the
Login
>
Enter PIN
menu, enter the
pre-set PIN
0000
. To do so, select the digit
0
in sequence with
or
and respective-
ly confirm with
. After entering the PIN,
access is enabled.
5. In the
Change PIN
menu:
■
Under
Enter new PIN
, enter a self-se-
lected new four-digit PIN. To do so, se-
lect one digit in sequence with
or
and respectively confirm with
.
■
Under
Reenter new PIN
, enter the
new PIN again. If both entries are identi-
cal,
PIN changed
is displayed.
6. In the
Enter date
menu, set the current
date (format:
DD.MM.20YY
). To do so, select
one digit in sequence with
or
and re-
spectively confirm with
.
7. In the
Enter time
>
HH:MM
menu, set the
current time (format:
HH:MM
). To do so, se-
lect one digit in sequence with
or
and
respectively confirm with
.
The basic settings have been completed. The
Not calibrated Press Start key
status
is displayed.
5.3
Setting the cutting height
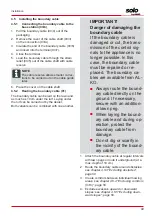
The cutting height can be manually adjusted con-
tinuously between 25 – 55 mm.
1.
Open the cover (10/1).
2.
Set the cutting height (the current cutting
height is displayed in the window (10/3) in
millimetres):
■
Increase the cutting height (i.e. lawn
height): Turn the rotary knob (10/2) clock-
wise (10/+).
■
Decrease the cutting height (i.e. lawn
height): Turn the rotary knob (10/2) anti-
clockwise (10/–).
3.
Close the cover.
5.4
Carrying out an automatic calibration
movement
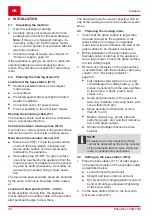
Place the appliance at the starting position
(09)
1.
Place the appliance at the starting position in-
side the mowing area:
■
At least 1 m left and 1 m in front of the
base station
■
Aligned with the front side to the bound-
ary cable
Starting the calibration movement
1.
Check that there are no obstacles in the ex-
pected movement area of the appliance. The
appliance must be able to move over the
boundary cable with both front wheels. Re-
move any obstacles if necessary.
2.
Start the appliance with
. The following is
shown on the display:
■
! Caution ! Starting Motors
■
Calibration
,
Phase [1]
During the calibration movement
To determine the signal strength inside the
boundary cable, the appliance first moves twice
straight beyond the boundary cable and then into
the base station and comes to a stop there.
■
The
Calibration completed
message is
shown on the display.
■
The rechargeable battery is being charged.
NOTE
The appliance must come to a stop
when it moves into the base station. If
the appliance does not touch the con-
tacts when it moves into the base sta-
tion, it moves further along the boundary
cable. If the appliance moves through
the base station, the calibration proce-
dure has failed. In this case, the base
station must be better aligned and the
calibration procedure repeated.
After the calibration movement
The pre-set current mowing duration is displayed.
For all further settings, refer to see
chapter 7
Summary of Contents for 127547
Page 67: ...67...


