GB
38
Start-up
Switching on the mower mechanism
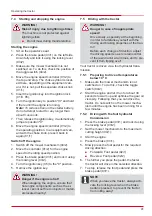
Switching on electrically: There is a switch (04/2)
located on the right next to the operator’s seat.
Use this to switch the mower mechanism on.
6
START-UP
WARNING!
Danger if assembly is not carried out
completely!
Do not operate the lawn tractor before it
has been fully assembled!
Carry out all the work described in the
assembly instructions. If you are uncer-
tain about anything, ask a specialist to
confirm that the assembly has been car-
ried out correctly before the machine is
started up!
Check whether all safety and protective
devices are in place and functioning cor-
rectly!
6.1
Checking the mower mechanism
Before use, always look and check whether the
cutter, fastening pin and the entire mowing unit
are worn or damaged. Worn or damaged blades
must be renewed by new ones in order to avoid
any imbalance.
6.2
Oil fill
The engine must be filled with oil before initial
start-up. Please comply with the instructions from
the engine manufacturer in this regard. Also
make sure the oil level is checked at regular in-
tervals and the oil is topped up if necessary.
6.3
Fuel fill
WARNING!
Dangers when handling fuel!
Fuel is highly inflammable. Only fill the
fuel tank outdoors! Do not smoke! Do not
refuel when the engine is running or is
hot!
Use a suitable funnel or a filler pipe when refuel-
ling so that no fuel is spilled on the engine, the
deck or the ground.
For safety reasons, the fuel tank cap and other
tank caps must be renewed if damaged.
Do not start the engine if the fuel has overflowed.
The tractor must be removed from the area con-
taminated by fuel, and the spilled fuel must be
absorbed and wiped away from the ground, the
engine and the deck using a cloth.
Do not make any attempt to start the machine un-
til fuel vapours have evaporated.
Only keep the fuel in containers intended for this
purpose.
Use lead-free petrol, min. RON 91.
Filling the tank
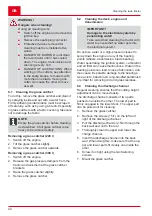
1. Switch off the engine if it is running and re-
move the ignition key as a precaution.
2. Wait until the engine has cooled down some-
what (risk of explosion if the fuel catches
fire!).
3. Open the engine cover.
4. Open the tank cap (06/1) and pour in the fuel.
Note:
Avoid overfilling the fuel tank!
5. Close the tank cap (06/1).
6. Close the engine cover.
6.4
Checking the tyre pressure
■
Check the tyre pressure at regular intervals.
■
Please refer to the specification on the tyre
for the necessary inflation pressure (recom-
mendation: 1 bar).
NOTE
1 PSI = 0.07 bar.
The tyre pressure can be checked and the tyre
inflated using a commercially available foot
pump.
6.5
Mounting the grass catcher
Lawn tractors are supplied with a grass catcher.
Please note that the illustrations may differ some-
what from the original.
Hooking in the fill-level sensor of the grass
catcher
The fill-level sensor uses a horn to signal when
the grass catcher must be emptied.
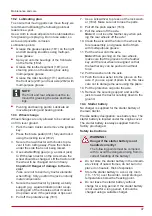
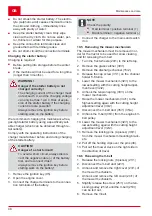
1. Remove the grass catcher.
2. Push the fill-level sensor (07/1) straight and
without excessive force into the opening until
it perceptibly engages (07/a). Make sure the
fill-level sensor is in the correct position.
Summary of Contents for Comfort 220 I
Page 3: ...3 01 1 2 3 4 5 02 1 2 03 1 2 04 1 2 05 06 1 07 a 1 08 1 2 3 a b...
Page 4: ...4 09 1 a b 10 a b Click 11 1 2 12 1 13 1 2 1 14 1 2 15 1 1 2 16 1 2 3...
Page 5: ...5 17 1 18 1 2 19 1 20 1 2 21 1 1 1 22 1 23 1 24 1...
Page 6: ...6 25 1 2 3 26 27 a b c d 28 29 1 1 30 1 31 1 32 1 2 a b c d...
Page 7: ...7 33 1 34 1 2 35 1 a 36 1 37 38 1 1 39...
Page 403: ...403 1 1 1 2 T3 T2 220 300 2 1 10 18 CE...
Page 404: ...RU 404 2 2 2 3 10 18 2 4...
Page 406: ...RU 406 3 3 1 16 3 2 3 3 3 4...
Page 407: ...407 3 5 3 6 3 7...
Page 408: ...RU 408 3 4 5 5 1 01 01 2 01 2 01 1 01 3 05 0 I II III II...
Page 412: ...RU 412 1 2 15 15 1 15 2 3 4 03 1 03 2 01 5 5 7 7 1 7 2 7 3 12 1 1 12 1 2 3 12 1 7 4...
Page 416: ...RU 416 8 8 1 220 1 2 3 300 1 2 3 4 8 2 8 3 1...
Page 417: ...417 2 15 1 3 15 2 4 5 6 7 9 10...
Page 418: ...RU 418 10 1 5 25 50 X X X X X X X X X X X X X X X X...
Page 422: ...RU 422...
Page 423: ...423 7 3 412...
Page 424: ...RU 424 2 1 2...
Page 425: ...425 13 xxxxxx x...
Page 428: ...UA 428 1 1 1 2 T3 T2 220 300 2 1 10 18 CE 2 2...
Page 429: ...429 2 3 10 18 2 4...
Page 431: ...431 3 3 1 16 3 2 3 3 3 4...
Page 432: ...UA 432 3 5 3 6 3 7 3 4...
Page 434: ...UA 434 02 1 02 2 5 5 04 1 1 04 1 04 2 6 6 1 6 2 6 3 ROZ 91 1 2 3 4 06 1 5 06 1 6 6 4 1 1 0 07...
Page 440: ...UA 440 8 8 1 220 1 2 3 300 1 2 3 4 8 2...
Page 441: ...441 8 3 1 2 15 1 3 15 2 4 5 6 7 9 10...
Page 442: ...UA 442 10 1 5 25 50 X X X X X X X X X X X X X X X X...
Page 446: ...UA 446 p 7 3 437...
Page 447: ...447 1 2 13 xxxxxx x...
Page 470: ...470...
Page 471: ...471...
Page 472: ......


