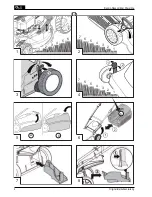
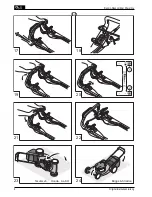
background image

GB

Translation of original user instructions

26

Petrol lawnmower

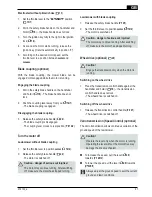
Starting the motor

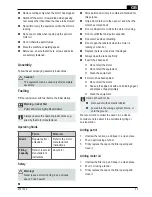
Caution - risk of poisoning!

Never leave a motor running in an enclosed 

space.

Caution - Risk of injury!

Do not tilt the lawnmower while starting.

 ▪Start the motor only when the blade is mounted 

(the blade acts as a flywheel mass)

 ▪If starting the motor when hot do NOT use the 

choke or primer button

 ▪Do not change the motor controller settings


„

Do not start the equipment if the outlet shaft is not 

covered by one of the following parts:


„

Grass catcher


„

Deflector plate


„

Mulch kit 


„

Be particularly careful when operating the starter 

switch - follow the manufacturer's instructions


„

Keep your feet at a safe distance from the cutting 

gear


„

Start the lawnmower where the grass is shorter

hold it (  

16

) - the brake handle does not lock.

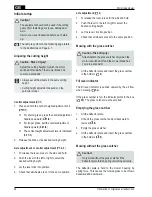
3.  Pull out the starter cord sharply, then allow it to 

slowly rewind (  

17

).

4.  When the motor has warmed up (about 15–20 

seconds), set the throttle lever to a position 

between 

min

 and 

max

.

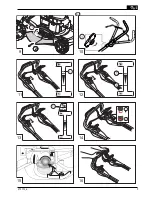
with remote throttle control, with primer 

(  

16

)

1.  Set the throttle lever to position 

max

 (  

12/1

).

2.  Press the primer button 3 times at intervals of about 

2 seconds (  

15

). If the temperature is below 

10 °C, press the primer button 5 times.

3.  Pull in the safety brake handle on the handlebar and 

hold it (  

16

) - the brake handle does not lock.

4.  Pull out the starter cord sharply, then allow it to 

slowly rewind (  

17

).

5.  As soon as the motor starts running, set the throttle 

lever for the desired motor rpm, at a position 

between 

min 

and 

max

.

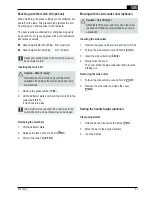
Starting electrically (optional)

Electrostart with primer 

(  

13

)

1.  Set the throttle lever to the "

START

" position 

(  

13/1

).

2.  Press the primer button 3 times at intervals of about 

2 seconds (  

15

). If the temperature is below 

10 °C, press the primer button 5 times.

3.  Pull in the safety brake handle on the handlebar and 

hold it (  

16

) – the brake handle does not lock.

4.  Turn the ignition key fully to the right in the ignition 

lock (  

18

).

5.  As soon as the motor starts running, release the 

ignition key (it returns automatically to position "0").

6.  According to the desired motor speed, set the 

throttle lever to a position between 

min

 and 

max

.

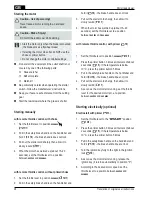
Starting manually

with remote throttle control, with choke

1.  Set the throttle lever to position 

max


(  

11/1

).

2.  Pull in the safety brake handle on the handlebar and 

hold it (  

16

) – the brake handle does not lock.

3.  Pull out the starter cord sharply, then allow it to 

slowly rewind (  

17

).

4.  When the motor has warmed up (about 15–20 

seconds), set the throttle lever to a position 

between 

min

 and 

max

.

with remote throttle control, without primer/choke

1.  Set the throttle lever to position 

max 

(  

12/1

).

2.  Pull in the safety brake handle on the handlebar and 

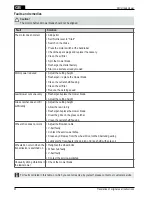
Summary of Contents for Powerline 5200BRV

Page 1: ...zinrasenmäher Powerline Betriebsanleitung Information I Manuals I service QUALITY FOR LIFE Garden Hobby 474 130_a I 01 2011 GB F I SLO DK N PL SK LV D NL E H HR S FIN CZ EST RO LT RUS UA P BG GR TR SRB MK ...

Page 2: ...e Copyright 2009 AL KO KOBER GROUP Kötz Germany This documentation is allowed to also in excerpts only with express authorization of the AL KO KOBER GROUP duplicates or third accessible is done Technical alterations of influence of the function reservations ...

Page 3: ...Original Betriebsanleitung 4 Benzin Rasenmäher Powerline 6 5 4 3 2 1 2 3 1 6 7 5 4 3 2 1 2 1 2 1 6 7 5 4 3 2 1 3 1 2 3 4 5 6 a b 7 8 ...

Page 4: ...5 474130_a 2 1 1 2 2 10 9 11 12 13 14 15 16 1 1 START 1 2 1 ...

Page 5: ...Original Betriebsanleitung 6 Benzin Rasenmäher Powerline Briggs Stratton Tecumseh Honda AL KO 17 18 19 20 21 22 23 24 1 2 ...

Page 6: ...7 474130_a 25 26 27 28 ...

Page 7: ...rations Product description This document describes various models of petrol lawnmowers Some models are equipped with a grass catcher and or are suitable for mulching Please identify your particular model in the product illustrations and descriptions of the various options Proper use This equipment is intended for moving lawns on private property and should be used on dry grass only Use for any ot...

Page 8: ...catcher 16 Ignition switch for electric start 17 Quick guide Symbols on the device Caution Be particularly careful when handling Remove the spark plug connector before working on the cutting gear Before initial startup read the instructions for use Quick guide Release the motor brake Keep other people out of the danger area Quick guide Switch on the wheel drive Keep hands and feet away from the cu...

Page 9: ...cutting gear Follow the hours of use regulations applying in the country concerned Do not leave the equipment unattended when ready to operate Only use the lawnmower if the mower blade is sharp Do not operate the equipment if the safety devices protective grilles are damaged Never operate the equipment if the safety devices are not fully assembled e g deflector plate grass catching devices Before ...

Page 10: ...azard Store petrol and oil only in containers intended for this purpose Only add or drain oil in the open air and when the motor has cooled down Do not add petrol or oil while the motor is running Do not overfill the tank petrol expands Do not smoke when refuelling Do not open the tank lock when the motor is running or when hot Replace the tank or tank lock if damaged Always close the tank cap fir...

Page 11: ...h the motor switched off and when the mower blade has come to a standstill Always set all the wheels to the same cutting height Cutting height adjustment depends on the particular model Central adjustment 1 1 Press and hold the central height adjustment knob 1 1 For shorter grass press the central adjustment handle downward 1 2 For longer grass pull the central adjustment handle upward 1 2 The cen...

Page 12: ...shaft 7 It must lock into place If the mulch kit is not locked into position both the mulch kit and the mower blade may be damaged Removing the mulch kit 1 Lift the deflector plate 2 Release the lock on the mulch kit 8 1 3 Pull out the mulch kit 8 2 Mowing with the side outlet duct optional Caution risk of injury Attach detach the side outlet only when the motor is switched off and the mower blade...

Page 13: ...afety brake handle on the handlebar and hold it 16 the brake handle does not lock 4 Pull out the starter cord sharply then allow it to slowly rewind 17 5 As soon as the motor starts running set the throttle lever for the desired motor rpm at a position between min and max Starting electrically optional Electrostart with primer 13 1 Set the throttle lever to the START position 13 1 2 Press the prim...
Page 14: ...ke handle 22 The motor is switched off Caution danger of serious cut injuries The motor may continue running After switching off make sure the motor has stopped turning Lawnmower with blade coupling 1 Release the safety brake handle 25 2 Set the throttle lever to position min 12 2 The motor is switched off Caution danger of serious cut injuries The motor may continue running After switching off ma...

Page 15: ...ous vibrations and may result in damage to the lawnmower Charging the starter battery optional The starter battery is maintenance free and is normally charged by the lawnmower In certain cases however the battery will need to be charged by the user Before the initial start up of the lawnmower If discharged before the winter season or if left unused for long periods 6 months Charging procedure 1 Ta...

Page 16: ...risk of explosion Do not store the equipment where there are naked flames or heat sources Allow the motor to cool down To save storage space fold the handlebar down 28 Store the equipment in an area which is kept dry and which cannot be accessed by children or unauthorised persons Store the starter battery where it will be protected from frost Recharge the starter battery from time to time Drain t...

Page 17: ... unevenly Resharpen replace the mower blade Adjust the cutting height Grass catcher does not fill sufficiently Adjust the cutting height Allow the lawn to dry Resharpen replace the mower blade Clear the grille on the grass catcher Clean the outlet shaft housing Wheel drive does not work Adjust the Bowden cable V belt faulty Contact the service workshop Clean any dirt away from the wheel drive toot...

Page 18: ...replacement parts have been used The equipment has been tampered with Technical modifications have been made The equipment was not used for its intended purpose for example used for commercial or communal applications The following are not covered by warranty Paint damage due to normal wear Wear parts identified by a border XXX XXX X on the spare parts list Combustion motors these are covered by a...

Page 19: ...run ko prom d o o 385 1 3096 567 385 1 3096 567 I AL KO Kober GmbH SRL 39 039 9329311 39 039 9329390 IN AGRO COMMERCIAL 91 3322874206 91 3322874139 IQ Gulistan Com 946 750 450 80 64 IRL Cyril Johnston Co Ltd 44 2890813121 44 2890914220 LY ASHOFAN FOR AGRICULT ACC 218 512660209 218 512660209 MA BADRA Sarl 212 022447128 212 022447130 MK Techno Geneks 389 2 2551801 389 2 2520175 N AL KO GINGE A S 47 ...

Reviews: