Section 3 - Operations
50
SCHWARZE SUPER UPDRAFT
revised 04/19
4.4 Gutter Broom Operation
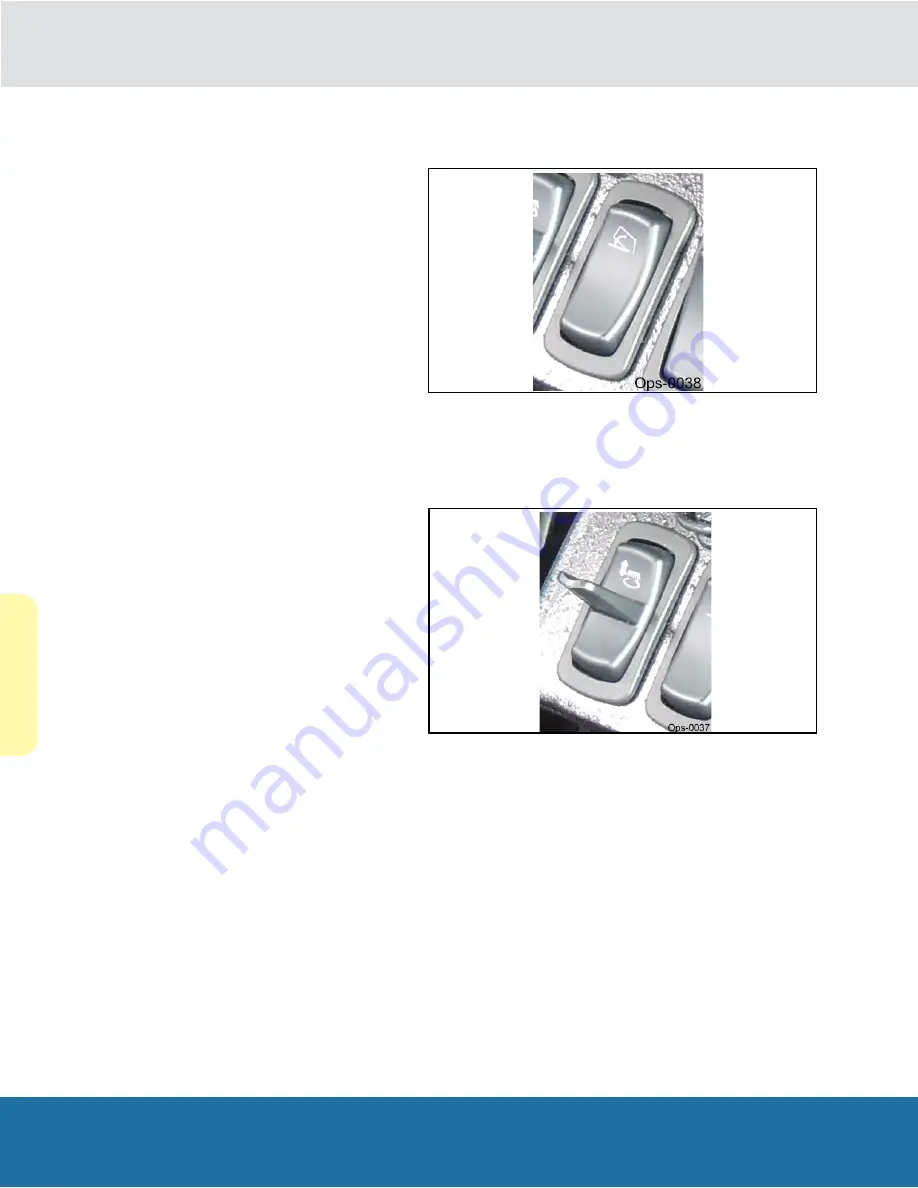
The gutter brooms are activated by a control panel
switch located on the cab console. The switch is
identified by the corresponding legend symbol
shown.
Use the following procedure to operate the gutter
broom under normal conditions in which street
gutters are accessible. The gutter brooms are
designed to be full-floating. If you encounter an
obstruction on the surface, the broom automatically
lifts to go over it. As broom bristles wear away, the
broom lowers to maintain contact with the surface.
Set the power setting to 90-100 and turn the broom
on by pushing the ‘Broom On’ toggle. The broom
will extend and begin spinning clockwise. To stop
the broom, simply push and hold the ‘Broom In’
toggle until the curb broom is fully retracted.
3.4 Gutter Broom Operation
OPERA
TION
The bleeder door is used to direct all of the airflow down the pressure hose and into the head, or to divert a
portion of the airflow to an exhaust location. Only in instances of light debris or leaves is the bleeder door
opened.
For sweeping of curb and gutter streets, the damper door should be in the ‘heavy’ or just slightly open position.
This directs all or most of the airflow to the sweeping head, producing maximum blast in the sweeping head’s
blast orifice.
When sweeping leaves or other light material, the damper door should be in the ‘light’ position, allowing some
of the airflow through the blast orifice, reducing the air pressure exerted against the rear of the front curtain and
permits debris to pass beneath the front curtain more easily.
4.4 Gutter Broom Operation
3.5 Light/Heavy Operation
OPERA
TION
‘PARK’ and engage the emergency brake.
The hopper may be raised and lowered by a control panel switch located on the cab console. The switch is
identified by the legend symbol shown.
1.
Push the cab console panel dump switch to the
UP position. After a momentary pause the door
will open and then the hopper will begin to
raise. Continue to hold the switch in the UP
position until the hopper has been raised.
When the switch is released, it will return to the
center neutral position.
NOTE:
If the safety prop has been put into
place, it must be removed before attempting to
lower the hopper.
2.
To lower the hopper, push the cab console
panel switch in the DOWN position. Continue to
hold the switch to the DOWN position until the
hopper has firmly seated itself against the
intake and fan seals.
4.6 Lights and Flashers Operation
Summary of Contents for Schwarze SUPERVA C SUPER UPDRAFT
Page 6: ...revised 04 19 SCHWARZE SUPER UPDRAFT 7 Section 1 Safety 1...
Page 37: ...Section 1 Safety 38 SCHWARZE SUPER UPDRAFT revised 04 19 This Page Intentionally Left Blank...
Page 41: ...Section 1 Safety 42 SCHWARZE SUPER UPDRAFT revised 04 19 This Page Intentionally Left Blank...
Page 44: ...revised 04 19 SCHWARZE SUPER UPDRAFT 45 Section 3 Operations 3...
Page 52: ...revised 04 19 SCHWARZE SUPER UPDRAFT 53 Section 4 Service 4...
Page 71: ...Section 4 Service 72 SCHWARZE SUPER UPDRAFT revised 04 19 This Page Intentionally Left Blank...
Page 72: ...revised 04 19 SCHWARZE SUPER UPDRAFT 73 Section 5 Troubleshooting 5...
Page 77: ...Section 4 Service 78 SCHWARZE SUPER UPDRAFT revised 04 19 This Page Intentionally Left Blank...
Page 78: ......


