11
When a key is pressed, a beep will sound and a Red LED will flash. Other indications are:
▪
Access Granted
: 1 beep and a Green LED flash. (When Pass Time ends, the DL5200 locks with a beep and a
Red LED flash).
▪
Invalid Code Entered
: 5 beeps and 5 Red LED flashes.
▪
Disabled Code Entered
: 5 beeps (with extended first beep) and 5 Red LED flashes.
▪
New Access Code Accepted
: 6 beeps and 6 Red LED flashes.
▪
Programming Error
: 2 sets of 5 beeps and 5 Red LED flashes.
▪
Return from Anti Tamper Lockout
: 2 beeps with a Red LED flash.
▪
Low Battery
: High/Low sounder with flashing Red LED for 5 seconds. (See below to replace batteries).
Note:
Keypress tones may be disabled using the
;
2
2
3
;
command (see Keypress Sound
Options, page 10).
Audible and LED Indications
Battery Replacement
Restore Factory Default (original settings that were set at the factory will be loaded).
1. Remove the battery pack, and with the batteries disconnected, press any numeric key for 10 seconds and release.
2. Connect the batteries and--within 3 seconds--press and hold
;
. After hearing 6 additional beeps, release
;
.
The DL5200 is now clear of all programmed data, and the lock is now ready to accept new programming.
Important:
If
you do not hear these 6 beeps, you must start over at step 1.
Failure to follow this exact procedure can result in erratic lock behavior.
Erase All Programming
When a valid code is entered and the batteries are weak, the YELLOW LED will light and the sounder will sound for 4
seconds. DL5200 Series locks use five (5) AA-size 1.5 volt alkaline batteries. Always replace weak batteries as
soon as possible.
The DL5200 is equipped with special "non-volatile" memory. Thus if power is lost for ANY length of time (such as discon-
necting the battery pack when replacing batteries or if the batteries die completely), all existing User Codes are retained
indefinitely.
CAUTION: Do not press any keys while batteries are disconnected unless you intend to erase all programming.
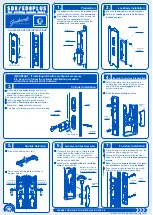
See Installation Instructions for detailed illustrations and mounting instructions.
1. At the Secondary Lock Side, remove the handle by first inserting the key turning the key cylinder to a vertical po-
sition. Then insert the lever release pin (or a stiff wire such as a bent paper clip) into the underside handle re-
lease hole and depress the lever catch. Pull off lever.
2. Remove the two flat head screws from above and below the lever spindle and remove the two flat head screws
on the left and right side of the top of the lock housing.
3. Remove the secondary housing from the door by depressing the spring tab.
4. Pull out the battery pack and replace all 5 batteries.
5. If you
do not
hear the 3 beeps when power is re-applied, all programming and settings have been retained, and
the lock is ready for use. Go to step 5.
6. If you
do
hear 3 beeps when power is re-applied,
do not press any keys for 15 seconds
. After the 15 second
period, the LED will flash red 6 times and 6 beeps will sound. Reset the clock using functions 38, 39 and 40.
7. To reinstall the Secondary Lock Side, reverse the procedure in step 4.

