background image

7

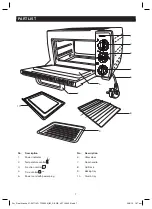
TEILELISTE

stay


on

Off

150

210

90

120

180

230

Min

2

3

4

1

5

8

10

9

6

7

Nr. 

Beschreibung 

Nr. 

Beschreibung 

1.

Betriebsanzeige

6.

Glastür

2.

Temperaturregler 

c

7.

Türgriff

3.

Funktionsregler 

8.

Rost

4.

Zeitregler 

min

9.

Backblech

5.

Netzkabel mit Netzstecker

10.

Krümelblech

For_Real_Alaska_37-001714R_TO1300N_IM_DE_GB_V07_140424.indb   7

24/4/14   1:57 pm

Summary of Contents for TO1300N

Page 1: ...Gebrauchsanweisung Mini Ofen TO1300N Page Size A5 IMS No 37 001714R written by Impala Technical Documentation Services For_Real_Alaska_37 001714R_TO1300N_IM_DE_GB_V07_140424 indb 1 24 4 14 1 57 pm...

Page 2: ...e 8 Bedienung 8 11 Reinigung und Pflege 12 Problembehebung 12 Technische Daten 13 Gew hrleistung 13 WICHTIGE SICHERHEITSHINWEISE Bevor Sie Ihr neues Ger t benutzen lesen Sie sich diese Gebrauchsanweis...

Page 3: ...ngliche Ger teteile k nnten sich w hrend der Benutzung erhitzen Halten Sie Kinder davon fern 8 berpr fen Sie regelm ig den Netzstecker und das Netzkabel auf Besch digungen Ist die Anschlussleitung di...

Page 4: ...weren Gegenst nde auf das Ger t Stellen Sie keine Gegenst nde mit offenen Flammen wie z B Kerzen auf oder neben das Ger t Stellen Sie keine mit Fl ssigkeit gef llten Gegenst nde wie z B Vasen auf das...

Page 5: ...bevor Sie das Ger t reinigen 29 Decken Sie die L ftungs ffnungen des Ger ts nicht ab Achten Sie auf eine ausreichende Bel ftung Stellen Sie das Ger t nicht in einen Schrank Lassen Sie mindestens 10 c...

Page 6: ...onellen Betrieb ausgelegt Nur in Innenr umen verwenden Verwenden Sie das Ger t nur wie in dieser Gebrauchsanweisung beschrieben Der Hersteller bernimmt keine Haftung f r Sch den die durch nicht bestim...

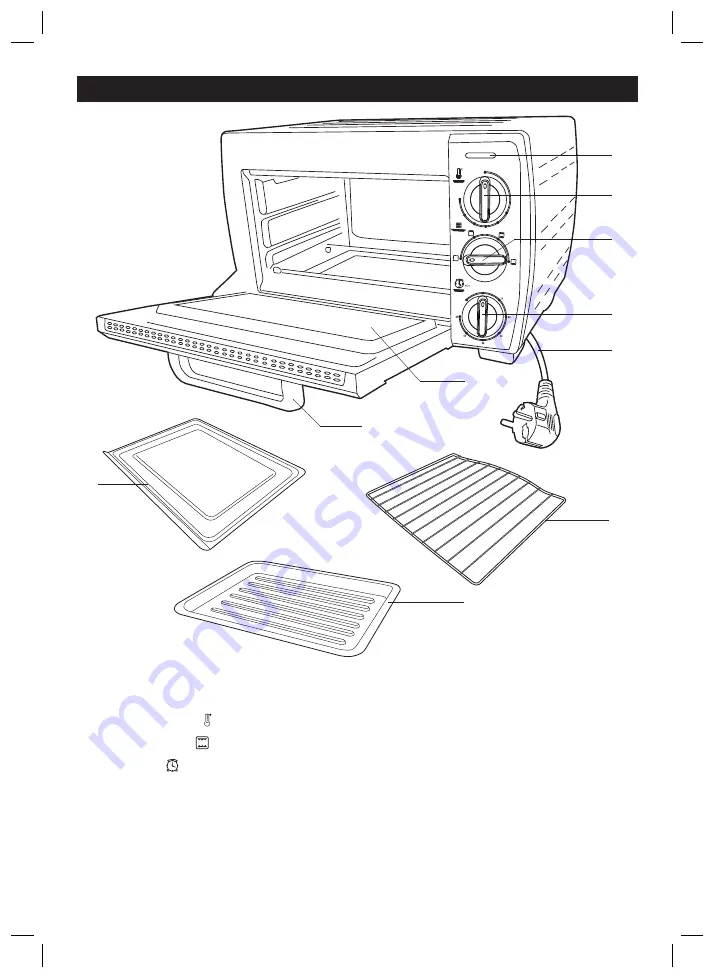
Page 7: ...7 Nr Beschreibung Nr Beschreibung 1 Betriebsanzeige 6 Glast r 2 Temperaturregler c 7 T rgriff 3 Funktionsregler 8 Rost 4 Zeitregler min 9 Backblech 5 Netzkabel mit Netzstecker 10 Kr melblech For_Real...

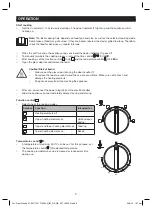
Page 8: ...itregler min 4 10 Die Betriebsanzeige 1 leuchtet auf und das Ger t beginnt aufzuheizen Hinweis Aufgrund im Ger t verbliebener Herstellungsr ckst nde kann es sein dass das Ger t einen leichten Geruch v...

Page 9: ...icht Verbrennungsgefahr ffnen Sie die Glast r 6 immer am T rgriff 7 Benutzen Sie den Ofenhandschuhe wenn Sie die Nahrungsmittel entnehmen m chten Stellen Sie sicher die Heizelemente dabei weder zu ber...

Page 10: ...Glast r 6 und legen Sie das Kr melblech 10 ein Setzen Sie den Rost 8 an der oberen Schiene ein Zus tzlich k nnen Sie noch das Backblech 9 auf dem Rost abstellen Geben Sie die Nahrungsmittel in das Ger...

Page 11: ...zzeit Setzen Sie Rost und Blech ein bevor Sie mit dem Vorheizen beginnen Achten Sie darauf dass sich zwischen Rost und Blech gen gend Zwischenraum befindet damit sich die Hitze gleichm ig verteilen ka...

Page 12: ...zelemente zu besch digen Glast r Benutzen Sie keine abreibenden Schw mme oder Reinigungsmittel Stahlwolle oder Metallutensilien um das Ger teinnere bzw u ere zu reinigen Vermeiden Sie den Einsatz von...

Page 13: ...ie durch h here Gewalt oder sonstige u ere Einfl sse entstehen fallen nicht unter die Gew hrleistung Wir empfehlen die Bedienungsanleitung aufmerksam zu lesen da dort wichtige Hinweise enthalten sind...

Page 14: ...Instruction manual Mini oven TO1300N Page Size A5 IMS No 37 001714R written by Impala Technical Documentation Services For_Real_Alaska_37 001714R_TO1300N_IM_DE_GB_V07_140424 indb 1 24 4 14 1 57 pm...

Page 15: ...first use 8 Operation 8 11 Cleaning and care 12 Troubleshooting 12 Technical data 13 Guarantee 13 IMPORTANT SAFETY INSTRUCTIONS Read this instruction manual carefully before using the appliance It co...

Page 16: ...en 7 Warning Accessible parts may become hot during use Children should be kept away 8 Regularly check the power plug and power cord for damage If the supply cord is damaged it must be replaced by the...

Page 17: ...n top of the appliance Do not place objects with open flames e g candles on top of or beside the appliance Do not place objects filled with water e g vases on or near the appliance 20 For additional p...

Page 18: ...s around the appliance to ensure sufficient ventilation 30 Do not use appliance without the crumb tray correctly inserted 31 Do not place any easily flammable materials close to the appliance 32 Do no...

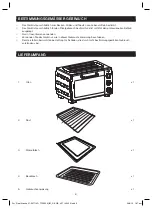
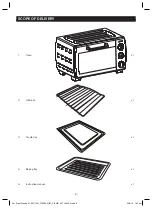
Page 19: ...6 SCOPE OF DELIVERY 1 Oven x 1 2 Grill rack x 1 3 Crumb tray x 1 4 Baking tray x 1 5 Instruction manual x 1 For_Real_Alaska_37 001714R_TO1300N_IM_DE_GB_V07_140424 indb 6 24 4 14 1 57 pm...

Page 20: ...cription No Description 1 Power indicator 6 Glass door 2 Temperature control c 7 Door handle 3 Function control 8 Grill rack 4 Time control min 9 Baking tray 5 Power cord with power plug 10 Crumb tray...

Page 21: ...n 4 10 The power indicator 1 lights up and the appliance starts heating up Note Due to the manufacturing residues the appliance may emit a slight odour This is normal and does not indicate any defect...

Page 22: ...burns Always open the glass door 6 using the door handle 7 To remove the food we recommend the use of oven mittens Make sure not to touch and damage the heating elements Keep hands away from steam ex...

Page 23: ...ert the crumb tray 10 Place the grill rack 8 on the upper rack guide and or place the baking tray 9 on the grill rack Place food and close the glass door 6 Set the temperature control c 2 to desired t...

Page 24: ...orten preheating time Place rack and tray in proper position before preheating Ensure the space between the rack and tray in order for the heat to be well distributed Cooked food and parts of the appl...

Page 25: ...r metallic utensils to clean the interior or exterior parts of the appliance Avoid the use of sprays as they may damage the appliance s surface except that the grill rack 8 and baking tray 9 and crumb...

Page 26: ...l as force or other external influences are not covered by this guarantee We recommend careful reading of the operating instructions as it contains important information Note 1 In case this product do...

Reviews: