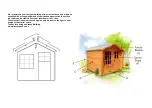
Assembly Guide For Albany Rockingham
Summerhouse.
RECOMMENDED TOOLS: HAMMER, CROSS HEAD SCREWDRIVER (BATTERY
OPERATED IF AVAILABLE), STANLEY KNIFE, SAW, STEPLADDERS. 10MM
SPANNNER OR SOCKET
ESTIMATED ASSEMBLY TIME: TWO PEOPLE 4 HOURS.
WE RECOMMEND PILOT DRILLING SCREW HOLES FIRST.
PARTS LIST
A: 1 X FLOOR (TWO HALVES 808
–
810 AND 1008 - 1012)
H: FELT ROLLS (QTY DEPENDS ON SIZE
OF THE BUILDING)
B: 1 X PLAIN GABLE
I: 1 X RIDGE FELT (1006 AND 1008 ONLY)
C: 2 X PLAIN SIDE
J: 1 X TRIM PACK
D: 1 X DOOR GABLE
K: 2 X DIAMOND FINALE
E: 2 X ROOF SECTIONS
L: WINDOW GLASS: 9
DOOR GLASS: 4
F: 1 X PURLIN
M: 1 X HANDLE SET
G: 1 X TRUSS (ONLY ON 1012)
N: 1 X NAIL & SCREW PACK
1. Lay the floor panel (A) in its desired position (remember to leave enough
space around the building for roof overhang and maintenance). It is essential the
floor is on a solid level base otherwise the building will not fit together properly
and the door may not fit flush. If the floor has been supplied in two pieces join
together by nailing into the joining blocks on one piece of floor. Place the panels
around the floor - it will help you understand how they fit together.
2. Position the plain gable (B) on the back edge of the floor (the lip on the
bottom overhangs the floor). While your assistant holds the gable place a side
panel (C) on the floor to form a corner. Check that the sides are sitting flat on the
floor and the panels are butted together, screw them together from the inside
using two of the coach screws provided.
3. Select the other side panel (C) and place on the floor, screw to the plain
gable as before with two screws, again making sure the sections are flat on the
floor.
Note: On larger buildings the sides may be supplied in two sections and will need
joining together using the coach bolts provided.
4. Before fitting the door gable (D) remove the key from the door. Unlock the
door and attach the handles (M), screw the door gable to the sides from the
inside as before.
5. Fit and screw the truss in place (if provided) and fit the purlin into the slot
provided on the gable end so it rests upright on the horizontal framing on both
gables. Place the roof sections on the building so that the overhang meets at the
apex. Before fixing check that the roof is sitting flat with the sides, if not it is
possible the floor is not level and will need packing in one corner.
6. With the roof square check that the sides and gables are sitting flat on the
floor. Screw the panels to the floor using two screws per panel, ensuring that you
screw into a floor joist (follow the lines of nails in the floor to locate the joists).
7. Screw the two roof sections together through the purlin then secure by nailing
through the roof into the framing on the sides and gables.
8. Felt the roof using the small clout nails provided. Start by carefully removing
the paper from the wide roll of felt, roll the felt out on a flat surface and cut in half
to give two equal strips (except 810, 1010 and 1012).
Place the first strip on the roof so it overhangs each end and at least 50mm at the
side, secure with three evenly spaced nails along the upper edge then fold the
felt over the side of the roof and nail every 100 - 150 mm along the bottom roof
framing working from the middle outwards. Repeat on the other side.
On 806-810 models position the third strip on one side of the roof just below the
apex, nail as before. Place the fourth strip on the roof dividing the overlap equally
the nail along both sides every 100-150mm.
On 1006-1008 models attach the third & fourth strip overlapping the first &
second by at least 100mm, secure at the top edge with a few nails and along the
bottom edge every 100
– 150mm as before working from the middle. Roll the
ridge felt out along the middle of the roof so the overlap is equal either side, nail
down both sides every 100 - 150mm again working from the middle outwards.
On 1210-1212 models position the third strip on one side of the roof so that is
overhangs the bottom strip by at least 100mm , nail as before. Repeat on the
other side. Roll the last strip of felt out along the middle of the roof so the overlap
is equal either side, nail down both sides every 100 - 150mm again working from
the middle outwards.
Fold the ends of the felt and nail into the ends of the framing.
9. Open the trim pack and remove the four fascia boards, nail them to the ends
of the roof then trim the felt if necessary. Nail on the diamond finales (its best to
pre-sink the nails first on a flat surface so as not to split them).
10. Fix the corner strips (long narrow strips) to each outside corner using three
nails per strip.
11. Glaze the building from the outside using the beading provided. Do not push
the beading too tight against the glass or it will crack.
We advise you wear gloves when handling glass.


