8
23
5. Control unit
Buttons and a joystick on the control unit enable you to activate and deactivate vari-
ous functions and settings. In this respect, the diagrams of individual display screens
shown in the following operating instructions may differ from the actual displays of your
control unit.
An audible signal will also sound with various display screens, but only if this function
has been activated (see chap
ter 5.3.7).
5.1 Fitting and removing the control unit for servicing
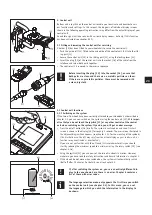
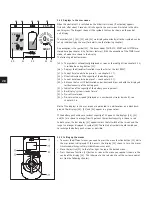
A holder [35] has been fitted to your wheelchair to secure the control unit.
•
Push the guide rail [32] fitted to the underside of the control unit [20] into the slid-
ing part [33].
•
Secure the control unit [20] in the sliding part [33] using the locking lever [34].
•
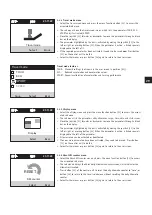
Insert the plug [30] of the control unit into the socket [16] of the cable from the
interface and screw both parts together.
•
The control unit is removed in the reverse sequence.
Before inserting the plug [30] into the socket [16], ensure that
both parts are clean and there are no metallic particles on them.
If there are any metallic particles, these must be removed with
a clean, dry cloth.
5.2 Control unit functions
5.2.1 Switching on the system
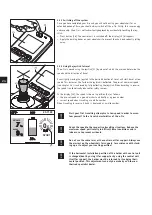
If the two e-fix wheels have been correctly attached to your wheelchair as described in
chapter 2.1, you can now switch on the system using the control unit [20].
It is imper-
ative that you do not touch the joystick [21] or any other controls of the control
unit when switching on the system. If you do, you will get an error message.
•
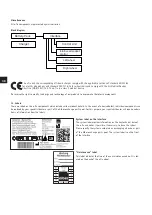
Press the on/off button [26] briefly. The system is switched on and the e-fix start
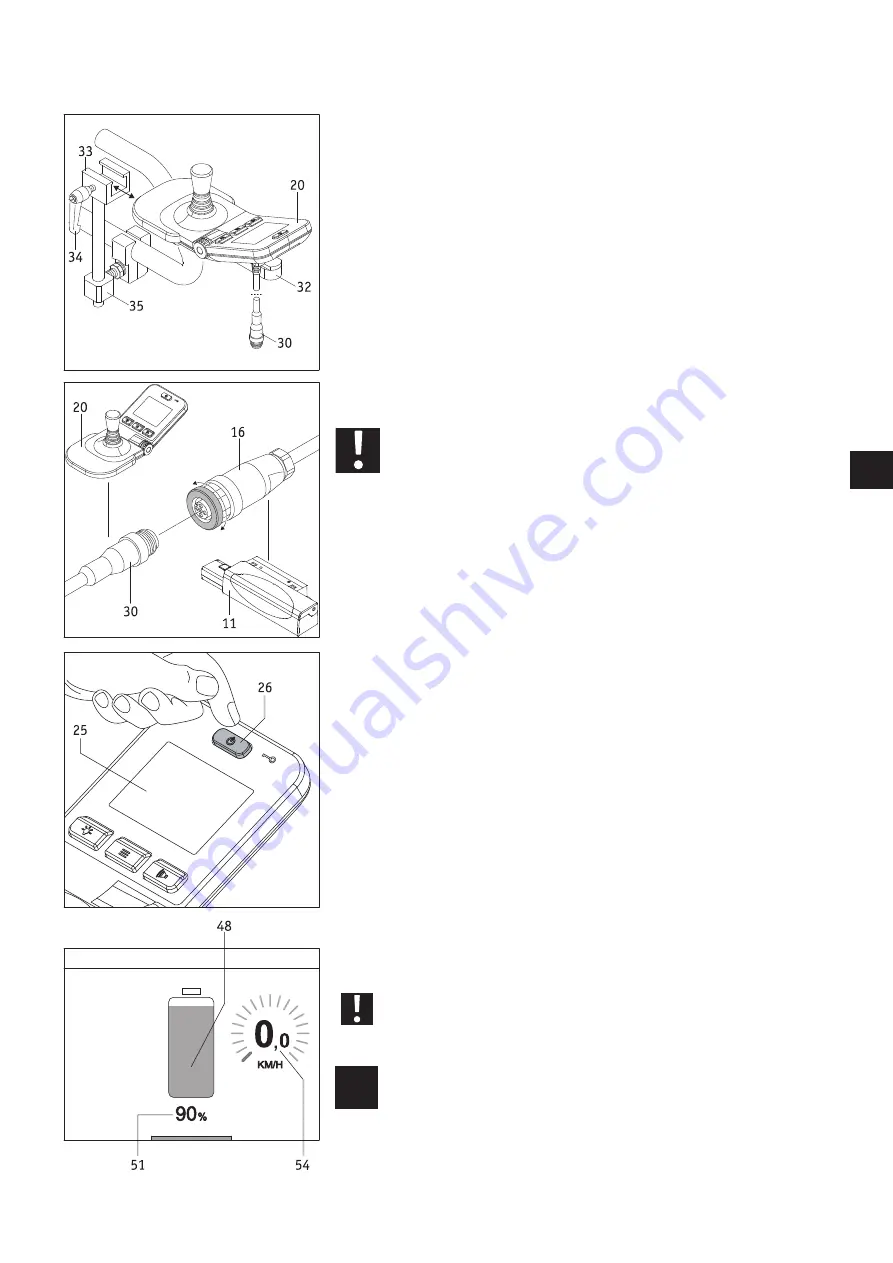
screen is shown in the display [25] for roughly 3 seconds. The user screen illustrated in
the adjacent diagram then appears (see chapter 5.3.1 for the meaning of the symbols).
(The illustrations on the left may vary from the actual display on your control unit, as
functions may be activated or deactivated.)
•
If you are not yet familiar with the e-fix and its travel characteristics you should
start by reducing the maximum speed to a minimum using the rotary switch [29] (see
chapter 5.2.6).
•
Using the joystick [21] you can now set the two e-fix wheels in motion. However,
make sure you have read the safety instructions and hazard information in chapter 3.
•
If the wheels do not move when switched on, the system will automatically switch
itself off after 10 minutes. For details, see also chapter 5.5.
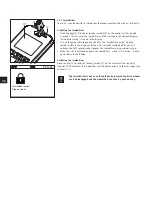
If, after switching the system on, you see an entirely different dis-
play to the one shown here, there is an error. Chapter 6 contains a
list of these with error codes.
The language selection menu only appears the first time you switch
on the control unit (see chapter 5.4). In this menu, you can set
the language in which you wish the information in the display to
be shown.
i
Summary of Contents for e-fix eco
Page 1: ...Gebrauchsanweisung e fix eco DE Instructions for Use e fix eco EN...
Page 3: ......
Page 4: ......
Page 52: ...47...


