System Installation
4200-097
4-1
Revision 1.06
4.
System Installation
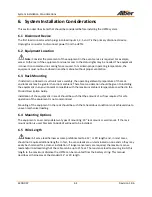
Note
: The UXTM must be installed in a restricted access location.
UXTM installation requires nothing more than standard hand tools, cutters, strippers and screwdrivers.
If the unit is to be wall mounted, a drill will also be required.
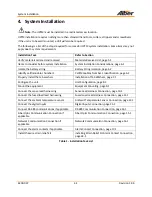
The following is a list of the steps required for successful UXTM system installation. Some items may not
apply due to system requirements.
Installation Task
Refer to Section
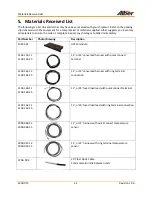
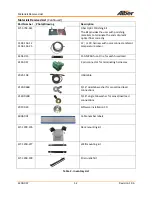
Verify materials ordered and received
Materials Received List, page 5-1
Items to consider before system installation
System Installation Considerations, page 6-1
Isolate the battery string
Battery String Isolation, page 6-2
Identify cell/monobloc Number 1
Cell/Monobloc Number 1 Identification, page 6-2
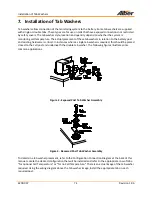
Properly install the tab washers
Installation of Tab Washers, page 7-1
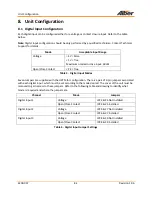
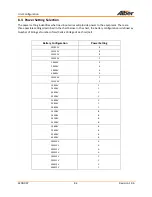
Configure the unit
Unit Configuration, page 8-1
Mount the equipment
Equipment Mounting, page 9-1
Connect the sense lead harnessing
Sense Lead Harness Connection, page 10-1
Connect the fused load lead harnessing
Fused Load Lead Harness Connection, page 11-1
Connect the ambient temperature sensor
Ambient Temperature Sensor
Connection, page 12-1
Connect the digital inputs
Digital Inputs Connection, page 13-1
Connect RS-485 communications if applicable
RS-485 Communication Connection, page 14-1
Fiber Optic Communication Connection if
applicable
Fiber Optic Communication Connection, page 15-1
Network Communication Connection if
applicable
Network Communication Connection, page 16-1
Connect the alarm contacts if applicable
Alarm Contact Connection, page 17-1
Install the wire strain relief kit
Installing Strain Relief Kit Alarm Contact Connection,
page 18-1
Table 1 - Installation Task List

