14
Installing Batteries
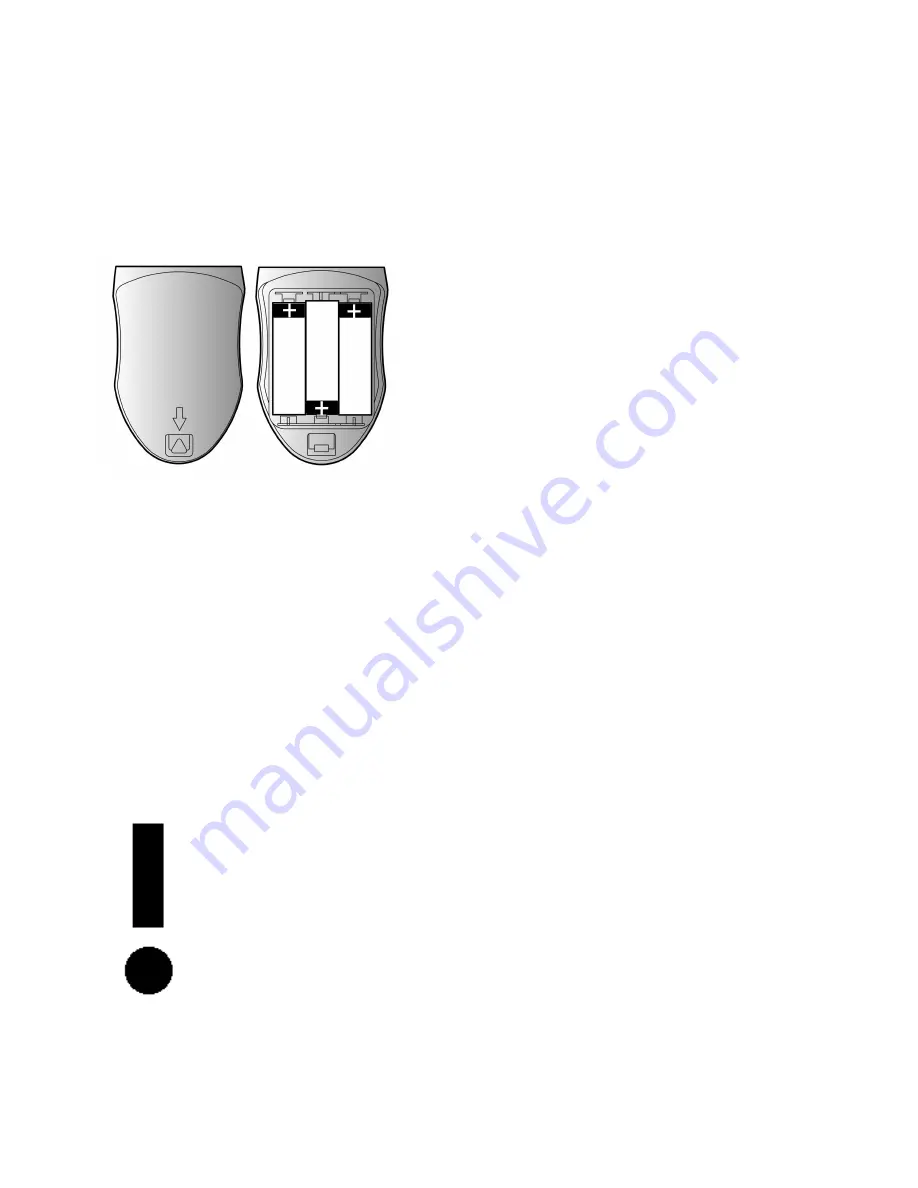
Your Tectalk Action operates with 3 AA size Alkaline or NiCD / NiMH batteries. The belt clip
should be removed to ease battery installation or removal. To install or remove batteries:
With back of radio facing you, gently press the triangular battery latch toward the top of the
radio.
•
Lift up on the bottom edge of the battery
cover and lift the cover off.
•
Insert 3 AA batteries observing the
polarity as shown.
•
Insert the two alignment tabs on the top
edge of the cover into their slots and
press down on the bottom of the cover to
secure.
Note
: Batteries are not included. Please do not mix used and fresh batteries or rechargeable
and non-rechargeable batteries together. Never try to charge non-rechargeable batteries,
they may explode and cause injury and / or fire. Never expose empty batteries into fire.
Recycle them properly.
Charging batteries
If NiMH or NiCd batteries are inserted, they may be charged with the designated wall charger
MW 904
(order Nr. C 689, separately available) within appr. 14 hours standard charging
time. Instead of this wall charger the mobile charging adapter cable
AL 222
for 12 V can be
used, too.
Please allow new rechargeable batteries about 10-14 hours charging time prior to first use.
New Nickel Cadmium or NiMH batteries do not provide their full capacity initially. This is
normal, and after 2-3 charging cycles the batteries will provide their full capacity.
Warning :
Please do not overcharge batteries too often. To avoid the unwanted „memory
effect“ which may reduce battery capacity drastically, use the batteries in the
radio from time to time, until they are really discharged, and do not recharge
the batteries too often after only short time of use. It is a good idea to have
two sets of rechargeable battery and to replace a battery set not before it is
really empty.
The Mic socket is working as charging terminal for the wall or mobile charger
charger. The radio must remain switched off during charging process. To
charge, insert the DC cable into the MIC socket of the radio, and then plug the
wall charger into a 230 V power outlet (or the DC cable into the cigarette
lighter socket).
Please do not use any other charging device not recommended by ALAN. Excessive currents
may destroy the radio and create a dangerous situation !
Summary of Contents for Tectalk Action
Page 3: ...3 Bedienelemente und Anzeigen LCD Display ...
Page 13: ...13 Control Buttons Indicators LCD Display ...
Page 23: ...23 Boutons de Contrôle Indicateurs Afficheur LCD ...
Page 33: ...33 Comandi e indicatori Display a cristalli liquidi ...
Page 43: ...43 Comandi e indicatori Display a cristalli liquidi ...


