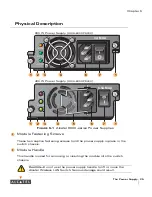
The Power Supply
31
Chapter 5
N
OTE
—
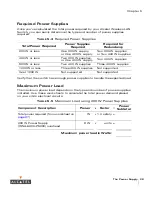
When using more than one power supply, verify that they are all of the
same type. Do not mix 200 W and 400 W power supplies in the same chas-
sis.
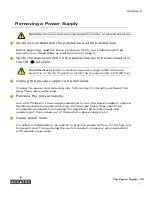
If replacing a previously installed power supply, first see
“Removing a Power
Supply”
on
page 33
.
If you are installing a power supply in an empty slot, you may have to remove
the blank cover plate first. To do this, use a #2 Phillips or cross-head
screwdriver. Turn the captive fastening screws on the faceplate
counter-clockwise until they are loose (they cannot be completely removed).
Remove the cover plate and store it in a safe place.
Verify the power switch on the power supply to be installed is
Off (
|
).
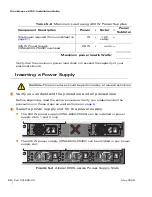
Insert the power supply into the chassis.
Grasp the power supply by the handle, keeping the LEDs on the left and
power switch on the right. Align the back of the module with the guide-rails in
the chassis power supply slot and gently slide the module toward the
backplane. Do not force the module; it should slide in easily most of the way.
There may be moderate resistance when the power supply meets the
connectors at the back of the chassis. Press firmly to engage the connectors,
but do not use excessive force.
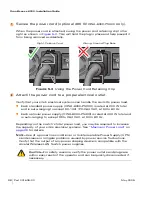
Secure the power supply.
Use the screwdriver to push in the module’s captive fastening screws and
turn them clockwise until moderate resistance is felt. Do not over-tighten.
Attach the power cord to the power supply.
Plug an appropriate power cord into the power input socket. The socket
accepts a power cord with a standard IEC320 plug.
N
OTE
—
On the 400 W power supply (OWA-6000-PS400), swing the cord
retaining clip to the left before attaching the power cord.
C
AUTION
—
Never insert or remove a power supply while its power
switch is in the On (
|
) position. Verify the power switch is Off (
|
) first.
C
AUTION
—
For proper safety and performance, the power cord must be
rated to 10 A and conform to grounded electrical standards in the
country where the product is operated.
3
4
5
6
Summary of Contents for OmniAccess 6000
Page 1: ...i OmniAccess 6000 Wireless LAN Switch Installation Guide TM ...
Page 10: ...OmniAccess 6000 Installation Guide x Part 031639 00 May 2005 ...
Page 14: ...OmniAccess 6000 Installation Guide xiv Part 031639 00 May 2005 ...
Page 18: ...OmniAccess 6000 Installation Guide 4 Part 031639 00 May 2005 ...
Page 27: ...Installing the Chassis 13 Chapter 2 ...
Page 28: ...OmniAccess 6000 Installation Guide 14 Part 031639 00 May 2005 ...
Page 36: ...OmniAccess 6000 Installation Guide 22 Part 031639 00 May 2005 ...
Page 48: ...OmniAccess 6000 Installation Guide 34 Part 031639 00 May 2005 ...
Page 74: ...OmniAccess 6000 Installation Guide 60 Part 031639 00 May 2005 ...

