OmniAccess 6000: Installation Guide
42
Part 031639-00
May 2005
Prepare the supervisor slot.
The first supervisor card should be installed in Slot 0 of the Alcatel Wireless
LAN Switch chassis. A second optional supervisor card can be installed in Slot
1 if desired. Supervisor cards cannot be installed in Slot 2 or Slot 3.
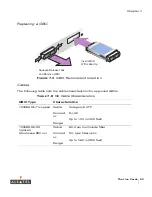
If replacing a previously installed module, first see
“Removing a Supervisor
Card”
on
page 43
.
To install a module in an empty bay, first remove the blank cover plate. To do
this, use a #2 Phillips or cross-head screwdriver to loosen both of the
fastening screws on the blank cover plate. The screws loosen with
counter-clockwise rotation but are captive and cannot be fully removed.
Carefully insert the supervisor card into the chassis slot.
Hold the supervisor card by the handle. Align the rear of the card with the
guide-rails in the chassis slot and gently slide the module toward the
backplane. Do not force the module; it should slide in easily most of the way.
Engage the supervisor card.
There may be moderate resistance when the supervisor card meets the
connectors in the backplane. Press firmly so that the connectors at the back of
the module engage with the backplane, but do not use excessive force.
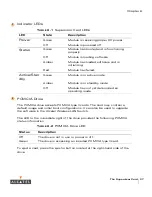
If the system is powered up, the module’s Power LED will light up green if the
supervisor card is inserted properly.
Secure the supervisor card.
Use a #2 Phillips or cross-head screwdriver to push in the captive fastening
screws and turn them clockwise until moderate resistance is felt. Do not
over-tighten.
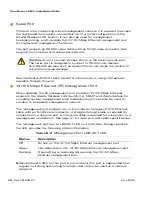
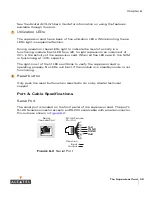
Connect the appropriate network cables.
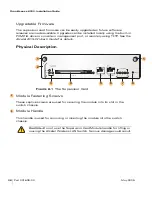
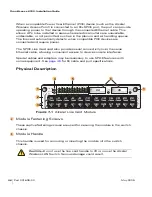
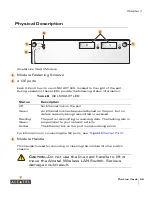
Supervisor card ports are described under
“Physical Description”
starting on
page 36
.
C
AUTION
—
Verify that the fastening screws for the module above the
supervisor card slot are fully secured. If the module in Slot 2 or Slot 3
is loose, it could interfere with the new module insertion and possibly
damage the components.
2
3
4
5
6
Summary of Contents for OmniAccess 6000
Page 1: ...i OmniAccess 6000 Wireless LAN Switch Installation Guide TM ...
Page 10: ...OmniAccess 6000 Installation Guide x Part 031639 00 May 2005 ...
Page 14: ...OmniAccess 6000 Installation Guide xiv Part 031639 00 May 2005 ...
Page 18: ...OmniAccess 6000 Installation Guide 4 Part 031639 00 May 2005 ...
Page 27: ...Installing the Chassis 13 Chapter 2 ...
Page 28: ...OmniAccess 6000 Installation Guide 14 Part 031639 00 May 2005 ...
Page 36: ...OmniAccess 6000 Installation Guide 22 Part 031639 00 May 2005 ...
Page 48: ...OmniAccess 6000 Installation Guide 34 Part 031639 00 May 2005 ...
Page 74: ...OmniAccess 6000 Installation Guide 60 Part 031639 00 May 2005 ...

