Installing the PSAX 2300 System
Installing the Hardware
18
255-700-161
PacketStar
®
PSAX 2300 Multiservice Media Gateway Installation Guide
, Issue 4
4
Verify that the input power from your facility power source meets the specifica-
tions in “Power Supply Module Specifications” on page 10 for the type of power
supply you have in your system.
5
Obtain the tools you will need during installation (see “Tools and Materials
Requirements” on page 15).
6
Remove components from their packaging as called for in the following proce-
dures. Save the original carton (including packaging) in which the PSAX 2300
chassis was received. This allows you to ship the system safely to another loca-
tion in the future (see “Shipping the System” on page 55).
Note:
Do not take the individual modules out of their ESD packaging until you
are actually ready to install them in the chassis.
Use the “Installation Checklist” (in back of this guide) to follow and check off the
installation process.
Installing the Hardware
This section describes how to attach the mounting brackets, install the chassis, con-
nect the ground and power cables.
WARNING:
!
To avoid the risk of personal injury or possible damage to your equipment or
configuration, you should install the equipment in a restricted access facility.
Attaching the Mounting Brackets to the Chassis
To prepare the PSAX 2300 chassis for mounting, determine how you want to position
the PSAX 2300 mounting brackets, either in the flush-mount or mid-mount position.
The chassis comes with two sets of mounting brackets:
•
23-in. flush-mounting brackets (2 each) for a 58.2 cm (23 in.) equipment rack
•
19-in. flush-mounting brackets (4 each) for a 48.26 cm (19 in.) equipment rack
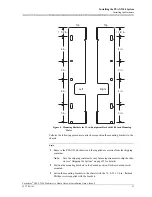
The mounting brackets can be attached to the chassis in a flush-mounted position (see
Figure 3 and Figure 4) or a mid-mounted position (see Figure 5).


