84/314
3CC08991ATAA TQ BJA 01
Issue 01 -- March 2004
--
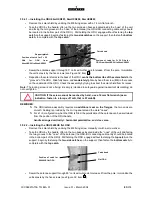
Flange the ODU handle.
--
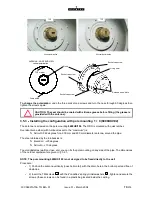
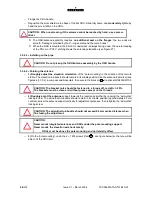
Reposition the solar shield via the back of the flat ODU. Slide fully home, and moderately tighten by
hand the screw (M4) on the ODU.
CAUTION : When unscrewing, if the screws cannot be reached by hand, use a screw-
driver.
S
The ODU/antenna assembly requires no additional seal on the flanges; the two ends are
smooth. Sealing is provided by the O--ring seal around the male “noses”.
S
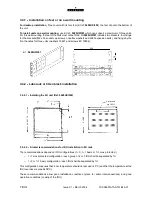
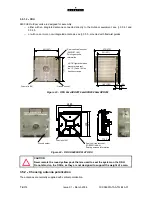
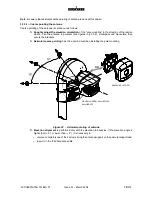
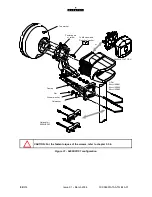
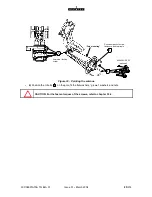
When the ODU is mounted, the 50--ohm coaxial jack is always facing down, the natural reading
of the POL H or POL V etching shows the antenna polarization (see Figure 27).
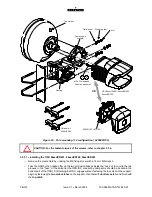
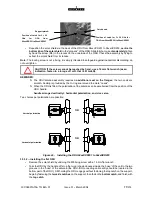
3.5.4.3 -- Installing on the pipe.
CAUTION: Do not pick up the ODU/antenna assembly by the ODU handle.
3.5.4.4 -- Pointing the antenna
--
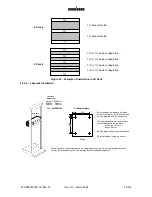
1) Roughly adjust the elevation orientation of the “pole mounting” in the direction of the remote
station. The elevation turnbuckle should remain in its middle position. Use the antenna top marker (see
figures in § 3.5.2), a compass and binoculars, then secure the brackets 2 in optional Kit 9400UXI103.
CAUTION: The bracket nuts should be fastened to a torque of 3 m.daN +/-- 20%.
The brackets must be clean and without grease except on the threads.
--
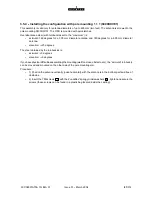
2) Roughly point the antenna support towards the required azimuthal by undoing the “azimuthal”
locking screw. The azimuthal turnbuckle should remain in its middle position (approximately 85 mm
centres); swivel the antenna support vertically for adjustment purposes, then retighten the “azimuthal”
locking screw.
CAUTION: The azimuthal turnbuckle should not exceed 94 mm centre distance when
fine tuning the adjustment.
CAUTION:
Never mount integrated antennas and ODUs under the pole mounting support.
Never mount the elevation axis horizontally:
ODUs must be above the pole mounting and not laterally offset.
--
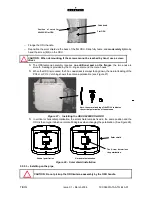
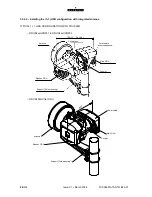
3) On the “pole mounting”, undo the 4 + 1 M8 screws (item 3 - see figure below) so that you will be
able to fit the ODU later.
Summary of Contents for 9400 UX
Page 1: ...3CC08991ATAA TQBJA 01 Alcatel 9400 UX User Manual ...
Page 4: ...4 314 3CC08991ATAA TQ BJA 01 Issue 01 March 2004 PAGE INTENTIONALLY LEFT BLANK ...
Page 6: ...6 314 3CC08991ATAA TQ BJA 01 Issue 01 March 2004 PAGE INTENTIONALLY LEFT BLANK ...
Page 14: ...14 314 3CC08991ATAA TQ BJA 01 Issue 01 March 2004 PAGE INTENTIONALLY LEFT BLANK ...
Page 19: ...19 314 3CC08991ATAA TQ BJA 01 Issue 01 March 2004 1 3 5 Eco Declaration ...

