background image

22

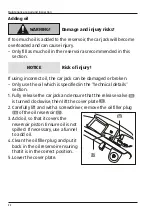
Adding oil

WARNING!

Damage and injury risks!

If too much oil is added to the reservoir, the car jack will become 

overloaded and can cause injury�
–  Only fill as much oil in the reservoir as recommended in this 

section�

NOTICE

Risk of injury!

If using incorrect oil, the car jack can be damaged or broken�
–  Only use the oil which is specified in the “Technical details“ 

section�

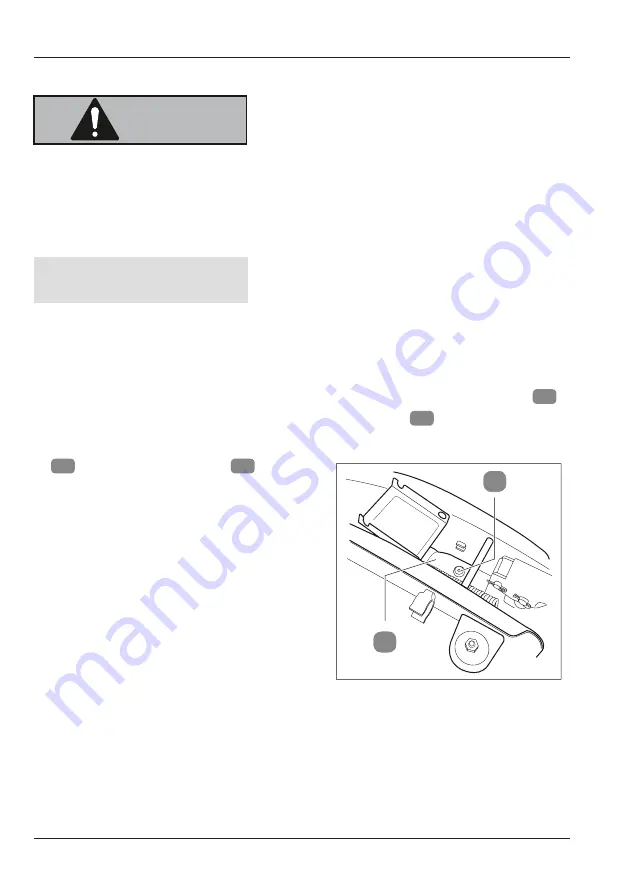
1�  Fully release the car jack and ensure that the release valve 

10


is turned clockwise, then lift the cover plate 

6

2� Carefully lift and with a screwdriver, remove the oil filler plug 

16

 of the oil reservoir 

17

3� Add oil, so that it covers the 

reservoir piston� Ensure oil is not 

spilled� If necessary, use a funnel 

to add oil�

4� Clean the oil filler plug and put it 

back in the oil reservoir ensuring 

that it is in the correct position�

5� Lower the cover plate�

16

17

Maintenance, repair and inspection

Summary of Contents for Auto XS FLX-WH-01

Page 1: ...HYDRAULIC TROLLEY JACK Original Instructions ...

Page 2: ......

Page 3: ...mbling dismantling 15 Assembling the car jack 16 Fitting the carry handle 16 Assembling the jack handle 16 Attaching the jack handle 16 Car jack use 17 Vehicle preparation 17 Car jack placement 17 Vehicle lifting 18 Vehicle lowering 19 Troubleshooting 20 Maintenance repair and inspection 21 Adding oil 22 Changing oil 23 Cleaning and storing 24 Technical details 25 Waste disposal 25 Disposal of the...

Page 4: ...A 1 2 5 6 7 9 11 12 8 8 10 3 4 8 14 13 B 4 ...

Page 5: ...11 9 10 8 C D E 5 ...

Page 6: ... holder 2 Saddle bolt 3 Saddle sleeve 4 Saddle 5 Lifting arm 6 Cover plate 7 Handle sleeve 8 Jack handle 9 Carry handle 10 Release valve 11 Carry handle nut 12 Jack handle clip 4 13 Pin 14 Drilled hole User Manual Warranty Card 6 ...

Page 7: ...7 ...

Page 8: ...must at the same time hand over these instructions Explanation of symbols The following symbols and words of warning are used in these instructions on the car jack or on the packaging This symbol warning word indicates danger with a high level of risk which will if not avoided lead to death or serious injuries This symbol warning word indicates danger with a medium level of risk which will if not ...

Page 9: ... logo in accordance with the DEKRA test program SAFETY Correct use The car jack is intended solely for short term lifting and lowering of vehicles whose total weight does not exceed 2 tonnes The car jack is intended solely for personal use and is not appropriate for commercial purposes The car jack is for use only as described in these instructions Any other use is incorrect and can lead to materi...

Page 10: ...en and animals are kept away whilst the vehicle is on the car jack Never lift the vehicle if there are passengers inside Make sure the load is supported in the centre of the saddle Support the vehicle with support devices with an adequate load capacity and before carrying out work on the vehicle remove the car jack When the vehicle is supported by only the car jack no one should be under the vehic...

Page 11: ...es the product the warranty is not valid In case of repair contact the manufacturer through the authorised repairer detailed on the warranty certificate For repairs only original parts for the car jack may be used The car jack contains mechanical parts which are important to protect it from damage Do not alter the car jack and do not add parts Only move the car jack when holding the carry handle e...

Page 12: ...aning and user maintenance must not be performed by children Do not leave the jack unattended while in use Keep children away from the jack Do not let children play with the jack Make sure that children do not play with the plastic wrapping They may get caught in it when playing and suffocate WARNING Danger of personal injury Use of the car jack in exceptional or adverse conditions and environment...

Page 13: ...d flat and must withstand a load of up to 2 tonnes Never clean the car jack by submerging it in water this can damage it Read the instructions in the Cleaning and storage section Do not use the car jack if the casing is cracked deformed or broken see the Maintenance repair and inspection section Immediately stop using it and contact the manufacturer through the authorised repairer detailed on your ...

Page 14: ...NG Danger of personal injury The car jack contains small parts which can be swallowed or cause suffocation Ensure all small parts are kept out of children s and animals reach General overview Before each use ensure that the release valve 10 on the car jack is completely closed turned clockwise and check that there is enough oil in the oil reservoir see Maintenance repair and inspection Before and ...

Page 15: ...priately placed in the saddle holder If necessary tighten the nut and the bolt For assembling and dismantling the saddle a 19 mm socket wrench and a 19 mm eye key is needed 1 With the eye key hold the wing nut of the saddle 15 whilst unscrewing the bolt of the saddle 2 with the socket wrench 2 Remove the wing nut of the saddle and the bolt of the saddle from the saddle structure 3 Remove the saddl...

Page 16: ...be safely attached at this time Otherwise reattach the carry handle Assembling the jack handle 1 Align two halves of the jack handle 8 with the pin 13 on one part and with the drilled hole 14 on the other part see picture B 2 Press both parts together until you hear the pin click into place see picture B To take apart the jack handle remove the jack handle from the car jack Press the pin down to s...

Page 17: ...2 If the vehicle is an automatic transmission place it in Park 3 Place manual transmission vehicles into 1st gear 4 Safely wedge the wheels wedges are not included Car jack placement 1 Ensure that the lifting arm 5 is fully released 2 Ensure that the release valve 10 is closed so that the plug on the end of the jack handle 8 is turned fully in a clockwise direction see picture E 3 Carefully place ...

Page 18: ...h can be found in the vehicle handbook If you are using two jack stands place them on the same point and at the same height on both sides of the vehicle 4 The lifting point s on the vehicle must be in the middle of the jack stand s Place the jack stand s in accordance with the manufacturer s instructions and ensure that they lock appropriately into place 5 Slowly turn the release valve 10 anticloc...

Page 19: ...the car jack to lower the vehicle 1 Place the saddle 4 under the lifting point 2 With the plug on the end of the jack handle 8 turn the release valve 10 clockwise see picture F 3 Pump the jack handle to lift the vehicle somewhat above the saddle s of the jack stand s not included 4 Remove the jack stands 5 Very slowly turn the release valve anticlockwise to lower the vehicle to the ground 6 Remove...

Page 20: ...enance repair and inspection section Verschmutztes Öl blockiert das Ablass ventil Change the oil see Maintenance repair and inspection section Visible damage Broken or bent parts due to falls or other knocks A qualified professional should look at and or fix the car jack Oil leak from the car jack The reservoir or the gaskets are faulty Contact the manufacturer through the authorised repairer deta...

Page 21: ...ne the car jack Check whether there are any cracks damaged welds and if there are pieces missing and or if they are loose and or damaged If the car jack is damaged or in any way deformed do not use it If you believe that the car jack was incorrectly loaded the manufacturer should immediatley check it Contact the manufacturer through the authorised repairer detailed on your warranty certificate If ...

Page 22: ...fied in the Technical details section 1 Fully release the car jack and ensure that the release valve 10 is turned clockwise then lift the cover plate 6 2 Carefully lift and with a screwdriver remove the oil filler plug 16 of the oil reservoir 17 3 Add oil so that it covers the reservoir piston Ensure oil is not spilled If necessary use a funnel to add oil 4 Clean the oil filler plug and put it bac...

Page 23: ... screwdriver remove the oil filler plug 16 of the oil reservoir 17 3 Stand the car jack up so that the used oil runs out of the oil reservoir then dispose of the oil in accordance with local regulations 4 Clean spilled oil from the car jack 5 Whilst the car jack is standing add the recommended oil see the Technical details section so that the reservoir piston is covered 6 Clean the oil filler plug...

Page 24: ...ar jack should not be stored in a position from which it could fall The car jack should be cleaned with a lightly oiled cloth Always ensure that the lifting arm 5 is fully lowered and that the jack handle handle 8 is safely attached to the car jack in the jack clips 12 see picture A Store the car jack in a cool dry place away from direct sun light and extreme temperatures hot or cold weather condi...

Page 25: ...rs As we are continually developing and enhancing our products changes may be made to the technology and design These instructions can be downloaded as a PDF file from our website www flexxtrade de WASTE DISPOSAL Disposing of packaging Sort the packaging before you dispose of it Dispose of the cardboard with the recycled paper service and plastic with the appropriate collection service Disposal of ...

Page 26: ...26 DECLARATION OF CONFORMITY Declaration of conformity ...

Page 27: ...27 ...

Page 28: ... use over the course of the first 3 years after date of purchase we will remedy the problem as quickly as possible once it has been brought to our attention In the unlikely event of such an occurrence or if you require any information about the product please contact us via our helpline support services details of which are to be found both in this manual and on the product itself AFTER SALES SUPP...

Reviews: