Visit our website at
www.alemlube.com.au
or
www.alemlube.co.nz
NSW/ACT
TEL: (02) 9677 1555
FAX: (02) 9675 1155
QLD/PNG
TEL: (07) 3204 9166
FAX: (07) 3204 1224
VIC/TAS
TEL: (03) 8787 8288
FAX: (03) 8787 8266
WA
TEL: (08) 9302 4199
FAX: (08) 9303 2095
SA/NT
TEL: (08) 8241 7111
FAX: (08) 8241 7011
NZ
TEL: (09) 447 1007
FAX: (09) 447 1008
2
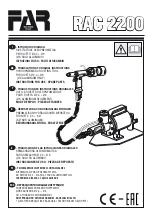
Propane Hose Reel
OWNER’S TECHNICAL MANUAL
SP610
Operation
1 Check your S Series reel for correct operation by slowly pulling out the hose. A clicking noise will be heard every half revolution
of the drum.
2 Latching mode switch, when your S Series reel is in free run state, pull out the hose and allow it to retract after hearing the first,
second or third click.
3 To unlatch the reel, slowly pull out the hose until the clicking noise stops, and then let the hose retract until the hose stop rests
against the hose guide.
4 If necessary, adjust spring tension on reel by adding or removing wraps of hose from spool, one wraps at a time, until desired
tension is obtained.Add wraps to increase tension. Remove wraps to decrease tension.
Warning
1. Make sure the hose is in proper working order.
2. Clean the hose with a cloth dipped in hot water to remove dirt or deposits and ensure correct rewinding.
3. Do not use detergents or solvents which could prove incompatible with cable-winder materials.
4. Dismantling of the unit by unskilled person could prove hazardous: the risk involved mainly concern the preloaded springs.
Installation Of Reel
1 Prior to mounting the hose reel, ensure that the supply line pressure does not exceed the maximum working pressure
of the hose reel.
2 Unpack and inspect the reel for damage. Turn by hand to check for smooth operation. Check for completeness.
3 For overhead ceiling mounting: Install reel at most 10ft/3m above the floor.
4 You will need to purchase appropriate hardware for mounting your new reel.
A) The base has four 6.5mm drill holes for mounting on a suitable flat surface.
B) Using the four holes in the base, mount the reel in the desired location. Be sure to use appropriate hardware
and tighten securely.
5 IMPORTANT: Apply teflon tape or pipe sealant to supply line threads, attach to reel inlet and tighten.
The other end of incoming line can now be connected to the desired supply source.
6 IMPORTANT: Apply teflon tape or pipe sealant to outlet fitting on reel hose, then attach to desired tool or nozzle.
Check connection for leakage, also check hose reel for correct operation. See: Operation Section.
7 If hose stopper adjustment is required, pull hose from reel and allow to latch at desired lenth. Loosen stopper bolts
and slide stopper to a position close to the hose guide. Tighten stopper bolts and unlatch the reel.


