19
•
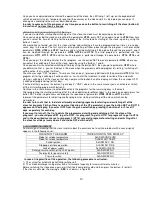
Switching off of the stove
occurs once you press button 4. The upper display shows the message OFF
(switched off) and the flow of pellet fuel into the firebox is stopped. After cooling, the tangential fan switches
off (stops working) and after 10 minutes from the moment of cooling, the suction device switches off as well.
The switching off speed of the smoke suction device is a parameter which may be set only by an authorized
repairman.
NOTE: Even when the stove is cold, switching off of the smoke suction device occurs after about 10 to 15
minutes.
For this reason DO NOT switch off the stove from the main switch (0-1) one the stove is switched off (OFF).
Wait until the switching off cycle is finished, that is, after cooling of the stove as it is previously described.
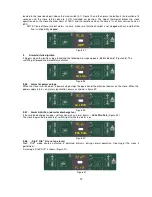
9.3 PARAMETERS USED BY THE STOVE USER
(Press button 3 to access the parameters)
Every time when you press this button you may get one of the following parameters with the corresponding
functions given here:
Use buttons 1 and 2 to change the value of the parameters
UT01:
day in the week. Day 1 … Day 7 or OFF to show that the programming is switched off
UT02:
change the current hours
UT03:
change of minutes
UT04:
button for access to technical parameters (reserved).
DO NOT TOUCH. THE PARAMETERS ARE
FACTORY ADJUSTED AND RESERVED FOR EXPERTS AND TECHNICAL STAFF OF THE STOVE
MANUFACTURER.
UT05:
change of the starting time (program 1) in stages of 10 minutes
UT06:
change of the switching off time (program 1) in stages of 10 minutes
UT07:
change of program 1, active / inactive, days in the week with the button 2 and going over through the days
with button 1. Confirm and proceed with button 3.
UT08:
change of the starting time (program 2) in stages of 10 minutes
UT09:
change of the switching off time (program 2) in stages of 10 minutes
UT10:
change program 2, active / inactive, days in the week with button 2 and going over through the days with
button 1. Confirm and leave the parameters with button 3.
UT11:
change of the starting time (program 3) in stages of 10 minutes
UT12:
change of the switching off time (program 3) in stages of 10 minutes
UT13:
change program 3, active / inactive, days in the week with the button 2 and going over through the days with
button 1. Confirm and proceed with button 3.
UT14:
change of the starting time (program 4) in stages of 10 minutes
UT15:
change of the switching off time (program 4) in stages of 10 minutes
UT16:
change program 4, active / inactive, days in the week with button 2 and going over through the days with
button 1. Confirm and leave the parameters with button 3.
NOTE: In order to go to the next parameter, use the button 3 (adjustment), button 1 for increasing and button 2 for
reduction.
NOTE: You can leave the program at any time by pressing button 4.
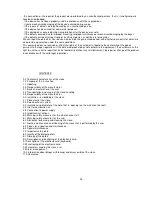
The stove programming enables that you program the starting and the switching off of the stove four time in one
day, seven days in the week (with the day 1 that indicates the day when the first programming has been
performed).
Setting the time
You can set the operation of the time and it can be seen on the lower red indicator of the keyboard. When you’re
programing the operation of the time, it functions also when the stove is not switched on since it is charged by a
battery.
You must adjust the time if you want to program the stove operation, that is, if you want to program automatic
switching on and switching off of the stove.
The procedure for adjustment of the time is the following:
Press the button 3 twice until the flickering message
UT01
appears.
At that moment, press the buttons 1 and 2 to adjust the day in the week (day 1 corresponds to Monday, continuing
further to day 7 which corresponds to Sunday). Adjust the day when you make the adjustment of the time (for
example, if it is Monday, set DAY1).
Than press the button SET once you set the day. The display shown a flickering message
UT02
. Now here you can
set the time by using the buttons 1 and 2. After you press the button SET one more time (to confirm the inserted
time), the flickering message
UT03
appears and now you can change the minutes of the time again by using the
buttons 1 and 2.
After setting the minutes, press the button SET once again to get the message
UT04
which corresponds to the
programing of the technical parameters (use only authorized repairmen).


