14
A2M 200
4.8.2 V-nail guide head replacement to change V-
nails size
The V-nail guide head must be changed each time you
use V-nails of different sizes.
Proceed as follows to replace it:
·
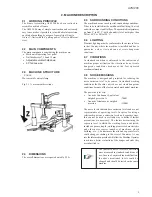
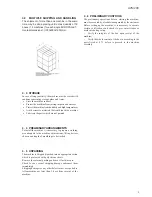
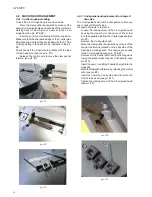
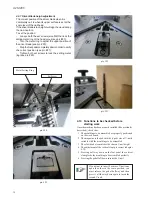
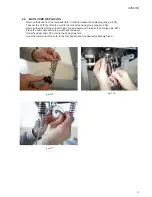
Loosen the locking screw of the V-nail guide head
by using the proper 5 mm Allen wrench (the screw
is on the opposite side from the V-nails magazine(See
pic. #9)
·
Remove the V-nail guide head
·
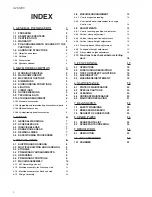
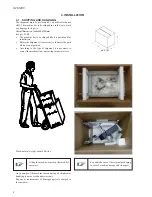
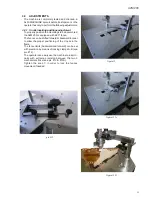
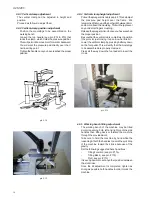
Move the claw pusher backwards by means of the
special control wire located on the back side of the
machine’s working bench. This will give you access
to the V-nail magazine (see pic. #7 & #8).
·
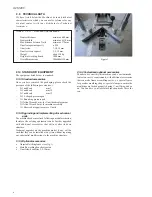
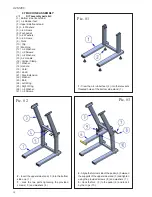
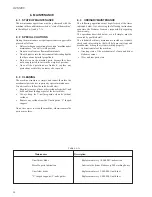
Remove all the V-nails that are still in the magazine
(using the proper brass magnet, if necessary) (see
pic. #10).
·
Insert the new V-nail strip (of desired height) into the
magazine
·
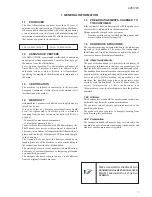
Move the clawpusher forward, by releasing the control
wire (see pic. #8).
·
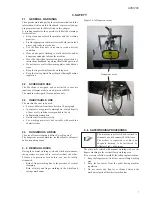
Insert the new size V-nail guide head to match the
V-nails to be used (see pic. #11).
·
Tighten the locking screw of the V-nail guide head
(see pic. #9).
4.8
MACHINE ARRANGEMENT
4.8.1 V-nails magazine loading
To load the V-nail magazine proceed as follows:
·
Move the claw pusher backwards by means of the
special control wire located on back side of the machine’s
working bench. This will give you access to the V-nail
magazine (see pic. #7 & #8).
·
Insert one or more V-nails strips into the magazine.
Make sure that the sharpened edge of the V-nails (glue
side) faces up and that they are loaded with the V of the
V-nails pointing in the direction as indicated in the pic.
#8.
Check to see if the V-nail size is suitable with the type
of claw head mounted. (see pic. #11)
·
Release the control wire to move the claw pusher
forward. (see pic. #7).
pic. #11
pic. #7
pic. #8
pic. #9
pic. #10


