background image

26

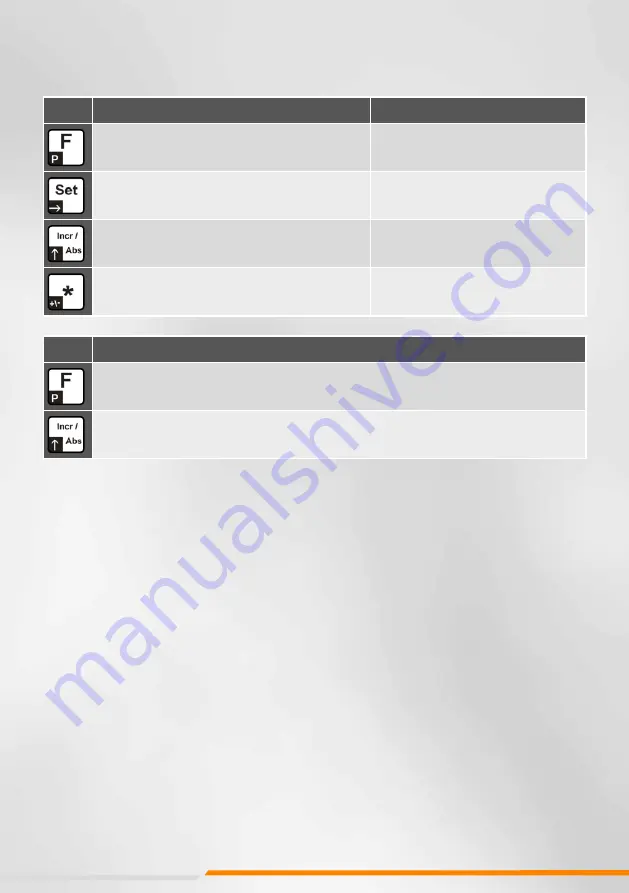
Key

Function at the user level

Function at parameter level

Basic key for key combinations

Activate/deactivate 

parameter level

Toggle fraction display in inch mode

Select next digit (decade)

Activate/deactivate incremental measurement

Increase value by 1

Activate/deactivate offset

Change sign

Key

Function in the initialisation level

Trigger calibration when the unit is activated

When activating the unit, reset parameters to factory settings and trigger calibration

kEy oVERViEw

The function of the keys at the parameter level is shown on the key labelling in the dark field at the bottom 

left, the function at the operator level is shown in large in the light field:

Summary of Contents for 03090

Page 1: ...ALFRA PRESS AP 600 Bedienungsanleitung User manual Mode d emploi Manuale di istruzioni de Ständerlochstanze IT Punzonatrice con Stand 03090 FR Poinçonneuse d atelier EN Stationary punching machine ...

Page 2: ... IZ16E 000 Affichage des positions à piles avec capteur externe 37 Caractéristiques techniques IZ16E 38 Montage et fonctionnement 39 Aperçu des touches 40 Niveau des paramètres 41 Liste des paramètres 42 Niveau de l initialisation 43 Fonctions du niveau de commande 44 45 Vue éclatée 60 71 Lire le présent manuel d utilisation avant la mise en service et le conserver Table des matières 32 45 FR 1 In...

Page 3: ...A 50 SERIE IZ16E 000 Indicatore di posizione a batteria con sensore esterno 51 Dati tecnici IZ16E 52 Struttura e funzione 53 Funzione dei tasti 54 Livello dei parametri 55 Lista parametri 56 Livello di inizializzazione 57 Funzioni a livello operatore 58 59 Vista esplosa 60 71 Leggere attentamente prima della messa in funzione e conservare Indice 46 59 IT ...

Page 4: ...b 66 mm Motorleistung 0 75 kW Äquivalenter Dauerschalldruckpegel 72 dB Betriebsspannung 400 V Gewicht ca 360 kg Gesamthöhe 1680 mm Arbeitshöhe 1200 mm Breite des Stanzkörpers 310 mm Tiefe des Stanzkörpers 1300 mm Länge der Anschlagschiene 1500 mm Verfahrweg Anschlagschiene gesamt 1000 mm Platzbedarf ca 2000 x 3000 mm Maximale Bleche und Schaltschranktüren Länge Breite 2200 mm 1000 mm Abkantung 30 ...

Page 5: ...en Betätigen des Stanz und Rückhubes Schneller Werkzeugwechsel hilft bei Problemstellungen mit vielen Durchbruchvarianten Lieferumfang Ständerlochstanze ALFRA PRESS 600 Artikel Nr 03090 mit Hydraulikzylinder Schrankunterbau Längen und Tiefenanschlag in X und Y Richtung verfahrbar Zylinderkolben mit Verdrehsicherung zum Einsatz aller Stempelaufnahmen doppeltwirkendes Hydraulikaggregat und Sicherhei...

Page 6: ...en Umständen manipuliert werden 6 Arbeiten mit dem Stanzbügel Stempel in die entsprechende Stempelaufnahme einsetzten und diese in den Stanzzylinder einsetzen Madenschraube nicht zu fest anziehen Matrize in das Matrizenbett einschieben und sicher verriegeln Um des Verletzungsrisiko aufgrund Werkzeugbruch durch falsch eingesetzte Werkzeuge zu vermeiden ist bei jedem Werkzeugeinsatz besonders darauf...

Page 7: ...en Bedienungsanleitung 7 Wartung und Pflege Das Hydraulikaggregat darf nur mit Markenhydrauliköl Viskositätsklasse HLP 32 betrieben werden Es ist auf ausreichenden Ölstand und Sauberkeit des Öls zu achten Den ersten Ölwechsel nach ca 500 Betriebsstunden durchführen jeden weiteren nach jeweils 5000 Betriebsstunden spätestens jedoch nach jeweils 2 Jahren Nach den ersten 50 Betriebsstunden sind alle ...

Page 8: ...rc Fleckenstein Geschäftsführer Alfra GmbH 2 Industriestraße 10 D 68766 Hockenheim Deutschland Produkt Alfra AP 600 03090 Konformitätserklärung Konformitätserklärung Hiermit erklären wir dass das oben genannte Produkt allen einschlägigen Bestimmungen der Maschinenrichtlinie 2006 42 EG entspricht Folgende harmonisierte Normen wurden angewandt EN ISO 12100 2010 Sicherheit von Maschinen 2014 68 EU Dr...

Page 9: ...9 Batteriebetriebene Positionsanzeige mit externem Sensor SERIE IZ16E 000 ...

Page 10: ...pannung 1 5 V oder 3 0V 24V auf Anfrage Stromaufnahme mit Messsystem 1 mA bei 1 5 V Batterielebensdauer 1 3 Jahre abhängig vom Batterietyp Betriebstemperatur 0 C 50 C Lagertemperatur 10 C 60 C Luftfeuchtigkeit max 80 nicht kondensierend Verfahrgeschwindigkeit max 4 m s Gehäuse Normeinbaugehäuse Kunststoff ABS schwarz Gehäuseabmessung B x H 96 x 72 mm Einbautiefe 30 mm je nach Version 60 mm Option ...

Page 11: ...lgen ausschließlich über die 4 frontseitigen Tasten bzw derer Tastenkombinationen die Anzeige erfolgt über das integrierte LCD Für verschiedene Applikationen kann das Symbol für die Maßeinheit per Parameter P02 geändert werden z B das Symbol für Winkelmessungen Die Normierung des Anzeigewertes muss entsprechend manuell über den Multiplikationsfaktor P08 und den Dezimalpunkt P03 erfolgen Für den In...

Page 12: ...er Parameterebene Basistaste für Tastenkombinationen Parameterebene aktivieren deaktivieren Bruchdarstellung im Inch Mode umschalten Nächste Stelle Dekade anwählen Kettenmaß aktivieren deaktivieren Wert um 1 erhöhen Versatzmaße aktivieren deaktivieren Vorzeichenwechsel Taste Funktion in der Initialisierungsebene Bei Aktivierung des Geräts Kalibrierung auslösen Bei Aktivierung des Geräts Parameter ...

Page 13: ...erden alle verfügbaren Parameter nacheinander angewählt 1x betätigen Mit dieser Taste wird die Dekade um eine Stelle von links nach rechts weitergeschaltet Die angewählte änderbare Dekade wird auf dem Display blinkend dargestellt 1x betätigen Mit dieser Taste wird der Wert in der angewählten Dekade immer um 1 erhöht 0 9 bzw 0 1 Mit dieser Taste kann bei manchen Parametern das Vorzeichen gewechselt...

Page 14: ...t 0 4 2 P05 ABC Tastensperre A Taste Set 0 aktiviert 1 deaktiviert B Taste Incr Abs 0 aktiviert 1 deaktiviert C Taste 0 aktiviert 1 deaktiviert 000 P08 Multiplikationsfaktor 0 0001 9 9999 1 0000 P09 Referenzwert 9999999 9999999 0 P10 Versatzmaß 1 9999999 9999999 0 P11 Versatzmaß 2 9999999 9999999 0 P12 Versatzmaß 3 9999999 9999999 0 P13 A Konfiguration Versatzmaße 0 3 A 0 Versatzmaße nicht aktivie...

Page 15: ...gung Gerät wieder einschalten i HINWEIS Bereits geänderte Parameter werden durch die Werksparameter überschrieben Bei Bedarf die Einstellungen zuvor notieren Gerät ausschalten Batterie entnehmen oder Stecker entfernen Gleichzeitig mit Tastenbetätigung Gerät wieder einschalten Taste gedrückt halten Hierbei werden sämtliche Parameter auf Werkseinstellung zurückgesetzt Weiterhin wird die Sensorkalibr...

Page 16: ... erscheint im Display der Text P09 Wenn die Tasten wieder losgelassen werden erscheint der Referenzwert P09 dieser kann dann wie in der Parameterebene verändert werden danach zum Speichern des Referenzwertes 1x betätigen Mit dieser Taste wird die Anzeige von Absolutmaß auf Kettenmaß umgeschaltet Der Anzeigewert wird temporär auf NULL gesetzt im Display erscheint das Symbol INC Bei erneuter Betätig...

Page 17: ... 1 die Anzeige wie folgt umgestellt werden Taste 1x betätigt Anzeige Inch Bruchdarstellung 1 64 Inch Taste 2x betätigt Anzeige Inch Bruchdarstellung 1 32 Inch Taste 3x betätigt Anzeige Inch Bruchdarstellung 1 16 Inch Taste 4x betätigt Anzeige Inch Dezimal 0 001 Inch uws 1x betätigen ...

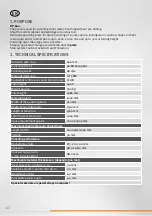
Page 18: ...e 66 mm Motor performance 0 75 kW Equivalent continuous sound pressure level 72 dB Total height 400 V Weight approx 360 kg Total height 1680 mm Working height 1200 mm Width of the punching body 310 mm Depth of punching body 1300 mm Length of fence rail 1500 mm Total travel of fence rail 1000 mm Space requirement approx 2000 x 3000 mm Maximum sheet metal and cabinet doors Length width 2200 mm 1000 ...

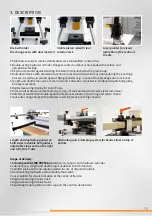
Page 19: ...le pedal for stepless actuation of punching and return stroke Quick die change helps with problems involving many punching variants Scope of delivery Column punch ALFRA PRESS 600 article no 03090 with hydraulic cylinder Cabinet base length and depth stop movable in X and Y direction Cylinder piston with anti rotation device for use of all punch holders Double acting hydraulic unit and safety foot ...

Page 20: ...anipulated under any circumstances 6 Working with the punching unit Insert the punch into the corresponding punch holder and insert it into the punching cylinder do not tighten the grub screw too much Insert the die into the die bed and lock it securely In order to avoid the risk of injury due to tool breakage caused by incorrectly inserted tools special care must be taken each time a tool is used...

Page 21: ...ntenance and care The hydraulic unit may only be operated with brand name hydraulic oil viscosity class HLP 32 Ensure that the oil level is sufficient and that the oil is clean Change the oil for the first time after approx 500 hours of operation then after every 5 000 hours of operation but at the latest after every 2 years After the first 50 operating hours check all hydraulic screw connections ...

Page 22: ...leckenstein CEO Alfra GmbH 2 Industriestraße 10 D 68766 Hockenheim Germany Product Alfra AP 600 03090 Declaration of conformity Declaration Of Conformity We hereby declare that the aforementioned product complies with all relevant provisions of the Machinery Directive 2006 42 EC The following harmonised standards have been applied EN ISO 12100 2011 03 Safety of machinery 2014 68 EU Pressure Equipm...

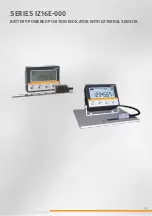
Page 23: ...23 Battery powered position indicator with external sensor SERIES IZ16E 000 ...

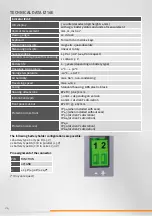
Page 24: ... 5 V or 3 0 V 24 V on request Current consumption with measuring system 1 mA at 1 5 V Battery life 1 3 years depending on battery type Operating temperature 0 C 50 C Storage temperature 10 C 60 C Air humidity max 80 non condensing Traversing speed max 4 m s Casing Standard housing ABS plastic black Housing dimensions W x H 96 x 72 mm Installation depth 30 mm depending on version 60 mm at client s ...

Page 25: ...s are made exclusively via the 4 front keys or their key combinations the display is via the integrated LCD For various applications the symbol for the unit of measurement can be changed by parameter P02 e g the symbol for angle measurements The normalisation of the display value must be done manually via the multiplication factor P08 and the decimal point P03 For inch mode the fraction display is...

Page 26: ...t Increase value by 1 Activate deactivate offset Change sign Key Function in the initialisation level Trigger calibration when the unit is activated When activating the unit reset parameters to factory settings and trigger calibration Key overview The function of the keys at the parameter level is shown on the key labelling in the dark field at the bottom left the function at the operator level is...

Page 27: ...from left to right The selected changeable decade flashes on the display Press 1x With this key the value in the selected decade is always increased by 1 0 9 or 0 1 With this key the sign of some parameters can be changed A negative sign is only possible if the value is not equal to ZERO Press for approx 3 seconds in the parameter level When leaving the parameter level all parameters are saved in ...

Page 28: ... 2 P05 ABC Key lock A Set key 0 activated 1 deactivated B Incr Tab key 0 activated 1 deactivated C Key 0 activated 1 deactivated 000 P08 Multiplying factor 0 0001 9 9999 1 0000 P09 Reference value 9999999 9999999 0 P10 Offset dimension 1 9999999 9999999 0 P11 Offset dimension 2 9999999 9999999 0 P12 Offset dimension 3 9999999 9999999 0 P13 A Configuration of offset dimensions 0 3 A 0 Offset cannot...

Page 29: ... pressing the key i NOTE Parameters that have already been changed will be overwritten by the factory parameters If necessary make a note of the settings beforehand Switch off the unit remove the battery or the plug Switch the unit back on whilst at the same time pressing the key Press and hold the key All parameters are reset to factory settings Furthermore the sensor calibration is triggered The...

Page 30: ...fter pressing the keys for approx 3 seconds the text P09 appears in the display When the keys are released again the reference value P09 appears which can then be changed as in the parameter level Then press once to save the reference value Press this key to switch the display from absolute to incremental The display value is temporarily set to ZERO the symbol INC appears in the display When the k...

Page 31: ...anged in inch mode parameter P02 1 as follows Key pressed 1x Display inch fraction display 1 64 Inch Key pressed 2x Display inch fraction display 1 32 Inch Key pressed 3x Display inch fraction display 1 16 Inch Key pressed 4x Display inch decimal 0 001 inch uws Press 1x ...

Page 32: ...de poinçonnage 66 mm Puissance du moteur 0 75 kW Niveau de pression acoustique continu équivalent 72 dB Tension de service 400 V Poids environ 360 kg Hauteur totale 1680 mm Hauteur de travail 1200 mm Largeur du corps de poinçon 310 mm Profondeur du corps de poinçon 1300 mm Longueur du rail de butée 1500 mm Course totale de déplacement du rail de butée 1000 mm Place nécessaire environ 2000 x 3000 m...

Page 33: ...ctionnement en continu des courses de poinçonnage et de retour Le changement d outil rapide aide à résoudre les problèmes à plusieurs variantes de ruptures Contenu de la livraison Poinçonneuse d atelier ALFRA PRESS 600 n d article 03090 avec cylindre hydraulique Substructure avec armoire butées longitudinales et de profondeur déplaçables dans les directions X et Y Piston de vérin avec ergotage pou...

Page 34: ...as être manipulé 6 Travailler avec l étrier de poinçonnage Insérer le poinçon dans le logement correspondant et mettre celui ci en place dans le cylindre de poinçonnage ne pas trop serrer la vis sans tête Insérer la matrice dans son banc et la verrouiller de manière sûre Afin d éviter tout risque de blessure lié à la rupture d outils mal insérés il faut tout particulièrement veiller à chaque utili...

Page 35: ...d utilisation jointe 7 Maintenance et entretien L agrégat hydraulique ne doit être utilisé qu avec de l huile hydraulique de marque de classe de viscosité HLP 32 Il faut veiller à ce que le niveau et la propreté de l huile soient suffisants Effectuer le premier remplacement de l huile après 500 heures de service environ puis toutes les 5 000 heures de service au plus tard cependant après 2 ans Con...

Page 36: ...recteur Alfra GmbH 2 Industriestraße 10 D 68766 Hockenheim Allemagne Produit Alfra AP 600 03090 Déclaration de conformité Déclaration de conformité Nous déclarons par la présente que le produit indiqué ci dessus répond aux clauses spécifiques de la directive relative aux machines 2006 42 CE Les normes harmonisées suivantes ont été appliquées EN ISO 12100 2010 Sécurité des machines 2014 68 UE Direc...

Page 37: ...37 Affichage des positions à piles avec capteur externe SÉRIE IZ16E 000 ...

Page 38: ...tative Tension d alimentation 1 5 V ou 3 0 V 24 V sur demande Courant absorbé avec le système de mesure 1 mA à 1 5 V Durée de vie de la pile de 1 à 3 ans selon le type de pile Température de service 0 C 50 C Température de stockage 10 C 60 C humidité de l air 80 maximum sans condensation Vitesse de déplacement 4 m s maximum Boîtier Boîtier normalisé en plastique ABS noir Dimensions du boîtier l x ...

Page 39: ...touches frontales ou avec des combinaisons de ces touches l affichage se fat sur le LCD intégré Pour diverses applications il est possible de changer le symbole de l unité de mesure au moyen du paramètre P02 comme par exemple le symbole pour les mesures d angles La normalisation de la valeur d affichage doit par conséquent être effectuée à la main au moyen du facteur de multiplication P08 et du si...

Page 40: ... de base pour les combinaisons de touches Activer désactiver le niveau des paramètres Passer à l affichage des fractions au mode en pouces Sélectionner le caractère suivant chiffre Activer désactiver la mesure incrémentale Augmenter la valeur de 1 Activer désactiver les mesures de décalage Changement du signe positif ou négatif Touche Fonctions dans le niveau d initialisation Déclencher un étalonn...

Page 41: ...difiée Tous les paramètres disponibles sont ainsi sélectionnés les uns après les autres Actionner 1x Cette touche permet de se déplacer d un chiffre de la gauche vers la droite Le chiffre sélectionné modifiable clignote à l écran Actionner 1x Cette touche permet d augmenter la valeur du chiffre de 1 à la fois de 0 à 9 ou 0 1 Cette touche permet de changer le signe ou de certains paramètres Un sign...

Page 42: ... P05 ABC Verrouillage des touches A Touche Set 0 activé 1 désactivé B Touche Incr Abs 0 activé 1 désactivé C Touche 0 activé 1 désactivé 000 P08 Facteur de multiplication 0 0001 9 9999 1 0000 P09 Valeur de référence 9999999 9999999 0 P10 Mesure de décalage 1 9999999 9999999 0 P11 Mesure de décalage 2 9999999 9999999 0 P12 Mesure de décalage 3 9999999 9999999 0 P13 A Configuration des mesures de dé...

Page 43: ...a fiche Rallumer l appareil tout en actionnant la touche i REMARQUE Les paramètres modifiés sont remplacés par les paramètres par défaut Noter d abord les réglages si nécessaire Éteindre l appareil retirer les piles ou débrancher la fiche Rallumer l appareil tout en actionnant la touche Maintenir la touche enfoncée L ensemble des paramètres est alors remplacé par les réglages par défaut L étalonna...

Page 44: ... P09 apparaît à l écran après que la touche a été actionnée pendant 3 secondes environ Lorsque ces touches sont relâchées la valeur de référence P09 apparaît elle peut alors être modifiée comme dans le niveau des paramètres Appuyer ensuite 1 x sur cette touche pour sauvegarder la valeur de référence Cette touche permet de commuter entre la mesure absolue et la mesure incrémentale La valeur affiché...

Page 45: ... mode en pouces paramètre P02 1 Touche actionnée 1 x Affichage en pouces par fraction 1 64 pouce Touche actionnée 2 x Affichage en pouces par fraction 1 32 pouce Touche actionnée 3 x Affichage en pouces par fraction 1 16 pouce Touche actionnée 4 x Affichage en pouces décimal 0 001 pouce etc Actionner 1x ...

Page 46: ... 60 kN a 165 bar Pressione Punzonatura 66 mm Potenza motore 0 75 kW Pressione sonora equivalente 72 dB Tensione 400 V Peso ca 360 kg Altezza totale 1680 mm Altezza di lavoro 1200 mm Corsa massima 310 mm Profondità massima 1300 mm Lunghezza barra 1500 mm Corsa totale della barra 1000 mm Spazio necessario ca 2000 x 3000 mm Massimale Lamiere e porte cabina quadri Lunghezza Larghezza 2200 mm 1000 mm P...

Page 47: ...n doppio pedale per l azionamento continuo della punzonatura e della corsa di ritorno Cilindro idraulico pronto per l uso di un puntatore laser per l indicazione visiva del centro dell utensile Cambio rapido dell utensile nel caso di varie soluzioni di punzonatura In dotazione Punzonatrice con Stand ALFRA PRESS 600 n art 03090 con cilindro idraulico Lo stand l arresto di lunghezza e profondità pos...

Page 48: ...so 6 Lavorare con la punzonatrice Inserire il punzone nel relativo alloggiamento del punzone e inserirlo nel cilindro del punzone non stringere eccessivamente l ingranaggio Inserire la matrice nell alloggiamento della matrice e bloccarla saldamente Al fine di evitare il rischio di lesioni dovute alla rottura dell utensile causata da utensili utilizzati in modo non corretto è necessario prestare pa...

Page 49: ...tà di impostazione del sistema di misura digitale disponibile come optional consultare le istruzioni d uso allegate 7 Manutenzione e cura Il gruppo idraulico può essere azionato solo con olio idraulico di marca classe di viscosità HLP 32 È necessario assicurarsi che il livello dell olio sia sufficiente e che l olio sia pulito Effettuare il primo cambio dell olio dopo circa 500 ore di funzionamento...

Page 50: ...tsführer Alfra GmbH 2 Industriestraße 10 D 68766 Hockenheim Germania Prodotto Alfra AP 600 03090 Dichiarazione di conformità Dichiarazione di conformità Con la presente dichiariamo che il prodotto sopra menzionato soddisfa tutte le disposizioni pertinenti della Direttiva Macchine 2006 42 CE Sono state applicate le seguenti norme armonizzate EN ISO 12100 2010 Sicurezza delle macchine 2014 68 UE Dir...

Page 51: ...51 Indicatore di posizione a batteria con sensore esterno SERIE IZ16E 000 ...

Page 52: ... 5 V o 3 0V 24V su richiesta Consumo energetico 1 mA a 1 5 V Durata batterie 1 3 anni a seconda del tipo batteria Temperatura di esercizio 0 C 50 C Temperatura di magazzinaggio 10 C 60 C Umidità max 80 no condensa Velocità di traslazione max 4 m s Alloggiamento normato Plastica ABS nero Dimensioni Alloggiamento B x H 96 x 72 mm Profondità 30 mm a seconda della versione 60 mm Opzione AG Frontale B ...

Page 53: ... tasti frontali o le loro combinazioni di tasti la visualizzazione avviene tramite il display LCD integrato Per le diverse applicazioni il simbolo dell unità di misura può essere modificato con il parametro P02 per es il simbolo per le misure angolari Di conseguenza il valore visualizzato deve essere scalato manualmente utilizzando il fattore di moltiplicazione P08 e il punto decimale P03 La rappr...

Page 54: ...Tasto base per le combinazioni Attivare disattivare parametri Commutazione della visualizzazione delle frazioni in pollici Passare alla prossima impostazione Attivare disattivare misure a catena Aumenta valore di 1 Attivare disattivare dimensioni offset Commutazione segno Tasto Funzioni di inizializzazione Attivare la calibrazione quando il dispositivo è attivato Quando l apparecchio è attivato ri...

Page 55: ...cato In questo modo tutti i parametri disponibili vengono selezionati uno dopo l altro Premere 1x Questo tasto fa avanzare la decade di una cifra da sinistra a destra La decade selezionata variabile lampeggia sul display Premere 1x Con questo tasto il valore viene sempre aumentato di 1 0 9 ovvero 0 1 Con questo tasto è possibile modificare il segno di alcuni parametri Il segno negativo è possibile...

Page 56: ... P05 ABC Blocco tasti A Tasto Set 0 attivato 1 disattivato B Tasto Incr Abs 0 aktiviert 1 deaktiviert C Tasto 0 attivato 1 disattivato 000 P08 Fattore di moltiplicazione 0 0001 9 9999 1 0000 P09 Valore di riferimento 9999999 9999999 0 P10 Valore di offset 1 9999999 9999999 0 P11 Valore di offset 2 9999999 9999999 0 P12 Valore di offset 3 9999999 9999999 0 P13 A Configurazione Valore di offset 0 3 ...

Page 57: ...il tasto i Nota bene I parametri già modificati vengono sovrascritti dai parametri di fabbrica Se necessario prendere nota delle impostazioni in anticipo Spegnere l apparecchio togliere la batteria o la spina Riaccendere l apparecchio mentre si tiene premuto il tasto Tenere premuto il tasto Ripristina tutti i parametri alle impostazioni di fabbrica Inoltre viene attivata la calibrazione del sensor...

Page 58: ...ivello dei parametri Dopo aver premuto i tasti per ca 3 secondi sul display appare la scritta P09 Al rilascio dei tasti appare il valore di riferimento P09 che può essere modificato come nel livello dei parametri Premere 1x per salvare Questo tasto commuta il display da dimensione assoluta a dimensione incrementale Il valore di visualizzazione è temporaneamente impostato su ZERO e sul display appa...

Page 59: ...1 la visualizzazione può essere modificata con questo tasto come segue Premere 1x Visualizzazione frazione Inch 1 64 Inch Premere 2x Visualizzazione frazione Inch 1 32 Inch Premere 3x Visualizzazione frazione Inch 1 16 Inch Premere 4x Visualizzazione decimale Inch 0 001 Inch e così via Premere 1x ...

Page 60: ...evision Maßstab Scale 1 4 ÜK kp Allgemeintoleranz General tolerance 2768 mH Datum Date Artikel Nr Order no Gewicht g Weight g 0 00 Genehmigt von Approved by Benennung Description 19 02 2021 Gezeichnet von Drawn by am at Material nicht festgelegt Blatt Sheet 1 von of 1 Geprüft von Checked by 03090 Modell 2019 A A B B C C D D E E F F G G H H J J K K L L M M 16 16 15 15 14 14 13 13 12 12 11 11 10 10 ...

Page 61: ...hariot à droite Carrello a destra 4 1 03090 02 04 Anschlagschiene stop rail rail de butée cautela la guida 5 2 03090 02 05 Welle shaft Arbres Albero 6 4 03090 02 06 Stellring Adjusting ring Bague de positionnement Collare dell albero 7 4 03090 02 07 Wellenaufnahme Shaft support Logement d arbre Alloggiamento albero 8 4 DIN912 M8X16 8 8 Zylinderschraube socket cap screw vis cylindrique vite cilindr...

Page 62: ...3090 03 02 Riegel Latch Taquet Barra 3 1 03090 03 03 Deckplatte Cover plate Plaque de couverture Coperchio 4 2 03090 03 04 Klemmleiste Clamping bar Barre de bornes Morsettiera 5 2 03090 03 05 Klemmschraube Clamping screw Vis d arrêt Vite di arresto 6 4 DIN912 M8x60 8 8 Zylinderschraube socket cap screw vis cylindrique vite cilindrica 7 4 DIN7991 M5x12 8 8 Senkschraube Countersunk screw Vis à tête ...

Page 63: ... Bouton de com mande Pulsante di comando 6 4 03090 04 06 Druckfeder Top spring Ressort à pression Molla di compres sione 7 8 DIN934 M5 Sechskantmutter Hexagon nut Écrou à six pans dado esagonale 8 8 DIN125 A5 3 Unterlegscheibe Washer machine à laver rotella 9 4 DIN912 M5x40 8 8 Zylinderschraube socket cap screw vis cylindrique vite cilindrica 10 1 DIN912 M4x20 8 8 Zylinderschraube socket cap screw...

Page 64: ...t Goujons filetés Perni filettati 4 2 03090 05 04 Anschlagplatte Stop plate Plaque de butée Piastra di arresto 5 1 03090 05 05 Schutzplatte Protection plate Plaque de protection Piastra di protezione 6 1 03197 15 Rändelschraube M6 knurled screw M6 Vis moletée M6 Vite zigrinata M6 7 1 03090 05 06 Rändelmutter knurled nut Écrou moletée Dado di zigrinata 8 8 DIN7991 M6x10 Senkkopfschraube countersunk...

Page 65: ... Anschlagplatte Stop plate Plaque de butée Piastra di arresto 5 1 03090 06 05 Schutzplatte Protection plate Plaque de protection Piastra di protezione 6 1 03197 15 Rändelschraube M6 knurled screw M6 Vis moletée M6 Vite zigrinata M6 7 1 DIN912 M6x12 Zylinderschraube socket cap screw vis cylindrique vite cilindrica 8 1 DIN6912 M8x30 Zylinderschraube socket cap screw vis cylindrique vite cilindrica 9...

Page 66: ...66 AP 600 Zylinder AP 600 Cylinder AP 600 Cylindre AP 600 Cilindro ...

Page 67: ...rique vite cilindrica 16 2 DIN912 M6X20 8 8 Zylinderschraube socket cap screw vis cylindrique vite cilindrica 17 1 03090 07 16 Schutzrohr Protection tube Gaine de protection Tubo di protezione 18 1 03090 07 15 Zylinderdeckel Cylinder cover Culasse Coperchio cilindro 19 2 DIN912 M6x120 8 8 Zylinderscraube socket cap screw vis cylindrique vite cilindrica 20 1 03170 03195 20 Laseraufnahme Laser holde...

Page 68: ... bolt Axe de charnière Perni a snodo 5 1 03197 06 Distanzscheibe Spacer washer Disque d écartement Distanziale 6 1 03090 08 06 Rechteckrohr L 535 Rectangular tube L 535 Tuyau rectangulaire L 535 Tubo rettangolare L 535 7 1 03090 08 07 Stützbolzen Support bolt Colonnette de soutien Perni di supporto 8 1 03090 08 08 Arretierung Locking device Blocage Bloccaggio 9 2 03090 08 09 Anschlagpuffer Stop bu...

Page 69: ...rbeitslampe M12 Ventil 2 M12 Ventil 1 M12 Reihe vorn Reihe hinten Hauptschalter Verdrahtungskanal Verdrahtungskanal Terminal 7 Laser Terminal 8Working lamp Isolating transformer AC 400 V 230 V 63 VA Contactor motor protection Terminal 5a Pedal Power supply K1 DC 5V Laser 0 5 A DC 24V control 1 A AC 400 V Control 0 315 AT Power supply control and work lamp AC 230 V DC 5 V Power supply laser AC 230 ...

Page 70: ...hr 4 M12 Verschr 3 M12 Verschr 2 M16 Hydraulikpumpe Steuerventil Verschr 5 M 20 Pedal connection cable gn ge PE Pedal housing sw 24V from safety switch cover br 24V on pedal actuation to contactor Hydr gr 24V Lower MV bl 24V MV raise Terminal 3 storey Phoe UTI 2 5 PE L N Terminal 2 storey Phoe UTI 2 5 L L Fuse Phoe UK5 HESI AC 400 V 3phase Screw 1 M20 5x1 5 mm 2 Main switch 16 A Safety transformer...

Page 71: ...71 ...

Page 72: ...02 22 Alfra GmbH 2 Industriestraße 10 D 68766 Hockenheim www alfra de info alfra de Tel 49 0 6205 3051 0 Fax 49 0 6205 3051 150 Fax International 49 0 6205 3051 135 ...

Reviews: