background image

English

English

3     

4     

5     

6     

•  As shown in fig. 3, attach the pendulum (10) under the clock base and insert the clock stand (8) on both 

sides. Then, insert the whole assembly on the base plate (9).

•  Install two spring connecters (12) on the base plate (9) narrow end down, push the spring as far as it 

will go. Connect the red and black wires of the digital clock to the spring connectors at Position 1 and 2 
respectively. (Fig.4) Bend the spring over to create a gap into which the metal wire is inserted.

•  As shown in figure 5. fill both partitions of the liquid container (6) with juice or soft drinks or vinegar up 

to about 1 cm below the top. This liquid is the electrolyte of the battery.

•  Install the container cover (7) and insert the copper (4) and zinc (5) strips as shown in fig. 6. They are 

called the electrodes of the battery. Do not let the metal strips touch each other. Note that you need 
to have one copper and zinc strip in each partition to make it work. Also note that the copper strips are 
reddish brown in colour and the zinc strips are bluish grey.

7     

10     

8     

Assembling your bAttery-powered CloCk

9     

•  You’re done! Insert two AA sized batteries according to the polarity indicated. (fig.10)

•  Repeat fig. 2 and 3 in the last section to assemble the watch module. Remove the liquid battery of the 

last experiment from the base plate.

•  Install three spring connectors (12) on the base plate (9) and connect the red and black wires of the 

battery compartment to the spring connectors at position 1 and 2 respectively. (fig 8)

•  As shown in fig. 9 install the resistor (ll) in the base plate and connect the wires to the spring connectors 

as below: Watch module red wire – 3 Watch module black wire – 2 Resistor red wires – 1, 3

•  As shown in fig. 7 connect the red and black wire of the liquid battery in last step to the spring 

connectors at position 1 and 2 respectively. You’re done! The digital clock is now powered up.

  The digital clock needs electricity to work. Electricity is produced by the flow of microscopic particles 

called electrons, and the battery you just made provides this stream of electrons, or electric current. 
What happens are the chemical reactions at the zinc and copper strips with the acidic liquid cause 
electrons to flow when a wire is connected between them. Like any battery, this type of battery has a 
limited life. Hydrogen is produced at the copper electrode while the zinc electrode acquires deposits of 
oxides that act as a barrier between the metal and the electrolyte. To revitalize the liquid battery, clean  
the metal strips with sandpaper and refill the container with fresh liquid.

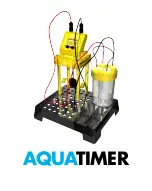
Summary of Contents for AQUATIMER

Page 1: ...solar radio and learn about solar energy Set the radio to listen to your favourite programme Contents and instructions in English Also runs on 2 AA 1 5 V batteries not included Bygg en solcellsdri ven...

Page 2: ...3 5 4 6 Fig 3 Fig 5 Fig 4 Fig 6 7 9 8 10 Fig 7 Fig 9 Fig 8 Fig 10...

Page 3: ...mportant Incaseofinjury getmedicalassistanceimmediately 1 In case of contact between chemicals and eye Flush the eye generously with water while holding the eye open if necessary Get immediately medic...

Page 4: ...me Protect the toy from water or dampness Used batteries and broken electrical and electronic products must be disposed of at an approved collection point Such products must not be thrown with househo...

Page 5: ...fig 10 Repeat fig 2 and 3 in the last section to assemble the watch module Remove the liquid battery of the last experiment from the base plate Install three spring connectors 12 on the base plate 9 a...

Page 6: ...yfte att avg ra om de r l mpliga f r ett visst barn 5 Diskutera varningarna och s kerhets informa tionen med barnet eller barnen innan de b rjar experimentera G igenom s ker hantering av syra alkalier...

Page 7: ...d Undvik att uts tta leksaken f r fukt eller v ta F rbrukade batterier och kasserade el och elektronikprodukter ska l mnas p godk nt insamlingsst lle Dessa produkter f r inte l ggas som hush llsavfall...

Page 8: ...spektive 2 enligt fig 7 Nu r det klart Nu r den digitala klockan laddad Nu r det klart S tt in tv AA batterier enligt den polaritet som anges fig 10 F lj anvisningarna till figur 2 och 3 f r att s tta...

Page 9: ...tbarn Instruksenefor hvertfors kskalgj revoksnemedhjelpereistand til vurdereomdeteregnetforderesbarn 5 Den voksne medhjelperen skal diskutere advarslene og sikkerhetsinformasjonen med barnet eller bar...

Page 10: ...te batterier og delagte elektriske eller elektroniske produkter m avhendes ved et godkjent oppsamlingssted Slikeprodukterm ikkekastesihusholdningsavfallet Hvis du en gang i fremtiden trenger kaste det...

Page 11: ...is posisjon 1 og 2 som vist p fig 7 N er du ferdig Den digitale klokken er klar N er du ferdig Sett inn to AA batterier med riktig polaritet fig 10 Gjenta fig 2 og 3 i den siste delen for montere klok...

Page 12: ...d henblikp omdetervelegnettiletbestemtbarn 5 Den voksne som holder opsyn skal diskutere advarslerne og sikkerhedsinformationen med barnet eller b rnene f r de g r i gang med eksperimenterne Det er is...

Page 13: ...mpe Brugte batterier og beskadigede elektriske og elektroniske produkter skal afleveres p en godkendt genbrugsplads S danne produkter m ikke smides ud sammen med almindeligt husholdningsaffald Hvis du...

Page 14: ...at samle urmodulet Fjern v skebatteriet fra det sidste eksperiment fra bundpladen Monter tre fjederforbindelsesklemmer 12 p bundpladen 9 og forbind den r de og sorte ledning fra batterirummet med fjed...

Page 15: ...alvojille mahdollisuus arvioida koetta ja p tt onko se sopiva kyseiselle lapselle 5 Valvovan aikuisen tulee keskustella varoituksista ja turvallisuustiedoista lapsen tai lasten kanssa ennen kokeiden a...

Page 16: ...s hk ja elektroniikkatuotteet on toimitettava hyv ksyttyyn ker yspisteeseen N it tuotteita ei saa h vitt talousj tteen mukana Jos haluat tulevaisuudessa h vitt t m n tuotteen ota huomioon ett s hk tuo...

Page 17: ...kalleen niin ett napaisuus on oikein kuva 10 1 Seuraa kuvan 2 ja 3 ohjeita kellomoduulin kokoamiseksi Poista aiemman kokeen nesteakku pohjalevylt 2 Asenna kolme jousiliitint 12 pohjalevyyn 9 ja liit p...

Page 18: ...a 2 AA paristoa paikalleen kuvan 10 mukaisesti niin ett napaisuus on oikein VAROITUS l aiheuta oikosulkua paristojen ja jousiliitinten v lille sill se voi aiheuttaa kuumentumista Johtoja ei saa ty nt...

Page 19: ...AQUATIMER...

Reviews: