
Aliaro reserve the right to vary from the description given in this data sheet and shall not be liable for any errors.
www.aliaro.com
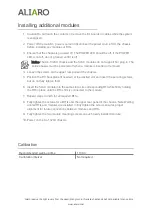
Installing additional modules
1.
Caution Do not touch the contacts or remove the I/O boards or cables while the system
is energized.
2.
Power off the main DC power source or disconnect the power source from the chassis
before installing any modules or RTIs.
3.
Ensure that the chassis is powered off. The POWER LED should be off. If the POWER
LED is not off, do not proceed until it is off.
Notice The AL-1020U chassis and the SLSC modules do not support hot plug-in. The
entire chassis must be powered off when a module is inserted or removed.
4.
Loosen the screws on the upper rear panel of the chassis.
5.
Position the RTI backplane (if needed) at the desired slot and insert the securing screws,
but do not fully tighten them.
6.
Insert the SLSC module into the same slot as its corresponding RTI while firmly holding
the RTI in place until the RTI is firmly connected to the module.
7.
Repeat steps 4 and 5 for all required RTIs.
8.
Fully tighten the screws for all RTIs and the upper rear panel of the chassis. Note Waiting
until all RTIs and modules are installed to fully tighten the screws ensures proper
alignment for future connections between modules and RTIs.
9.
Fully tighten the two module mounting screws on each newly installed module.
10.
Power on the AL-1020U chassis
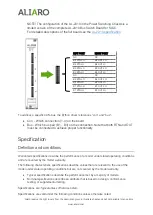
Calibration
Recommended warm-up time
10 min
Calibration interval
Not required