RFID
T
AG
R
EADER
C
HAPTER
3
ALH-901
X
U
SER
’
S
G
UIDE
DOC.
CONTROL
#8102117-000
REV
A
30
Tag Mask
– Presets
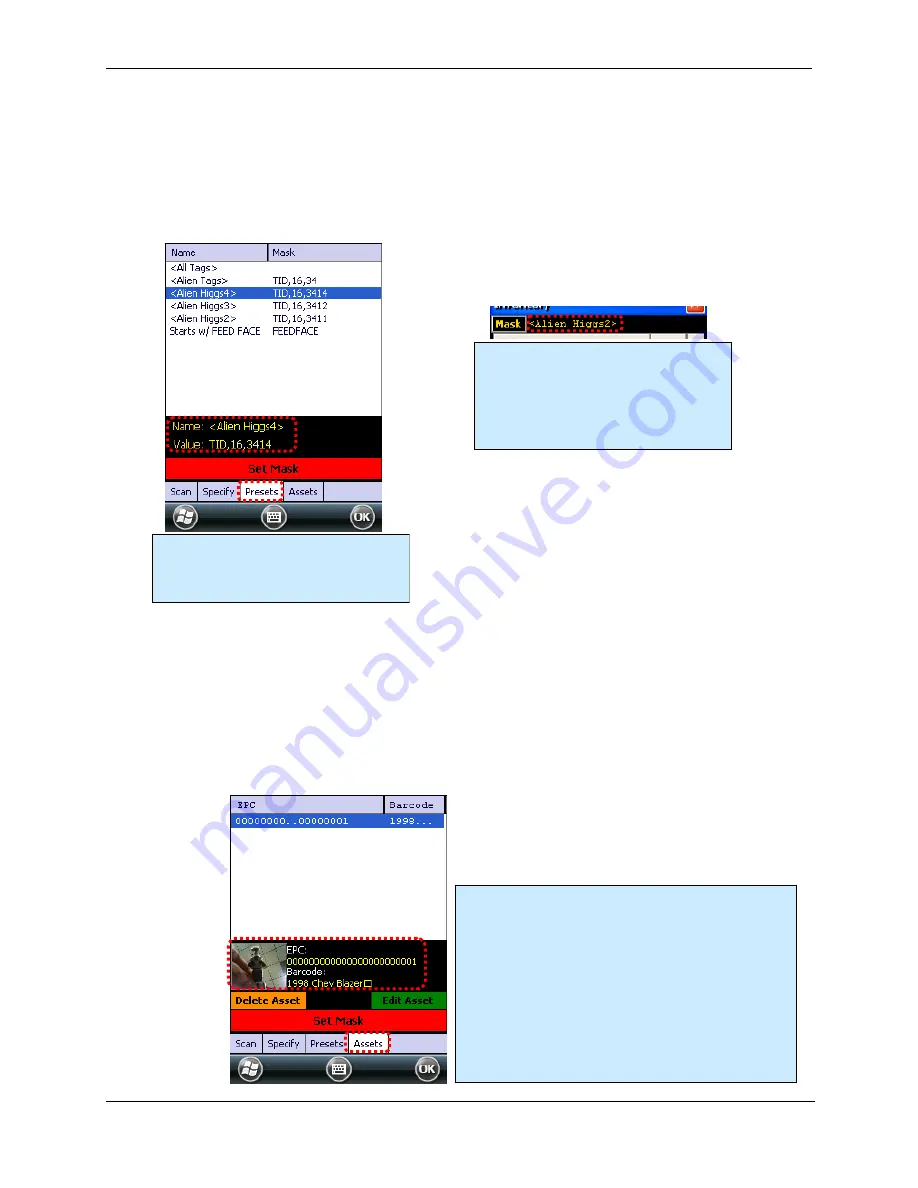
The third way to set a tag mask is with the Presets tab. This screen shows a list of pre-defined tag
masks, such as “all tags”, “all Higgs3 tags”, etc. These presets are hard-coded in the application
right now, but will be user-configurable in the future.
Tag Mask
– Assets
The Assets feature of the RFID demo application shows how you might associate an EPC code,
barcode, or photo snapshot (ALH-9011 only) to an actual physical asset. By linking those pieces of
information, you can cross-
reference a barcode scan with the EPC code on that product’s RFID
tag, and see a picture of the asset each time the tag is read. If you need to search for a particular
asset, you can select it from the
list of assets, set the Tag Mask to that asset’s EPC code, and then
use the Geiger utility to go look for that tag. When the tag is detected, the item’s photo is shown on
the screen for verification, and you can also see the associated barcode as well.
Pick one of the selections from the
Presets list, and you can see the
displayed name and mask definition.
Click the Set Mask button to use it.
Masks chosen from the Presets tab are
shown on the utility screens with the
display name in the mask preset
definition. Your mask presets might
display “Blue Jeans” or “Pallet Tags”
instead.
Assets can be created from the Tag Mask-Assets tab,
or directly from the Inventory page, using the “Asset”
button there. Select an asset from the list to see its
details, and then click the Set Mask button to configure
the reader to only read t
hat asset’s RFID tag.
Assets are not saved from session-to-session in this
version of the demo program.
When you select an asset from the list, the “Delete All”
button changes to “Delete Asset” and the “Add Asset”
button changes to “Edit Asset”.


