background image

TROUBLESHOOTING

Solution


This is caused by lower temperatures on the outside of the tent combined with body heat on the inside of the 
tent. When this occurs avoid touching walls to reduce contact leakage. Leaving the door and windows open will 
reduce condensation of moisture. 

To protect against seam leakage, apply a generous amount of seam sealer on interior of leaking seams. 

To avoid mildew, never put your tent away wet or damp. However, if mildew occurs, use a soft bristle brush or 
sponge with mild dish washing soap or Fels Naphtha soap to clean. Let the tent dry in the sunlight and apply 
seam sealer compound on inside seams. 

For small tears use a self-adhesive patch kit. We recommend a canvas or awning repair shop for larger tears. 

A ground cloth under the tent prevents the floor from feeling damp and helps prolong its life. The cloth should 
be smaller than the tent floor to prevent rain from running under the tent.

Stake should be pulled with another stake, hammer or stake puller, but never by pulling on the tent. Avoid 
staking tent so tight that it stretches the fabric. Over stretching may cause stake loops to tear.

Problem

1) Condensation

2) Seam leakage

3) Mildew

4) Repairing a tear

5) Floor condensation

6) Removing stakes

Summary of Contents for AB-2000

Page 1: ...THE BUFFALO TENT MINI Model AB 2000 OWNER S MANUAL ...

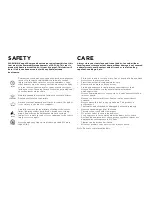
Page 2: ...ants Carefully consider the possiblibly of falling rocks or tree limbs lightning strikes flash floods avalanches strong winds and other potential hazards when choosing a campsite to reduce the risk of loss or damage to the tent or injury to its occupants Never hang heavy objects from the center hub No more than 20 lbs Store your tent in a cool dry place free of brush dirt any debris Never store te...

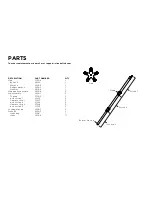
Page 3: ...eg assembly Top cap pole section 1 clamp section 1 pole section 2 clamp section 2 pole section 3 Locking wire pin Stake kit stake bag stake QTY 1 1 1 1 1 5 5 5 5 5 5 5 5 5 1 1 11 PART NUMBER C1006 H1010 H1005 H1003 H1004 H1006 A1001 C1005 C1013 C1017 C1014 C1018 C1015 H1007 A1003 C1021 H1009 Hub Section 1 Section 2 Section 3 Bottom Pin Hole Clamp ...

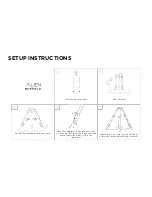
Page 4: ... legs fully away from the center Repeat step 4 on every leg one section at a time until all five legs are fully extended 1 4 3 5 A B Open the clamp lever A Extend out section 2 of each leg B The section is fully extended when you see the pin hole Close the clamp lever ...

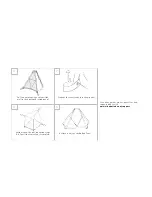
Page 5: ...legs out until the wall section between is tightened Work around the tent repeating steps 6 7 until the tent setup is complete It s time to enjoy your Buffalo Tent 7 6 9 8 For online guides videos questions and support please visit www alienbuffalo com support ...

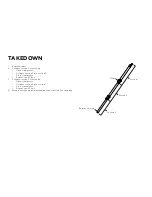
Page 6: ...into section 2 Close clamp lever Repeat on all 5 legs 3 Collapse section 2 of every leg Open clamp lever Collapse section 2 into section 1 Close clamp lever Repeat on all 5 legs 4 Wrap loose tent material around legs and stuff into the carry bag Section 1 Section 2 Section 3 Bottom Pin Hole Clamp ...

Page 7: ...oap or Fels Naphtha soap to clean Let the tent dry in the sunlight and apply seam sealer compound on inside seams For small tears use a self adhesive patch kit We recommend a canvas or awning repair shop for larger tears A ground cloth under the tent prevents the floor from feeling damp and helps prolong its life The cloth should be smaller than the tent floor to prevent rain from running under th...

Page 8: ...www alienbuffalo com support alienbuffalo com 1 530 322 0123 REV C ...

Reviews: