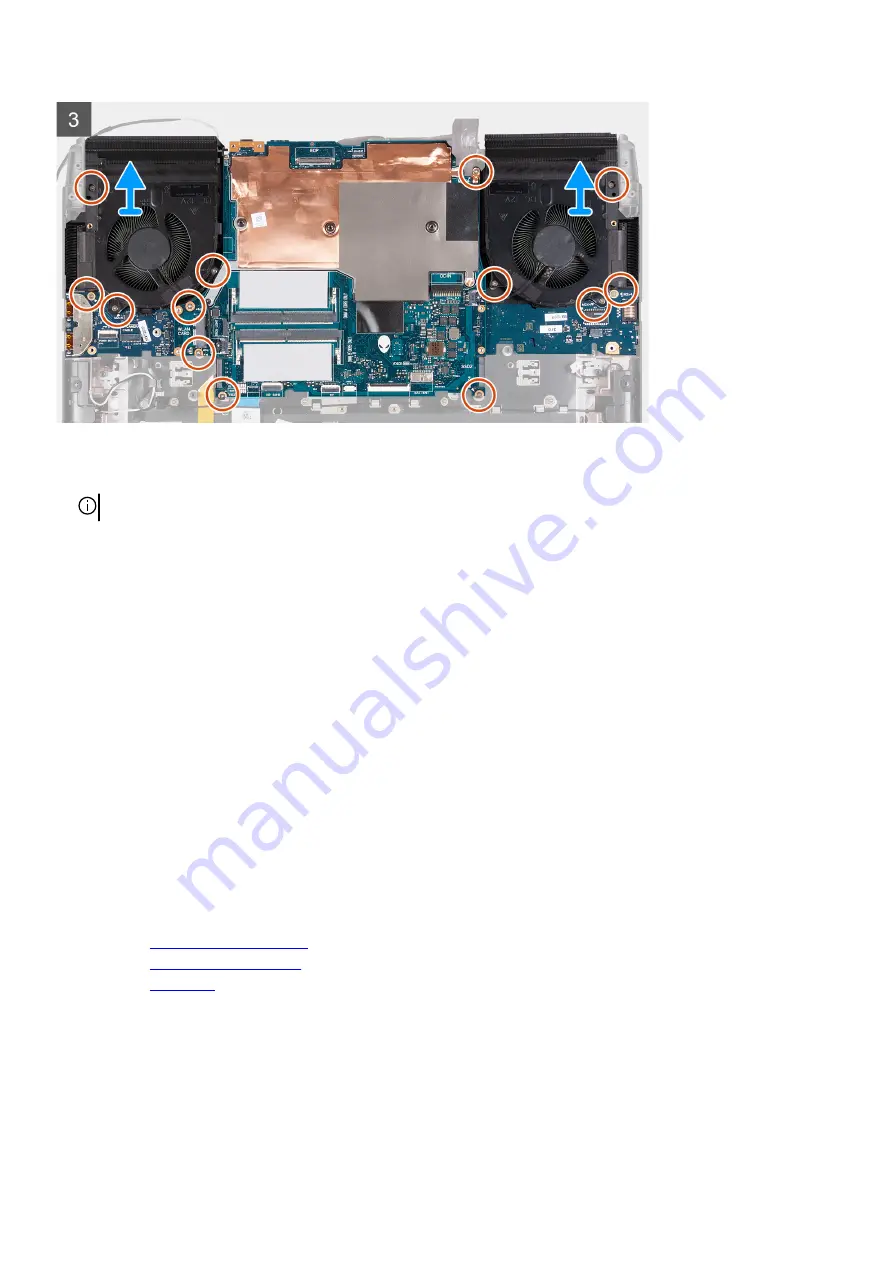
Steps
1. Peel the Mylar covering the system board.
NOTE: Re-adhere the Mylar after any installation/replacement procedures.
2. Remove the two screws (M2x4) that secure the Type-C bracket to the system board.
3. Lift the Type-C bracket off the system board.
4. Disconnect the camera cable from the system board.
5. Peel the tapes securing the camera cable to the system board.
6. Remove the camera cable through the routing on the fan and palm-rest and keyboard-assembly.
7. Peel the tape that secures the display-cable connector latch to the system board.
8. Open the latch and disconnect the display cable from the system board.
9. Disconnect the Alien head LED-cable from the system board.
10. Peel the display cable off the system board and remove the display cable from the slot on the palm-rest and keyboard assembly.
11. Disconnect the power-adapter port-cable from the system board.
12. Peel the power-adapter port-cable from the system board.
13. Disconnect the right-fan cable from the system board.
14. Disconnect the speaker cable from the system board.
15. Open the latch and disconnect the touchpad cable from the system board.
16. Open the latch and disconnect the keyboard-controller board cable from the system board.
17. Disconnect the left-fan cable from the system board.
18. Open the latch and disconnect the power-button cable from the system board.
19. Remove the thirteen screws (M2x4) that secure the system board to the palm-rest and keyboard assembly.
20.Hold firmly on the left and right fans and lift the system-board assembly off the palm-rest and keyboard assembly.
21. Remove the
22.Remove the
.
23.Remove the
24.Turn the system board over.
25.After performing all the above steps, you are left with the system board.
Installing the system board
Prerequisites
If you are replacing a component, remove the existing component before performing the installation process.
53


