Modules
7 - 22 RAID Setup
7
RAID Mode Setup
1.
Install two identical serial hard disk drives
2.
Prepare a formatted blank 3.5" 1.44MB floppy diskette, and an external USB
floppy disk drive.
3.
Create a
RAID Driver Diskette
by using an operable computer to copy the
drvdisk
folder from the
Device Drivers & Uti User’s Manual CD-
ROM
(Navigate/
Browse..
to
D:Drivers\Raid\drvdisk
) to the blank floppy
diskette.
4.
Startup your computer and press <
F2>
to enter the
BIOS
(see
“Advanced
Menu” on page 5 - 8
).
5.
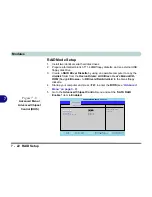
Go to the
Advanced Chipset Control
menu and set the “
SATA RAID
Enable:
"
item to
Enabled
.
PhoenixBIOS Setup Utility
Advanced
F1
Help
Select Item
-/+
Change Values
F9
Setup Defaults
Esc
Exit
Select Menu
Enter
Select
Sub-Menu
F10
Save and Exit
Item Specific Help
Advanced
Advanced Chipset Control
SATA RAID Enable
[
Enabled
]
CPU FAN Speed:
[Auto]
Card Reader:
[Enabled]
Display Time on LED
[Enabled]
Enable SATA RAID
function
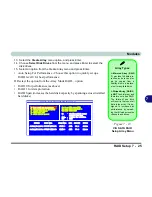
Figure 7 - 8
Advanced Menu >
Advanced Chipset
Control (BIOS)
Summary of Contents for MJ-12 m7700a
Page 1: ......
Page 2: ......
Page 20: ...XVIII Preface...
Page 76: ...Drivers Utilities 4 14 4...
Page 92: ...BIOS Utilities 5 16 5...
Page 106: ...Modules 7 6 Mini PCI Wireless LAN Module 7 Help Menu Figure 7 2 Ralink WLAN Utility...
Page 110: ...Modules 7 10 Bluetooth WLAN Combo Module 7 Figure 7 3 Switching WLAN Controls...
Page 118: ...Modules 7 18 PC Camera 7 Figure 7 6 Audio Setup...
Page 128: ...Modules 7 28 7...
Page 140: ...Troubleshooting 8 12 8...

