Modules
7 - 24 RAID Setup
7
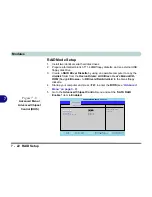
9.
The
SATA RAID BIOS Utility
will then appear.
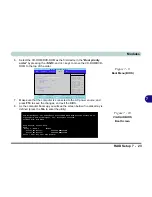
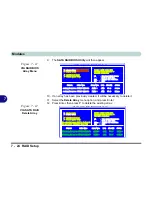
10. If an array has been previously created, it will be necessary to delete it.
11. Select the
Delete Array
menu option, and press Enter.
12. Press Enter, then press
Y
to delete the existing array.
VIA Tech. VT8237 Series SATA RAID BIOS Ver 4.93
Create Array
Delete Array
Create/Delete Spare
Serial Boot Array
Serial Number View
Create a RAID array with
the hard disks attached to
VIA RAID controller
F1
:
View Array/disk Status
,
:
Move to next item
Enter
:
Confirm the selection
Esc
:
Exit
Channel
Drive Name
Array Name
Mode
Size(GB)
Status
Serial_Ch0 Master FUJITSU MHT2060B
ARRAY 0
SATA
55.89
Source
Serial_Ch1 Master FUJITSU MHT2060B
ARRAY 0
SATA
55.89
Mirror
Figure 7 - 11
VIA RAID BIOS
Array Menu
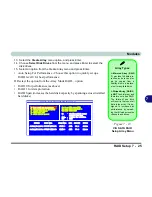
Figure 7 - 12
VIA SATA RAID
Delete Array
VIA Tech. VT8237 Series SATA RAID BIOS Ver 4.93
Create Array
Delete Array
Create/Delete Spare
Serial Boot Array
Serial Number View
Create a RAID array with
the hard disks attached to
VIA RAID controller
F1
:
View Array/disk Status
,
:
Move to next item
Enter
:
Confirm the selection
Esc
:
Exit
Channel
Drive Name
Array Name
Mode
Size(GB)
Status
[*]Serial_Ch0 Master FUJITSU MHT2060B
ARRAY 0
SATA
55.89
Stripe0
[*]Serial_Ch1 Master FUJITSU MHT2060B
ARRAY 0
SATA
55.89
Stripe1
The selected array will be destroyed.
Are you sure? Continue? Press Y/N
Summary of Contents for MJ-12 m7700a
Page 1: ......
Page 2: ......
Page 20: ...XVIII Preface...
Page 76: ...Drivers Utilities 4 14 4...
Page 92: ...BIOS Utilities 5 16 5...
Page 106: ...Modules 7 6 Mini PCI Wireless LAN Module 7 Help Menu Figure 7 2 Ralink WLAN Utility...
Page 110: ...Modules 7 10 Bluetooth WLAN Combo Module 7 Figure 7 3 Switching WLAN Controls...
Page 118: ...Modules 7 18 PC Camera 7 Figure 7 6 Audio Setup...
Page 128: ...Modules 7 28 7...
Page 140: ...Troubleshooting 8 12 8...

