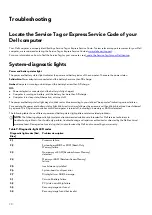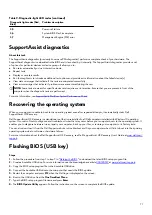
Table 9. Diagnostic-light LED codes
(continued)
Diagnostic light codes (Red,
Blue)
Problem description
3,5
Power-rail failure
3,6
System BIOS Flash incomplete
3,7
Management Engine (ME) error
SupportAssist diagnostics
About this task
The SupportAssist diagnostics (previously known as ePSA diagnostics) performs a complete check of your hardware. The
SupportAssist diagnostics is embedded in the BIOS and is launched by it internally. The SupportAssist diagnostics provides a set
of options for particular devices or device groups. It allows you to:
●
Run tests automatically or in an interactive mode.
●
Repeat tests
●
Display or save test results
●
Run thorough tests to introduce additional test options and provide extra information about the failed device(s)
●
View status messages that indicate if the tests are completed successfully
●
View error messages that indicate if problems were encountered during the test
NOTE: Some tests are meant for specific devices and require user interaction. Ensure that you are present in front of the
computer when the diagnostic tests are performed.
For more information, see
SupportAssist Pre-Boot System Performance Check
Recovering the operating system
When your computer is unable to boot to the operating system even after repeated attempts, it automatically starts Dell
SupportAssist OS Recovery.
Dell SupportAssist OS Recovery is a standalone tool that is preinstalled in all Dell computers installed with Windows 10 operating
system. It consists of tools to diagnose and troubleshoot issues that may occur before your computer boots to the operating system. It
enables you to diagnose hardware issues, repair your computer, back up your files, or restore your computer to its factory state.
You can also download it from the Dell Support website to troubleshoot and fix your computer when it fails to boot into their primary
operating system due to software or hardware failures.
For more information about the Dell SupportAssist OS Recovery, see Dell SupportAssist OS Recovery User's Guide at
Flashing BIOS (USB key)
Steps
1. Follow the procedure from step 1 to step 7 in "
" to download the latest BIOS setup program file.
2. Create a bootable USB drive. For more information see the knowledge base article
3. Copy the BIOS setup program file to the bootable USB drive.
4. Connect the bootable USB drive to the computer that needs the BIOS update.
5. Restart the computer and press F12 when the Dell logo is displayed on the screen.
6. Boot to the USB drive from the One Time Boot Menu.
7. Type the BIOS setup program filename and press Enter.
8. The BIOS Update Utility appears. Follow the instructions on the screen to complete the BIOS update.
71


