2. Once inserted the locking knob (which is normally used to secure the jump board) must be
tightened to lock the planking handles on to the reformer.
If you have any further questions or queries, please feel free to contact the team at Align-Pilates on
01386 425 923
or alternatively at
customercare@mad-hq.com
.
www.Align-Pilates.com
Instructions for Use
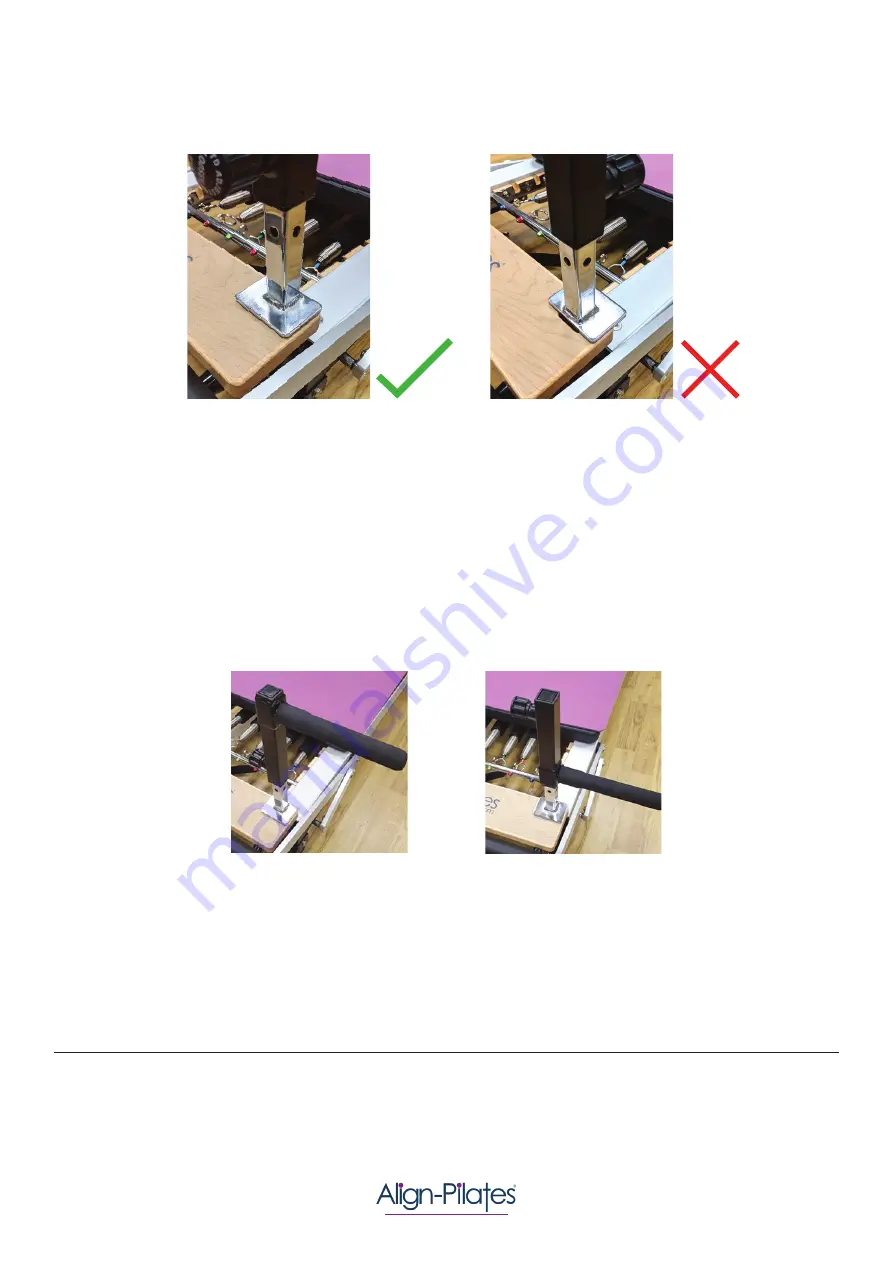
1. The chrome part of the planking handle must always be inserted in to the jump board receiver slot so
the chrome plate sits on the standing platform, and is fully supported. The chrome plate must not stick
out towards the carriage, as then the handles are not fully supported and this may damage your carriage
upholstery. See below images for correct position.
3. Now the planking handle chrome section is installed, you can adjust the height and direction the
handle faces. The handle can face inward, outward, forward or backward. To adjust the height, simply
loosen the adjustment knob and pull it outwards, you can now slide the handle up or down or remove it
completely. When you reach the desired height release the knob and ensure the locking pin engages in
to one of the holes on the chrome section, then tighten before use. To get the maximum range between
high and low positions the Planking Handle can be removed and flipped over.
Warning: the Planking handles must not be used in a higher position than that shown in the Maximum
High Position pictured below, i.e. the handle should never be higher than top of the chrome tube:
We hope you enjoy using your Align-Pilates Planking bars and the added exercise possibilities they bring!
Maximum High Position
Maximum Low Position


