15.USAGE INSTRUCTIONS AND CHECK LISTS
¶ ¾ ¨Æ » ¦ « À ¬
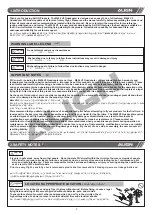
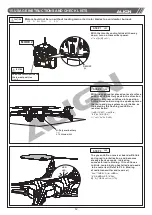
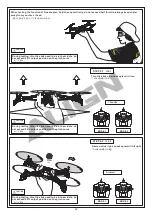
Motor should not be run without loading main or tail rotor blades to avoid motor burnout.
°¹ ¤¥¦ ¨¦ ±°¥±Á ©§±Á ª ª º ¤³ ¿ ³ ¹ ¹  ¡ ¥Á §°¹ ¿ ·¡
MODE 2
±ªª·±±¦³§«¡¥¶»±¾¹·¡
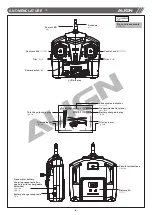
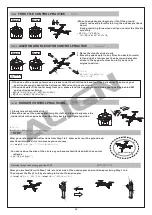
With the throttle control stick all the way
down, turn on transmitter power.
ON/OFF
¹·¶Ã
Push the throttle stick to
the lowest position
ªª·±±¦³§¡
¹À¤±¦ªªº¦
LED
·°Ã¡¬
4
¬«
LED
««
ª¥¹À¦¥¡
LED
¤«Ä°Ãª¥¹À¥±¡
¥¶ ·¹À¡
(
°¾
P.12
»±¾»±¦¾ª¹À
)
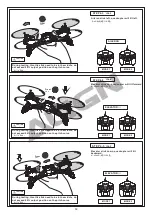
The green LED on receiver board will blink
during radio initialization, and becomes
steady after 4 seconds, indicating
successful radio binding. If it continues
to blink, radio binding has failed and needs
to be restarted.(Refer to P.12: Binding
of radio transmitter and receiver)
ª ·
CAUTION
LED
LED
¿
ª ·
CAUTION
¨Æ
1
STEP 1
¨Æ
2
STEP 2
¨Æ
3
STEP 3
½±
¸©¥©ª¦¸«¡±
Li-Po
¹¦
¨¹¥ª¤¦±¤¹¦®¦©¦¡¦®¤ ¦²°
¾¨¡¨»±¾¹À»ªÁ»Å¨¤¥Â¡
¥¶ ¦¾
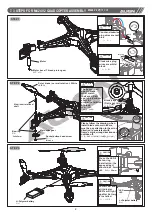
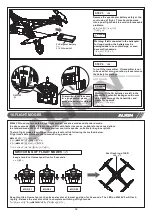
With the
placed on level surface,
push the Li-Po battery pack in the direction
shown in diagram until fixed into position.
At this time avoid moving the quadcopter so
the radio and gyro system can initialize, as
indicated by the flashing red LED on
receiver board.
quadcopter
13
Li-Polymer battery
¾»¹¦
3.7V 530mAh/20C


