Align Trex Se Setup Guide
■
Use the channel key to select each channel that needs adjusting.
■
Use the increase and decrease buttons to center the servo arms.
■
If subtim value required to center the servo is more than +/- 20 to 30 you should
locate a servo arm that will line up closer to center than the current arm being used.
■
To save the information press scroll and increase at the same time or turn off the transmitter
❍
After adjusting the subtrims and with both sticks at center, you can now hook up your linkage rods.
Linkage rods set to the length specified in the manual will be very close. Choose the same hole in
each servo arm that will result in the arm and control rod being perpendicular as shown on Figure A,
B and C above, represented by the red lines.
#3 Linkage adjustment , control alignment and pitch
●
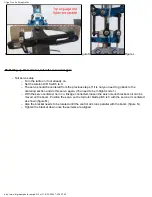
Now its time to adjust the linkage on the head assembly. In order to correctly set up your new Trex you will
need a pitch guage. This tool is used to measure the pitch angle of the main rotor blades in relation to the
flybar. The Align Pitch Guage (figure D) works very well and is specifically for smaller electric helis. If you do
not have a pitch guage you should not continue until you do or have some other manner of determining the
pitch.
Figure D
❍
Turn on the transmitter.
❍
Aileron D/R switch to one and all other switches at 0.
❍
Motor disconnnected for safety.
❍
Connect battery to ESC and wait for Gyro to initialize.
❍
All servo arms should still be centered.
❍
Extend your main blades and make sure the flybar and the blades are level.
❍
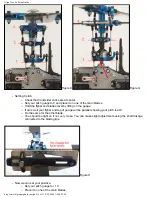
Examine the image below and compare to your head linkage.
❍
Starting with the linkage coming from the servos, make sure the bottom of the swashplate is level all
the way around.
❍
Move up to the head linkage and adjust as necessary to get the alignment shown below.
http://www.digimemphoto.com/pdf/ (5 of 13)1/25/2006 7:09:05 PM


