background image

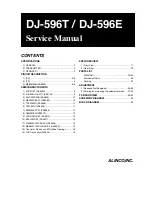
DJ-596T / DJ-596E

Service Manual

CONTENTS

SPECIFICATIONS

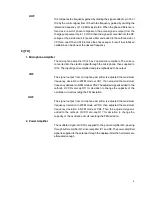
1) GENERAL ................................................................ 2
2) TRANSMITTER ........................................................ 2
3) RECEIVER ............................................................... 2

CIRCUIT DESCRIPTION

1) [RX] ...................................................................... 3~5
2) [TX] ........................................................................... 5
3) M38267M8L(XA0844) ........................................... 6~8

SEMICONDUCTOR DATA

1)

µ

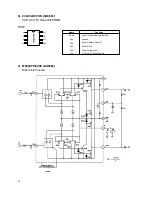
PC2710T (XA0449) ................................................ 9

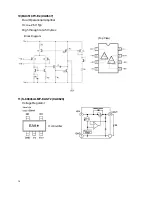
2) S-81350HG-KD-T1 (XA0724) ................................... 9

3) 24LC32AT-I/SN (XA0604) ....................................... 10
4) M5222FP-600C (XA0385) ...................................... 10
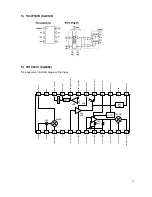
5) TC4W53FU (XA0348) ............................................. 11
6) TK10931V (XA0666) ............................................... 11

7) NJM2902V-TE1 (XA0596) ...................................... 12

8) NJM2070M (XA0210) ............................................. 12

9)

µ

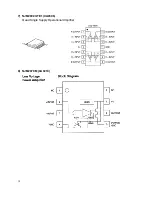
PD3140GS-E1 (XA0312) ...................................... 13

10) BA4510FV-E2 (XA0537) ......................................... 14

  11) S-80845ALMP-EA9-T2 (XA0620) ........................... 14

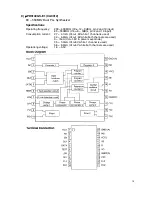
12) MB88347LPFV-G-BND-EF (XA0599) ..................... 15

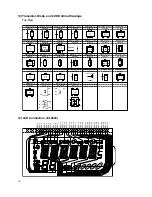
13) Transistor, Diode and LED Outline Drawings ........... 16
14) LCD Connection(EL0044) ....................................... 16

EXPLODED VIEW

1) Front View ............................................................... 17
2) Rear View ............................................................... 18

PARTS LIST

MAIN Unit ......................................................... 19~24

Mechanical Parts .................................................... 24
Packing ................................................................... 24

ADJUSTMENT

1) Required Test Equipment .................................. 25~26
2) Entering and releasing the adjustment mode .... 27~32

PC BOARD VIEW

.................................................. 33~34

SCHEMATIC DIAGRAM

............................................. 35

BLOCK DIAGRAM

...................................................... 36

ALINCO,INC.

Summary of Contents for DJ-596E

Page 1: ...666 11 7 NJM2902V TE1 XA0596 12 8 NJM2070M XA0210 12 9 µPD3140GS E1 XA0312 13 10 BA4510FV E2 XA0537 14 11 S 80845ALMP EA9 T2 XA0620 14 12 MB88347LPFV G BND EF XA0599 15 13 Transistor Diode and LED Outline Drawings 16 14 LCD Connection EL0044 16 EXPLODEDVIEW 1 Front View 17 2 Rear View 18 PARTS LIST MAIN Unit 19 24 Mechanical Parts 24 Packing 24 ADJUSTMENT 1 Required Test Equipment 25 26 2 Entering...

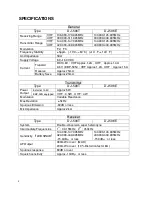
Page 2: ...Receive Approx 75mA Current Battery Save Approx 25mA Transmitter Type DJ 596T DJ 596E External 13 8V Approx 5W Power Output EBP 50N equipped VHF 4 5W UHF 4W Modulation Variable Reactance Max Deviation 5kHz Spurious Emission 60dB or less Mic Impedance Approx 2k Receiver Type DJ 596T DJ 596E System Double conversion super heterodyne Intermediate Frequencies 1st 39 15MHz 2nd 450kHz Sensitivity 12dB S...

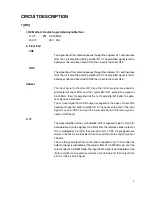
Page 3: ...lifier Q18 after the adja cent signal is eliminated The 1st local signal from VCO output is supplied to the base of mixer Q16 passing through the buffer amplifier Q15 The upper side band of the local signal is used in VHF band and the lower side band of the local signal is used in UHF band 4 IF The signal amplified at the 1st IF amplifier Q18 is supplied to pin 24 of IC5 for demodulation Also the ...

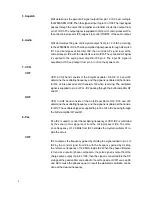
Page 4: ...assed at shift transistor Q8 when receiving The oscillated signal is supplied to pin 2 of PLL IC2 passing through the buffer amplifier Q7 and Q1 UHF VCO in UHF band consists of the Colpitts oscillator D16 D18 and L22 determine the oscillating frequency and the signal is oscillated at the transis tor Q12 The oscillated signal is supplied to pin 19 of PLL IC2 passing through the buffer amplifier Q7 ...

Page 5: ...gnal is amplified and pre emphasized to be output VHF The signal output from microphone amplifier is adjusted the maximum frequency deviation in WFM mode at VR1 then adjusted the maximum frequency deviation in NFM mode at VR2 The adjusted signal is added to the cathode of VCO vari cap D11 for deviation to change the capacity of the oscillation circuit resulting the FM deviation UHF The signal outp...

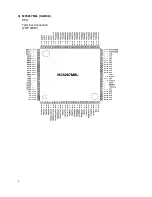
Page 6: ...6 3 M38267M8L XA0844 CPU Terminal Connection TOP VIEW ...

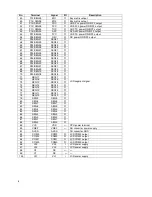
Page 7: ...n output 20 P44 RXD CRX I UART data reception input 21 P43 TOUT BEEP BP2 I O Beep tone output Band plan 2 22 P42 INT2 RE2 I Rotary encoder input 23 P41 INT1 STL I Steal input 24 P40 SD O Signal detection output 25 P77 PT5 I PTT input 26 P76 DSQ I Digital squelch input 27 P75 SSTB O Strobe signal to scramble IC 28 P74 AFS O AF switch output 29 P73 C S O Digital scramble ON OFF 30 P72 DUD I Digital ...

Page 8: ...23 SEG23 O 66 P34 SEG22 SEG22 O 67 P33 SEG21 SEG21 O 68 P32 SEG20 SEG20 O 69 P31 SEG19 SEG19 O 70 P30 SEG18 SEG18 O 71 SEG17 SEG17 O 72 SEG16 SEG16 O 73 SEG15 SEG15 O 74 SEG14 SEG14 O 75 SEG13 SEG13 O 76 SEG12 SEG12 O 77 SEG11 SEG11 O 78 SEG10 SEG10 O 79 SEG9 SEG9 O 80 SEG8 SEG8 O 81 SEG7 SEG7 O 82 SEG6 SEG6 O 83 SEG5 SEG5 O 84 SEG4 SEG4 O 85 SEG3 SEG3 O 86 SEG2 SEG2 O 87 SEG1 SEG1 O 88 SEG0 SEG0 ...

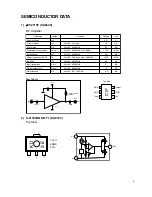
Page 9: ...o signa 22 mA Power gain GP Vcc 5V f 500MHz 33 dB Staturated output power Po sat Vcc 5V f 500MHz Pin 8dBm 13 5 dBm Noise figure NF Vcc 5V f 500MHz 3 5 dB Upper frequency 3dB fu Vcc 5V Reference freq 100MHz 1000 MHz Isolation ISL Vcc 5V f 500MHz 39 dB Input return loss RL in Vcc 5V f 500MHz 6 dB Output return loss RL out Vcc 5V f 500MHz 12 dB Gain flatness Gp Vcc 5V f 0 1 0 6GHz 0 8 dB 2 S 81350HG ...

Page 10: ...erial EEPROM A0 A1 A2 Vss SDA SCL WP Vcc Name Function Vss Ground A0 A2 User Configurable Chip Selects SDA Serial Address Data I O SCL Serial Clock WP Write Protect Input Vcc 2 5V 6 0V Power Supply PDIP 4 M5222FP 600C XA0385 Electronic Volume ...

Page 11: ...ef Vcc AM AMP FM AMP FM DET MIXER OSC RF INPUT GND COMP OUTPUT COMP INPUT NOISE AMP OUTPUT NOISE AMP INPUT AM AGC INPUT AGC AMP OUTPUT RF AGC OUTPUT RSSI OUTPUT AM SW AM DET OUT OSC B OSC E MIX OUTPUT Vcc AM IF INPUT DECOUPLING FM IF INPUT DECOUPLING DECOUPLING LIM OUTPUT QUAD INPUT FM DET OUTPUT Pin Assignment BLOCK Diagram Top View ...

Page 12: ...12 7 NJM2902V TE1 XA0596 Quad Single Supply Operational Amplifier 8 NJM2070M XA0210 ...

Page 13: ...m pin 2 and 19 input 80 550MHz Vin 8 0dBm pin 2 and 19 input Consumption current 2 7 4 1mA Vcc 1 8V while 1 channel is used 4 3 6 6mA Vcc 1 8V while both channels are used 0 10uA Vcc 1 8V in power save mode 3 5 5 3mA Vcc 5V while 1 channel is used 5 6 8 6mA Vcc 5V while both channels are used Operationg voltage 1 8 5 5V ...

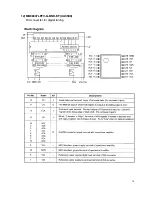
Page 14: ...14 10 BA4510FV E2 XA0537 Dual Operational Amplifier Vcc 2 5V Typ High through rate 5V µSec Block Diagram Top View 11 S 80845ALMP EA9 T2 XA0620 Voltage Regulator ...

Page 15: ...15 12 MB88347LPFV G BND EF XA0599 D A converter for digital tuning ...

Page 16: ...1116 TX XU0188 DAN235E TL XD0320 M MA132WA TX XD0321 MA2S077 TX XD0319 MA2S111 TX XD0323 MA2S30400L XD0312 K MA2S728 TX XD0315 B RN731V TE 17 XD0257 U2FWJ44N TE12R XD0294 BRPG1201W TR XL0028 SML 310MTT86 XL0036 2SK3074 XE0044 1SV214 TPH4 XD0131 1SV311 TPL3 XD0344 1SV279 TPH3 XD0364 UN9211 TX XU0063 XP1501 TX XU0172 RN1107 TE85L XU0193 14 LCD Connection EL0044 SEG0 SEG1 SEG2 SEG3 SEG4 SEG5 SEG6 SEG...

Page 17: ...17 EXPLODED VIEW 1 Front View ...

Page 18: ...18 2 Rear View ...

Page 19: ...6CH470J50PT C50 CU3502 Chip C GRM36CK010C50PT Ref No Parts No Description Part Name Ver C52 CU3531 Chip C GRM36B471K50PT C53 CU3547 Chip C GRM36B103K16PT C54 CU3535 Chip C GRM36B102K50PT C55 CS0398 Chip Tantalum TMCP0J225MTR C56 CU3531 Chip C GRM36B471K50PT C57 CU3531 Chip C GRM36B471K50PT C59 CS0403 Chip Tantalum TMCP1D224MTR C60 CU3516 Chip C GRM36CH270J50PT C61 CU3526 Chip C GRM36CH181J25PT C62...

Page 20: ...hip C GRM36B102K50PT C171 CS0398 Chip Tantalum TMCP0J225MTR C172 CU3535 Chip C GRM36B102K50PT Ref No Parts No Description Part Name Ver C173 CU3111 Chip C C1608JB1C104KT N C174 CU3541 Chip C GRM36B332K50PT C175 CU3551 Chip C GRM36B223K16PT C176 CU3551 Chip C GRM36B223K16PT C177 CS0367 Chip Tantalum TMCMA0J106MTR C178 CU3547 Chip C GRM36B103K16PT C179 CS0408 Chip Tantalum 6MCM156MATER C180 CU0108 C...

Page 21: ...LPFV G BND EF IC5 XA0666 IC TK10931VTL Ref No Parts No Description Part Name Ver IC6 XA0844 IC M38267M8L275GP IC7 XA0604 IC 24LC32AT I SN IC8 XA0596 IC NJM2902V TE1 IC9 XA0210 IC NJM2070M T1 IC10 XA0385 IC M5222FP 600C IC11 XA0620 IC S 80845ALMP EA9 T2 IC13 XA0348 IC TC4W53FU TE12 IC14 XA0537 IC BA4510FV E2 IC15 XA0348 IC TC4W53FU TE12 JK1 UJ0046 Jack MJ82 1 JK2 UJ0019 Jack HSJ1493 01 010 JK3 UJ00...

Page 22: ...Chip R ERJ2GEJ103X R13 RK3522 Chip R ERJ2GEJ470X R14 RK3516 Chip R ERJ2GEJ150X R15 RK3546 Chip R ERJ2GEJ472X R16 RK3550 Chip R ERJ2GEJ103X R17 RK3546 Chip R ERJ2GEJ472X R18 RK3546 Chip R ERJ2GEJ472X R19 RK3550 Chip R ERJ2GEJ103X R20 RK3518 Chip R ERJ2GEJ220X Ref No Parts No Description Part Name Ver R22 RK3561 Chip R ERJ2GEJ823X R23 RK3544 Chip R ERJ2GEJ332X R24 RK3548 Chip R ERJ2GEJ682X R25 RK354...

Page 23: ... R ERJ2GEJ103X R207 RK3562 Chip R ERJ2GEJ104X R208 RK3550 Chip R ERJ2GEJ103X Ref No Parts No Description Part Name Ver R84 RK3539 Chip R ERJ2GEJ122X R85 RK3539 Chip R ERJ2GEJ122X R86 RK3562 Chip R ERJ2GEJ104X R87 RK3526 Chip R ERJ2GEJ101X R88 RK3544 Chip R ERJ2GEJ332X R89 RK3028 Chip R MCR03EZHJ151 R90 RK3542 Chip R ERJ2GEJ222X R91 RK3562 Chip R ERJ2GEJ104X R92 RK3558 Chip R ERJ2GEJ473X R93 RK3501...

Page 24: ...U0030 Switch EVQPJ005Q TC1 CT0045 Trimmer SMD3 010C1 VR1 RH0144 Trimmer Pot MVR22HXBRN223 VR2 RH0144 Trimmer Pot MVR22HXBRN223 VR3 RH0144 Trimmer Pot MVR22HXBRN223 VR4 RH0144 Trimmer Pot MVR22HXBRN223 W3 MACLH2GG Wire 30AH1 025 H1 W4 MRCKH5AA Wire 28R02 55 02 X1 XQ0139 Crystal UM5 12 9MHZ X2 XK0003 Discriminator CDBM450C7 X3 XQ0131 Crystal CSA310 3 686400MHZ XF1 XF0039 Crystal Filter DSF753SB D391...

Page 25: ...nce 8Ω Dissipation 1W or more Jack 3 5mm 5 SSG Output frequency 500MHz or more Output level 20dBµ 0 1µV to 120dBµ 1V Modulation FM 6 Spectrum Analyzer Measuring range Up to 2GHz or more 7 Power meter Measurable frequency Up to 500MHz Impedance 50Ω unbalanced Measuring range 0 1W to 10W 8 Audio Voltmeter Measurable frequency Up to 100kHz Sensitivity 1mV to 10V 9 Audio Generator Output frequency 67H...

Page 26: ...acteristics Flat CN 60 dB or more Note Standard modulation 1kHz 3 5kHz DEV Reference sensitivity 12dB SINAD Specified audio output level 200mW at 8Ω Standard audio output level 50mW at 8Ω Use an RF cable 3D2W 1m for test equipment Attach a fuse to the RF indicated by EMF All SSG outputs are indicated by EMF Supply voltage for the transceiver 13 8VDC ...

Page 27: ...e below To enter the adjustment mode set key lock and input 490217 Decimal point at 100MHz and 10MHz appears in LCD To release the mode same manner to enter the adjustment mode Channel frequency used in the adjustment mode Frequency MHz Memory Channel Channel Function T E 1 Reference frequency 445 435 2 UHF high power 445 435 3 UHF low power 445 435 4 VHF high power 145 145 5 VHF low power 145 145...

Page 28: ...ion 3 While watching the reading of the TX power meter set the output power to the value closest to 0 8W by rotating the main tuning dial 4 When the key is released the output power at that time will be stored as the low power setting VHF high power adjustment 1 In the adjustment mode select channel 4 by rotating the main tuning dial 2 Hold down the key to start transmission 3 While watching the r...

Page 29: ...ment See Note on adjusting the sensitivity later in this section 1 In the adjustment mode select channel 9 by rotating the main tuning dial 2 Set the minimum frequency sensitivity rotating the main tuning dial while F appears after the key is pressed UHF medium frequency sensitivity adjustment See Note on adjusting the sensitivity later in this section 1 In the adjustment mode select channel 10 by...

Page 30: ...tment 1 In the adjustment mode select channel 16 by rotating the main tuning dial 2 Input a 50mVrms 1kHz signal with your transceiver tester through the external microphone jack 3 With the tester put the transceiver in the transmission mode 4 Rotate the VR1 on the printed circuit board of the transceiver until the deviation is set to 4 5kHz VHF narrow deviation adjustment 1 In the adjustment mode ...

Page 31: ...e not adjusting it 1 In the adjustment mode select channel 20 by rotating the main tuning dial 2 Press the key DTMF code 1 is automatically sent and you will hear the monitoring tone from the speaker 3 Check the deviation with the transceiver tester and make sure the deviation level is within 2 1 to 3 7kHz range DTMF D test 1 In the adjustment mode select channel 21 by rotating the main tuning dia...

Page 32: ...g dial 2 Press the key A 255 DCS code is automatically sent 3 Check the deviation with the transceiver tester and make sure the deviation level is within 0 5 to 1 5kHz range Tone Burst test This function is only for checking the tone burst not adjusting it 1 In the adjustment mode select channel 26 by rotating the main tuning dial 2 Press the key A 1750Hz tone burst is automatically sent 3 Check t...

Page 33: ...33 PC BOARD VIEW MAIN SIDE A ...

Page 34: ...34 MAIN SIDE B ...

Page 35: ...35 SCHEMATIC DIAGRAM DJ 596 RX VHF RX UHF ...

Page 36: ...36 BLOCK DIAGRAM DJ 596 ...

Page 37: ...anual ALINCO INC Head Office Shin Dai Building 9th Floor 2 6 1 Chome Dojimahama Kita ku Osaka 530 0004 Japan Phone 81 6 4797 2136 Fax 81 6 4797 2157 E mail export alinco co jp Copyright 2001 Alinco lnc Osaka Japan Printed in Japan PM0071 ...

Reviews: