W 3 1 S E R I E S
H I G H P R E S S U R E B R E A T H I N G A I R C O M P R E S S O R
©ALKIN Kompresör Sanayi ve Ticaret Limited Şirketi
38
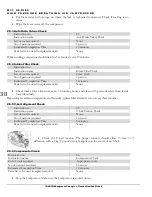
Put foam water with sponge on where the leak is, tightened connectors. Check if leaking is no
more.
Wipe the foam water off the compressor.
2.5.3 Auto Drain Valves Check
Instruction no
03
Instruction name
Auto Drain Valves Check
List of tools required
None
No of persons required
1 person
Estimated Completion Time
10 minutes
Parts list to be used in replacement kit
None
While working, compressor should drain for 5 seconds at every 10 minutes.
2.5.4 Intake Filter Check
Instruction no
04
Instruction name
Intake Filter Check
List of tools required
Clean cloth
No of persons required
1 person
Estimated Completion Time
5 minutes
Parts list to be used in replacement kit
None
Check intake filter element at every 50 running hours and clean with pressurized air from inside
towards outside.
Depending on ambient temperature and humidity, replace filter element at most every three months.
2.5.5 V-belt Alignment Check
Instruction no
05
Instruction name
V-belt Tension Check
List of tools required
None
No of persons required
1 person
Estimated Completion Time
5 minutes
Parts list to be used in replacement kit
None
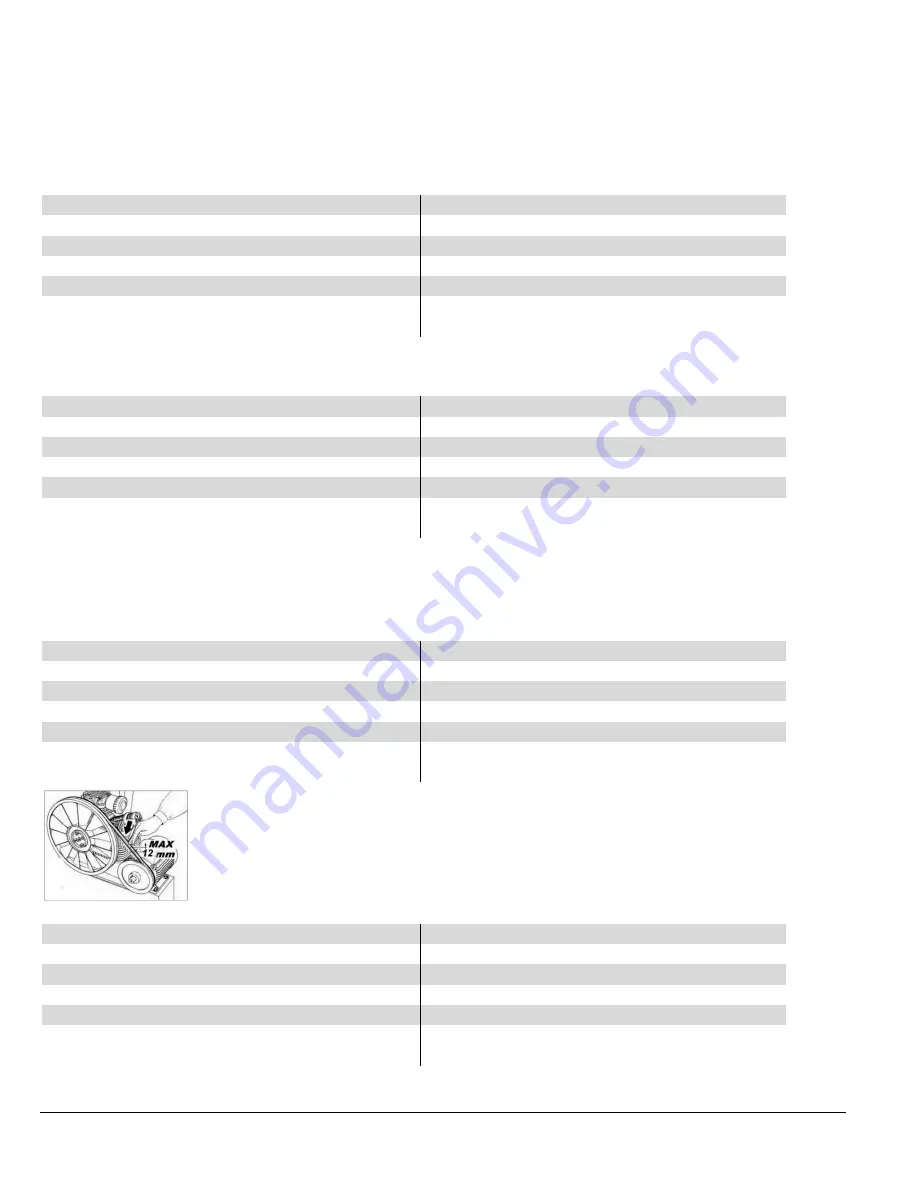
Check the V-belt tension. The proper tension should allow 13 mm (½”)
deflection with a 1 kg (2 pounds) weight applied on the center of each belt.
2.5.6 Components Check
Instruction no
06
Instruction name
Components Check
List of tools required
Appropriate tools
No of persons required
1 person
Estimated Completion Time
10 minutes
Parts list to be used in replacement kit
None
Stop the compressor. Make sure the compressor is cooled down.

