*941035-00*
941035-00
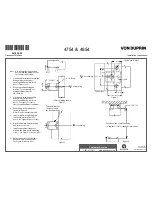
Note:
Use lock washers on top and
bottom mullion fittings except
for counter sunk screws.
1.
Line up and install bottom mullion
fitting with center of door
opening and flush with closed
doors (Figure 1 or 2).
2.
Wire top mullion fitting and
mullion. Test assembly. See
wiring diagram opposite
side of sheet.
3.
Line up and install top mullion
fitting with center of door
opening and flush with closed
doors. See Figure 5 (reverse
side) for optional frame conditions.
4.
Cut mullion body to length as
shown in Figure 6.
Note:
Do not cut mullion cable.
5.
Insert mullion in top fitting and
slide bottom of mullion into
place. See Figure 6 (reverse side).
6.
Nest mullion into bottom fitting
and secure set screw.
7.
Install top mullion clamp over
mullion and fitting with mounting
screws. See Figure 6 (reverse side).
8.
Adjust strikes for 1/32 clearance
between latch bolt and strike.
See Figure 6 (reverse side).
3 15/32”
3/16” R. typ.
F-Flat sill fitting shown
Figure 1
Top anchor
1/4-20 X 5/8” B.H.M.S.
2
Threshold must be
cut to fit around
the flat sill fitting
Figure 2
2 3/8”
2 7/8”
1 3/16”
1/16” ref.
Door opening
Door opening
1 7/16”
1 11/16”
9/16”
Cut off top end of mullion body
so length is 1/16” less than this dimension.
CL
CL
Figure 4
2”
Figure 3
Door opening
CL
Disconnect Mullions
4754 & 4854
Installation Instructions
© Allegion 2014
Printed in U.S.A.
941035-00 Rev. 01/14-b
Customer Service
1-877-671-7011
www.allegion.com/us


