27
PRATIK - Installation use and maintenance ENG- EDITION: 2018-07-05
5.5
ELECTRICAL CONNECTIONS
CAUTION: • The electric voltage for connection to the framework of the lift must
correspond to the voltage indicated on the electrical panel.
• The control cabinet must be connected to a main switch constructed and installed in
accordance with prevailing regulations in the country of use.
• The system that supplies electricity to the electrical panel of the lift must be done according to the
regulations of the country of use. • The minimum required power is 3 kW.
• The minimum section of the power circuit electric cables must be 4 mm2. • In this phase, the
electric engine can be turned on only for a few seconds, to avoid damage to the hydraulic pump.
PROCEDURE:
• Connect the power supply cable to the power supply network.
CAUTION: - Once completed the installation, connect the ground wire workshop the lift structure
to eliminate the possibility of accumulation of electrostatic discharge
WARNING: Before you proceed with the next steps, read the instructions in section 4.0 and 4.1
about the control panel functions and get comfortable at performing the various operations with
the lifter discharged.
5.6
HYDRAULIC SYSTEM FILLING
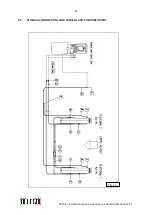
• Pour 6 litres of oil inside tank (T Fig. 10)
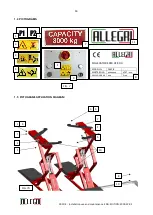
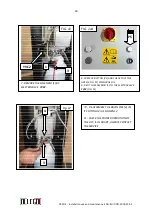
• Power the line by turning the Switch/Disconnector (10, Fig.1A) to ON (1): the voltage warning light (13,
Fig.1A) will turn on
• Push the lifting button "UP" (10, Fig. 1A) and check that the motor turns in the correct direction. Should this
not be the case, CUT OFF POWER FROM THE ELECTRIC NETWORK, and reverse two phases on socket
coming out of control unit (During this phase, electric motor can be operated just for a few seconds, in order
to
avoid any damage to the hydraulic pump).
DANGER:
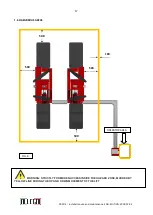
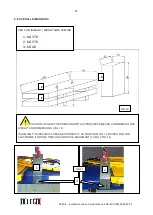
Make sure that there are neither persons nor animals close to lift hazardous areas (Fig. 7) Always
carry out this check before attempting to raise or lower the lift.
• Proceed to lifting the platforms, press UP button (10 fig. 1A), bring them to the maximum height. Check
that the oil level inside the tank is higher than the filter. Otherwise, add more oil.
.
CAUTION: Constantly check that there are no oil leaks, if there are, disconnect the power supply
and tighten loose connections.
• Cover and fix the pipes between the two platforms with ducts (17 Fig. 1B) being careful not to
crush tubes and cables.
Summary of Contents for PRATIK 30
Page 2: ...2 PRATIK Installation use and maintenance ENG EDITION 2018 07 05...
Page 3: ...3 PRATIK Installation use and maintenance ENG EDITION 2018 07 05...
Page 4: ...4 PRATIK Installation use and maintenance ENG EDITION 2018 07 05...
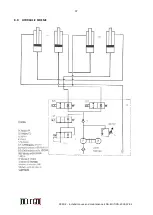
Page 37: ...37 PRATIK Installation use and maintenance ENG EDITION 2018 07 05 8 0 HYDRAULIC SCHEME...
Page 38: ...38 PRATIK Installation use and maintenance ENG EDITION 2018 07 05...
Page 42: ...42 PRATIK Installation use and maintenance ENG EDITION 2018 07 05...
Page 44: ...44 PRATIK Installation use and maintenance ENG EDITION 2018 07 05...
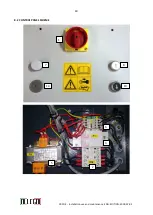
Page 53: ...53 PRATIK Installation use and maintenance ENG EDITION 2018 07 05 TAV 3 CONTROL UNIT...

