18
Rockwell Automation Publication 6300B-UM002A-EN-P - October 2020
Chapter 2 Install the Wall Mount Box PC
Operate the wall mount box PC in an industrial or control room environment,
which uses some form of power isolation from the public, low-voltage mains.
Connect DC Power (for Cat. Nos. 6300B-PBCx Wall Mount PCs)
All VersaView DC powered models require a safety extra low voltage (SELV)
(1)
power supply per UL. The power supply is internally protected against reverse
polarity.
To minimize ground loop currents and noise, Allen-Bradley® recommends that
DC powered models use only one grounded connection. For the ground
connection on these model, see
.
Follow these steps to connect the computer to a DC power source.
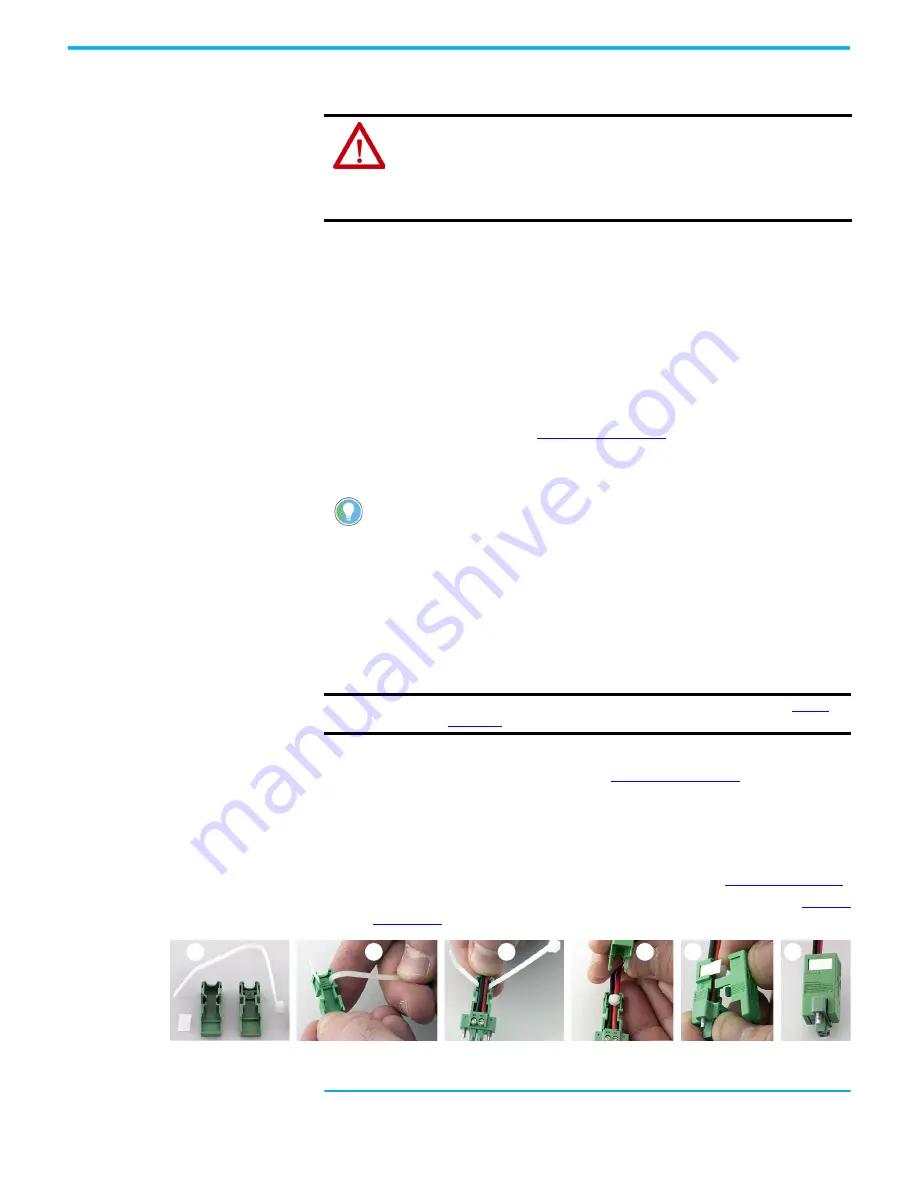
Install the Factory-supplied DC Power Connector Assembly
This connector assembly provides strain relief for the DC power wires by
reducing their movement. To assemble and attach the connector assembly,
perform the following steps.
1.
Remove the DC terminal block from the computer chassis.
For the terminal block location, see
.
2. Open the power connector assembly kit that ships with the computer
(A).
3. Insert the cable tie through the slots of the appropriate connector half
(B).
4. Strip the end of each DC power wire to the length in
.
5. Insert each stripped end into the DC terminal block as shown in
ATTENTION:
For VersaView 6300B wall mount box PCs with a Windows OS, perform
the following:
• Supply the computer with its own disconnect. Use an uninterruptible power source
(UPS) to help protect against unexpected power failure or power surges.
• Always shut down the Windows OS before you disconnect power to the computer to
minimize performance degradation and operating system failures.
(1) Where SELV is as defined in IEC 61010-2-201.
You need the following tools for this installation:
• Small screwdriver
• Wire stripper, cutter, and crimper tool
• Cutting pliers
IMPORTANT
DC power wires must be of stranded copper and sized according to
D
A
B
C
E
F


