1A
OPERATIONS
1.10 Operating
To utilize your Allen Engineering
Razorback
®
Rider
to its fullest capacity the machine should be driven in the
direction the operator is facing. This will finish the widest possible area while giving the operator an excellent
view of the slab surface about to be troweled. When the machine reaches the end of the slab make a 180
degree turn and repeat the straight line of direction to the other end of the slab. To familiarize a new operator
with the Riding Trowel the following steps should be taken.
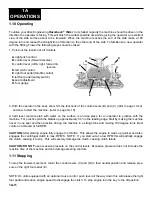
1. Point out the location of all Controls
A.
right pitch control
B.
control lever (forward reverse)
C.
control lever (left & right, forward &
reverse
D.
left pitch control
E.
right foot pedal (throttle control)
F.
left foot pedal (safety switch)
G.
seat adjustment
H.
fuel gauge
A
B
C
D
E
F
G
H
2. With the operator in the seat, show him the functions of the control levers (B) and (C) (refer to page 1A-12)
and how to start the machine. (refer to page 1A-10)
A hard level concrete slab with water on the surface is an idea place for an operator to practice with the
machine. For practice pitch the blades up approximately 1/4" on the leading edge. Start by making the machine
hover in one spot and then practice driving the machine in a straight line and making 180 degree turns. Best
control is achieved at full RPM.
CAUTION:
After starting engine fully engage the throttle. This allows the engine to warm up quicker and also
engages the centrifugal clutch to max. RPM'S. NOTE: If you start out at a low RPM this will partially engage
the clutch, causing it to slip. This will severely damage the clutch, causing clutch failure.
CAUTION: DO NOT
use excessive pressure on the control levers. Excessive pressure does not increase the
reaction time of the machine and can damage steering controls.
1.11 Stopping
To stop the trowels movement, return the control levers (C) and (B) to their neutral position and release pres-
sure on the right foot pedal (E) .
NOTE: On units equipped with an optional cruise control push lever all the way down this will release the right
foot pedal and reduce engine speed to disengage the clutch. To stop engine turn the key to the off position.
1A-11
Summary of Contents for 032034
Page 23: ...2A PARTS ENGINE MOUNT SYSTEM 2A 4 VANGUARD LINAMAR...
Page 27: ...2A PARTS SUPER DUTY SD GEARBOX RIGHT HAND SITTING ON MACHINE SOM PART 029141 2A 8...
Page 29: ...2A PARTS 2A 10 SUPER DUTY SD GEARBOX LEFT HAND SITTING ON MACHINE SOM PART 029142...
Page 31: ...2A PARTS FUEL SYSTEM ASSEMBLY 2A 12...
Page 33: ...2A PARTS 2A 14 ELECTRICAL COMPONENTS...
Page 35: ...2A PARTS 2A 16 VANGUARD WIRING DIAGRAM...
Page 37: ...2A PARTS 2A 18 PITCH CONTROL ASSEMBLY...
Page 39: ...2A PARTS STEERING LEVER ASSEMBLY 2A 20...
Page 41: ...2A PARTS SPRAY SYSTEM ASSEMBLY 2A 22...
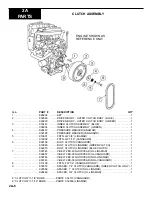
Page 43: ...2A 24 2A PARTS SPIDER ASSEMBLY...


