ASSEMBLY INSTRUCTIONS
8
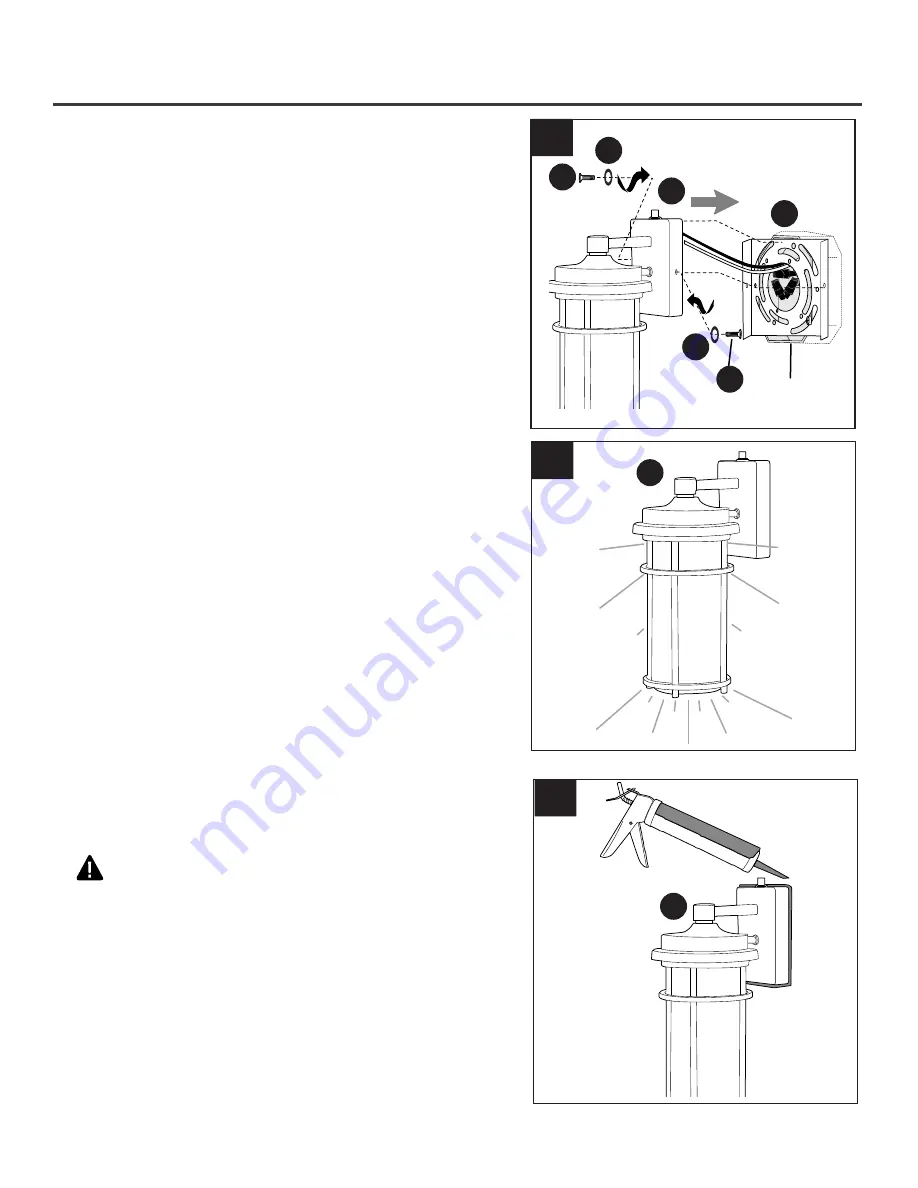
7.
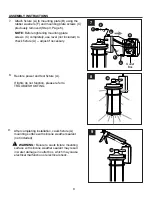
Attach fixture (A) to mounting plate (B) using the
rubber washers (F) and mounting plate screws (C)
previously removed (Step 3, Page 6).
NOTE:
Before tightening mounting plate
screws (C) completely, use level (not included) to
check fixture (A) -- adjust if necessary.
Restore power and test fixture (A).
If lights do not function, please refer to
TROUBLESHOOTING.
8.
After completing installation, caulk fixture (A)
mounting surface with silicone weather sealant
(not included).
WARNING:
Failure to caulk fixture mounting
surface with silicone weather sealant may result
in water damage in outlet box, which may cause
electrical malfunction or electrical shock.
9.
B
7
8
A
9
A
A
C
C
Outlet
Box
F
F


