15
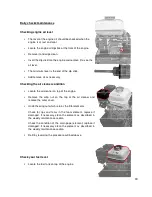
Adjusting the handle bars
•
Loosen the four bolts
at the base of the
upper handle bar.
•
Move the handle bar
into
the
desired
position.
•
Tighten the four bolts.
Parking brake
•
To engage the parking brake, pull the red lever
rearwards.
•
Tighten the lock handle by rotating it clockwise in order
to hold the brake lever in place.
Starting the engine
Before starting the engine:
-
Check engine oil level
– refer to the Honda engine manual for the recommended oil
specification.
-
Check fuel level
– clean around the fuel filler cap before removing it. Do not overfill the tank.
The fuel filler cap must be firmly secured in order to prevent fuel leakage during operation.
-
Always use clean, fresh unleaded petrol. Purchase fuel in quantities which can be used within
30 days. Never mix oil with petrol.
-
Carry out the daily checks found on page 29-31.
•
Ensure that the drives to the rear roller and cutting cylinder are disengaged.
•
Check that the parking brake is engaged.
Summary of Contents for C 34
Page 2: ...2 ...
Page 27: ...27 ...
Page 42: ...42 ...
Page 43: ...43 C34 PARTS SECTION ...
Page 44: ...44 ...
Page 49: ...49 MODEL C34 Countershaft Assembly Engine Side FIG 3A ...
Page 51: ...51 MODEL C34 Counter Assembly Brake Side FIG 3B ...
Page 53: ...53 MODEL C34 Kickstand Assembly FIG 4 ...
Page 55: ...55 MODEL C34 Handle Bar Assembly FIG 5 ...
Page 57: ...57 MODEL C34 Lower Handle Bar Assembly FIG 6 ...
Page 59: ...59 MODEL C34 REAR ROLLER ASSEMBLY FIG 7 ...
Page 61: ...61 MODEL C34 Main Frame Assembly FIG 8 ...
Page 63: ...63 MODEL C34 BRUSH CARTRIDGE FIG 9 ...
Page 65: ...65 MODEL C34 VERTICUTTER CARTRIDGE FIG 10 ...
Page 67: ...67 MODEL C34 SCARIFIER CARTRIDGE FIG 11 ...
Page 69: ...69 MODEL C34 SORREL ROLLER CARTRIDGE FIG 12 ...
Page 71: ...71 MODEL C34 CUTTING CYLINDER 6 BL CARTRIDGE FIG 13 ...
Page 73: ...73 MODEL C34 CUTTING CYLINDER 6 BL CARTRIDGE FIG 14 ...
Page 74: ...74 Notes ...


