22
4.
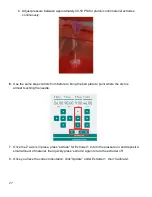
Once the Z axis is in place,
press “extrude” for extruder 1 to turn the pressure on and deposit a
small amount of material, then quickly press “extrude” again to turn the extruder off.
5.
Once you have the correct position
, click “Update” (left) under Extruder 1, then “Calibrate” (right).
NOTE: Sometimes the syringe moves slightly when you hit extrude. If it is too low, it will
not create a good dot and no material will come out. If it is too high, then a dangling line
will be created.
NOTE: You must always calibrate Extruder 1 first and then Extruder 2. If you only plan
to use Extruder 1, you can skip calibrating Extruder 2. However, if you only want to use
Extruder 2, you can calibrate Extruder 1 to any position. However, you must still press
‘Calibrate.’


