26
33711
Section 5 Service Procedures
To reduce the risk of electric shock, fire, explosion, serious injury or death:
• Disconnect electric power to the washer before servicing.
• Never start the washer with any guards/panels removed.
• Whenever ground wires are removed during servicing, these ground wires must be
reconnected to ensure that the washer is properly grounded.
W003
WARNING
© Copyright, Alliance Laundry Systems LLC – DO NOT COPY or TRANSMIT
j. Turn the 1/4 inch bolt out of transmission shaft
and remove tool and drive bell from washer.
k. Loosen the two wing nuts and remove drive bell
from tool.
l. Carefully pry the old seal out of the drive bell
and clean any foreign materials from the bell.
IMPORTANT: We recommend that both the seal
seat and the seal head be replaced together in pairs.
DO NOT replace only one of the two.
m. Install the new seal into the drive bell.
n. Remove the seal head from the hub and clean
any foreign material from the hub seal
mounting area.
o. Place the new seal head on hub and carefully
push the seal head into position.
IMPORTANT: Make sure the seal is pressed down
against the shoulder on the hub.
NOTE: Soapy water will aid in the assembly of the
seal onto the hub.
IMPORTANT: DO NOT apply any type of
lubricants to the sealing surfaces of either the seal
seat or seal head as you will damage the seals.
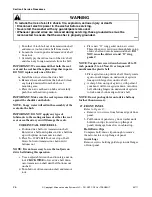
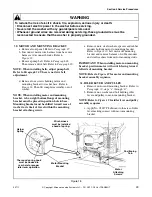
TO REINSTALL DRIVE BELL
a. Position drive bell over transmission shaft.
Rotate drive bell until splines in drive bell line
up with splines on transmission shaft.
b. Place No. 294P4 Bell Tool over top of bell.
Screw bolt into transmission shaft until it
bottoms out.
NOTE: It is not necessary to use the tool jaws on
drive bell during this operation.
c. Use an adjustable wrench and turn large nut on
tool CLOCKWISE to force drive bell down
onto transmission shaft until bell bottoms out
on shaft.
d. Turn bolt out of transmission shaft and remove
tool.
e. Place new “O” ring gasket onto new screw.
Thread the new screw down through hole in top
of drive bell and into transmission shaft. DO
NOT reuse the old screw and “O” ring
gasket!
NOTE: Torque new screw down between 45 to 55
inch pounds (5 to 6.2 Nm). Over torque will
mushroom the plastic bell.
f. Place agitator on top of drive bell. Slowly rotate
agitator until fingers on underside of agitator
line up with large slots on drive bell.
g. A sharp blow on top of agitator, with palm of
your hand, will force agitator down onto drive
bell, allowing fingers on underside of agitator
to lock under bottom edge of drive bell.
NOTE: Do not push agitator onto drive bell any
further than necessary.
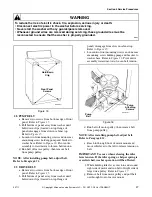
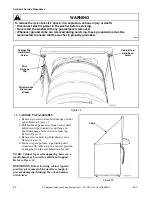
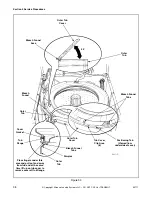
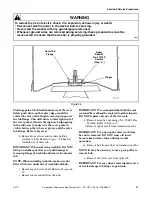
27. FRONT PANEL
Refer to Figure 15.
a. Remove two screws from bottom edge of front
panel.
b. Pull bottom of panel away from washer until
hold-down clips (located on top flange of
panel) disengage from slots in cabinet top.
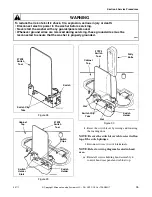
Hold-Down Clips
Compress hold-down clips enough to remove
them from slots in top flange of panel.
Guide Lugs
Remove screws holding guide lugs to side flanges
of front panel.


