33711
45
Section 5 Service Procedures
To reduce the risk of electric shock, fire, explosion, serious injury or death:
• Disconnect electric power to the washer before servicing.
• Never start the washer with any guards/panels removed.
• Whenever ground wires are removed during servicing, these ground wires must be
reconnected to ensure that the washer is properly grounded.
W003
WARNING
© Copyright, Alliance Laundry Systems LLC – DO NOT COPY or TRANSMIT
41. OUTER TUB
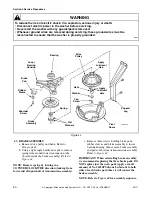
a. Remove agitator. Refer to Paragraph 25.
b. Remove front panel. Refer to Paragraph 27.
c. Remove two cabinet top hold-down screws and
hinge cabinet top or remove. Refer to
Paragraph 35.
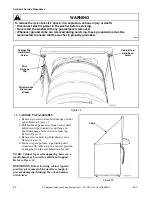
d. Loosen hose clamp and disconnect filler hose
from backflow preventer. Refer to Figure 31.
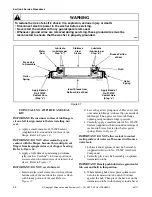
NOTE: When reinstalling filler hose, the white line
on hose must be aligned with the arrow on the
backflow preventer; and white line on hose that
connects to tub cover must be aligned with line
located on top side of outer tub cover. Refer to
Figure 31. Make sure the hose is in its natural
position (not kinked or twisted) and is parallel to the
rear edge of the washer cabinet. If it is not, loosen
hose clamp and straighten the hose.
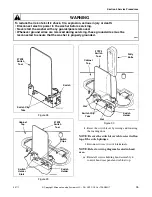
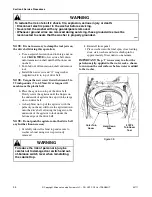
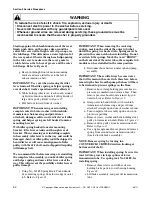
e. Locate the eight clip areas on the outer tub
cover. Using the 273P4 Tub Cover Tool, insert
the two prongs of the tool underneath each side
of the tandem clips. Refer to Figure 38. Tilt the
tool toward the center of the tub cover and at the
same time lift up on cover to unsnap hold-down
tabs from outer tub flange.
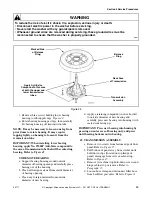
NOTE: We recommend using a new cover gasket
when installing the outer tub cover. Before
installing the new gasket, clean and remove any
foreign material that is in the gasket groove of the
cover. The outer tub flange must also be cleaned.
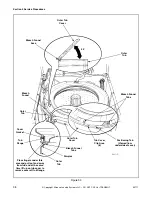
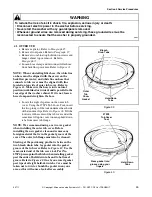
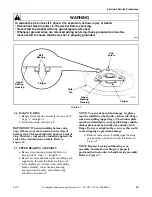
Starting at the positioning pin that is between the
two bleach drain tabs, lay gasket into the gasket
groove of the tub cover. Refer to Figure 39. Use the
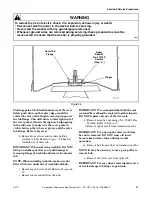
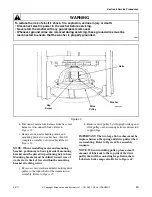
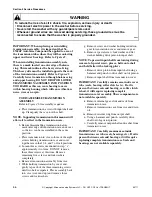
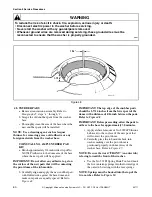
semi-curled end of the tub cover tool, Part No.
273P4 press against both tabs when installing gasket
past the ends of hold-down tabs and to bottom of
groove. Refer to Figure 40. One by one, insert gasket
past tips of all eight hold-down tabs. Care must be
taken not to twist or bunch the gasket in any one
area as this will cause a leak after assembly.
Figure 39
Figure 40
Outer
Tub
Cover
Gasket
Hold-Down
Tabs
Bleach
Drain Tabs
Hold-Down
Tabs
Press gasket into
groove using your
fingers
273P4
Tub Cover
Tool


