background image

Instruction manual

Part No. D1167R4 

Code:  249/00398/10  

April 2011

Machine with start-stop button

Cygnus Premium

Summary of Contents for Cygnus Premium

Page 1: ...Instruction manual Part No D1167R4 Code 249 00398 10 April 2011 Machine with start stop button Cygnus Premium...

Page 2: ......

Page 3: ...Basic operating instructions 17 Opening the door 17 Fill the drum 17 Close the door 17 Select program 17 Add detergent 18 Start the machine 18 Indications of program sequence 19 End of the program 21...

Page 4: ...the machine out of order 63 Standard programs 64 Machine with start stop button 64 Extend boards 65 Liquid soap connections option 65 Electrical connection of the extend boards liquid soap pumps 66 S...

Page 5: ......

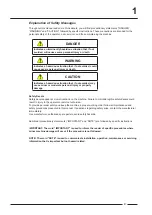
Page 6: ...NG PARTS HAZARD This symbol alerts you to the presence of possible dangerous moving parts within the machine Guards should always be in place when the machine is in operation Be very careful when serv...

Page 7: ...e applicable collection point for the recycling of electrical and electronic equipment Ensuring this product is disposed of correctly you will help prevent potential negative consequences for the envi...

Page 8: ...Safety Decals Safety decals appear at crucial locations on the machine Failure to maintain legible safety decals could result in injury to the operator or service technician To provide personal safety...

Page 9: ...he washer where it will be exposed to water and or weather 10 Do not tamper with the controls 11 Do not repair or replace any part of the washer or attempt any servicing unless specifically recommende...

Page 10: ...the manufacturer s instructions may result in conditions which can produce bodily injury and or property damage 28 It is recommended that the machine be installed by qualified technicians 29 Before s...

Page 11: ...start with the door open b Close and lock the door and start a cycle Attempt to open the door while the cycle is in progress The door should not open If the door lock and interlock are not functionin...

Page 12: ......

Page 13: ...the program number C program segments D program time E indication of the operation F indication of adding soap G economy wash function H spin speed limitation function I several functions predefined s...

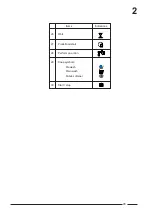
Page 14: ...9 20 21 22 25 26 27 28 29 30 13 24 23 1 2 3 4 14 Screen indications Items Indications 1 Prewash Main wash 1st rinse 2nd rinse 3rd rinse 4th rinse Spin 2 Test program 3 Wash movement 4 Drain through va...

Page 15: ...Outputs 14 Motor 15 Reduce spin speed final spin 16 Reduced wash movement 17 Hold condition 18 Soak 19 Error message 20 Units of measure C min cm F cm inch rpm Gal lbs L Hz rpm sec kg 21 Time indicat...

Page 16: ...2 16 Items Indications 26 Wait 27 Predefined start 28 Perform an action 29 Soap symbols Prewash Main wash Fabric softener 30 Start stop...

Page 17: ...tton the programmer can contain up to 60 programs Opening the door Open the door Basic operating instructions With the up A and down B key you select a program In the bottom section L you see informat...

Page 18: ...erfoaming which can damage the machine In accordance with the program the soap symbols light up to inform where soap needs to be added in the soapbox Add detergent Start the machine Press the start st...

Page 19: ...oftware Machine setup User configuration C Indication of water injection until the programmed water level has been reached D Indication of soap injection liquid soap or powder F Condition wait until a...

Page 20: ...own Final spin blinking fast continuously blinking slowly continuously H When water is drained through the valve or the pump the drain symbol appears I J When at the end of a program segment the water...

Page 21: ...n top disappear and the water will be drained As long as the water is higher than the safety level the door is locked and the water level C and the drain symbol B appear on the display While the door...

Page 22: ...within 24 hours the program will continue from the phase when the power failure happened When the door is not unlocked automatically because of a failure one must remove the service panel A at the bot...

Page 23: ...up key A or the down key B If one presses the down key B now is scrolling on the display and the current temperature is shown in C or F If one presses the down key B again is scrolling on the display...

Page 24: ...rs on the display Subsequently change the spin speed with the up A and down B key and confirm with enter C The symbol E for this program setting remains visible during the program to inform that one i...

Page 25: ...k key to leave the menu Predefined start By setting a certain time the machine will start at this time Soak Heavily soiled linen is washed at 40 C with a specific reduced wash movement Reduced wash mo...

Page 26: ...he up and down key Press enter and then select the number of minutes of the predefined start with the up and down key Press enter and select the desired day with the up and down key Press enter to con...

Page 27: ...ion by putting the function on with the up and down key Confirm with enter Now one can set the soak temperature with the up and down key Confirm the setting with enter and then introduce the soak time...

Page 28: ...ygnus Assist Abso wash weight dependable There are 2 possibilities to adapt wash programs automatically in order to save water soap time and energy Water absorption adapting the water level and or soa...

Page 29: ...wash function Press the function key E and then select abso wash with the up and down key Confirm with enter C turn off the abso wash function with the up and down key and confirm with enter execute...

Page 30: ...set in the Cygnus Assist programming software Machine setup User configuration Standard setting water level reduction by 20 Press the ECO button G before or during the program to select the economy wa...

Page 31: ...ymbol F appears on the display to let you know that this function has been activated see Label 8 Press the up key A to add some time Press enter C to confirm Remarks During this hold function press th...

Page 32: ...32...

Page 33: ...key A until the code is blinking on the display If the code has been changed one must enter the modified code with the up and down key Confirm this code by pressing enter C When delivering the machine...

Page 34: ...urs and mention of the serial number see p 37 Test program testing the water level water valves motor heating drain valve s or pump outputs inputs LEDs and displays see p 39 Modify the entry code see...

Page 35: ...e MMC data card see p 54 Set the service counters see p 61 Overview of the error messages from the last wash cycle see p 63 Edit the content of the wash program see p 51 Put the machine out of order s...

Page 36: ...M233A2 02 8 36...

Page 37: ...enu total working hours of the machine XXXX or the total time that the machine has been working appears on the display Press the back key appears again on the display mentioning the serial number The...

Page 38: ...38...

Page 39: ...level detector see p 41 INLET test activate the inlets see p 41 MOTOR test the motor with several speeds autotuning see p 43 HEAT test the temperature detector heating calibrate the temperature detec...

Page 40: ...8 40...

Page 41: ...e procedures until the water has reached the mark on the glass Then press enter to confirm XX X appears on the display If this number XX X does not correspond to the number that has been noted down ch...

Page 42: ...8 42...

Page 43: ...one must always execute the autotuning and the entire spin procedure in the test program By doing so the motor will have its maximum power test the temperature detector heating Press enter XX the cur...

Page 44: ...8 44...

Page 45: ...can be executed when the machine has a second drain valve drain 2 Press the back key appears again on the display Press the down key switch the outputs or relays on and off Press enter or relay 1 app...

Page 46: ...8 46...

Page 47: ...r Press the back key appears again on the display Dependent on the relay configuration one can also test input in1 and or in2 a small point next to the indication in1 and or in2 appears when a input s...

Page 48: ...8 48...

Page 49: ...n key Set the clock set the year month day day of the week hour and minutes Press enter to adjust the year appears on the display Press the up or down key to set the year Press enter to adjust the mon...

Page 50: ...8 50...

Page 51: ...lue of a wash component press enter and then edit the value with the up and down key Press enter to confirm each modification Press the down key to edit the following wash component The following wash...

Page 52: ...8 52...

Page 53: ...n of all the previous components min sec Spin component the spin speed and spin time rpm min sec This component allows selecting the distribute function with this function the water will be drained wi...

Page 54: ...all the files on the data card see p 57 Load washdata transfer of the wash data into the machine by means of a data card see p 57 Save washdata save the wash data on a data card see p 57 Save history...

Page 55: ...ad helpfile transfer of the help files into the machine by means of a data card see p 59 Save helpfile save the help files on a data card see p 59 Update firmware update of the machine firmware by mea...

Page 56: ...8 56...

Page 57: ...e machine will reboot After the reboot the version of the loaded wash data and the type of machine appear on the display Only the wash data that is appropriate for a corresponding type of machine and...

Page 58: ...8 58...

Page 59: ...select another file with the up and down key if the data card contains several files Press the back key to go back to the Load helpfile menu Select the next menu with the down key appears on the disp...

Page 60: ...8 60...

Page 61: ...y The minimum number of cycles and or hours is 100 0 1 on the display Example 500 hours 500 cycles 0 5 is shown on the display Press the back key to go back to the counter menu appears on the display...

Page 62: ...8 62...

Page 63: ...er confirm with enter Press the back key to really activate this function and so prevent the start of the machine To put the machine on order again one must repeat the entire procedure Press the upper...

Page 64: ...gent manufacturers to obtain the best possible wash results using the most frequently used detergents 1 GENTLE WASH 2 BATHS 30 30 2 SYNTHETIC 2 BATHS 40 40 3 COLOURED 2 BATHS 40 60 4 HOT WASH 2 BATHS...

Page 65: ...rammed in the specific steps in the wash data This can be changed on the machine Cygnus Professional Premium or using the infra red cable and the Cygnus Assist programming software The input connector...

Page 66: ...he wires directly on the printboard connect as indicated on the wiring diagram If the relay is connected to a digital input e g soap pumps central panel it is necessary to remove the resistors from th...

Page 67: ...230V AC 24V AC OUT OUT IN 230V 24V COM 230V AC 230V AC 230V AC 24V AC 230V AC 24V AC 230V AC 24V AC OUT OUT IN COM 24V 230V 230V AC 230V AC 67 Extend board 1 input 8 outputs at the top Extend board 1...

Page 68: ...24V 230V AC 24V AC 230V AC 24V AC 230V AC 68 Extend board 5 inputs 5 outputs If the relay is connected to a digital input e g soap pumps central panel it is necessary to remove the resistors from the...

Page 69: ...10 69 Standard configuration of the soap pumps Extend board 1 input 8 outputs Extend board 1 input 5 outputs Extend board 5 inputs 5 outputs Extend board 1 input 1 output...

Page 70: ...communication between inverter and mainboard ERROR 8 INVERTER AUTOTUNING ERROR incorrect status during autotuning ERROR 9 INVERTER PARAMETER ERROR writing of parameters is refused error during writin...

Page 71: ...the wash data ERROR 18 WRONG WASH DATA ERROR wrong wash data for the corresponding machine ERROR 19 ID CHIP READ ERROR error by reading the identification chip ERROR 20 ID CHIP WRITE ERROR error by a...

Page 72: ...evel must be 0 machines with a valve after 4 minutes of the end of the wash program water level must be 0 machines with a pump ERROR 53 HEATING ERROR the programmed temperature is not reached after 20...

Page 73: ...RED EVENT 113 USER HAS ADVANCED the advance function has been used EVENT 114 INVERTER NOT RUNNING Although the communication with the frequency inverter is good the motor is not running This is detect...

Page 74: ...7 COPY DISPLAY FIRMWARE EVENT 168 COPY MAINBOARD FIRMWARE EVENT 169 RESTORE DISPLAY FIRMWARE EVENT 170 RESTORE MAINBOARD FIRMWARE EVENT 171 NEW BOOT EVENT 172 COPY BOOT EVENT 173 COPY PRICES EVENT 174...

Page 75: ...h data and the printboard with the highest firmware version will overwrite the other board Please wait until you have the start up screen on the display When a mainboard is already used on a different...

Page 76: ...re to the new mainboard There will be an automatic update restore of the wash data firmware and help file from the display board on the new mainboard Please wait until you have the start up screen on...

Page 77: ...ready used on a different machine the board contains firmware and wash data Replacement of the display WITHOUT firmware and wash data Turn off the power of the machine Disconnect all the connectors of...

Page 78: ......

Page 79: ......
Reviews: