Installation
Pallet Removal
The machine is delivered bolted onto the transport pallet and
packed in shrink-wrap foil or box.
1. Remove packing from machine.
2. Remove front and rear panel.
3. Remove bolts between machine and pallet.
4. Mount front and rear panel.
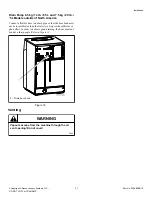
5. When machine is lifted off pallet, make sure the machine does
not come down on the floor with either of the rear corners
first. The machine's side panel can be damaged.
NOTE: Two self-adhesive rubber stop-blocks are
supplied with the machine. They may be applied as
paint protection when opening the door.
6. Mount leveling legs.
7. Level machine with feet of the machine.
WARNING
It is of utmost importance that the machine is
placed level, from side to side as well as front to
back. If the machine is not properly leveled, it
may result in out-of-balance error without a real
out of balance in the drum.
W913
8. Recheck the setting of the safety switch, refer to
.
Mounting Bolt Installation (If Required),
Models with Base Frame with Built-In
Filter
NOTE: Machines do not need to be mounted by means
of anchoring bolts. If anchoring is necessary, perform
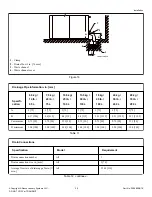
the following steps. Refer to
1. Drill two holes for the anchoring bolts. Hole diameter in ma-
chine base is 0.47 in [12 mm].
2. Place the machine adjacent to mounting foundation. Do not
attempt to move it by pushing on the sides, always use the
bottom of the frame to lift and move the whole machine.
3. Place the machine carefully over the two drilled holes.
4. Check that the machine is seated in a perfectly level manner.
Adjust leveling legs as needed.
5. Install the anchoring bolts in the holes drilled in the floor.
6. Install the washers and locknuts on machine and anchor bolts.
Tighten them by hand to machine base.
NOTE: If necessary, prop the machine frame up to
prevent damage while tightening anchor bolts.
7. Remove the shipping braces securing the moving components
from the machine.
Installation
©
Copyright, Alliance Laundry Systems LLC -
DO NOT COPY or TRANSMIT
26
Part No. D1598ENR10
Summary of Contents for UY105 PRO
Page 2: ......


